1. ആമുഖം
This manual provides essential information for the safe and correct assembly, operation, and maintenance of your ALAULM 10'x 14' Outdoor Hardtop Wall Mounted Lean-to Gazebo. Please read all instructions carefully before beginning assembly and retain this manual for future reference.
സുരക്ഷാ വിവരങ്ങൾ
- Assembly Team: This gazebo should be assembled by 3-5 people to ensure stability and safety.
- ഗ്രൗണ്ട് ആങ്കറിംഗ്: Always secure the ground spikes properly to prevent accidents.
- ജാഗ്രത: Be cautious during assembly and disassembly to avoid potential hazards.
- കാറ്റിൻ്റെ പ്രതിരോധം: After installing the ground stakes, the structure can withstand gusts up to 40 mph.
2. പാക്കേജ് ഉള്ളടക്കം
Your ALAULM Hardtop Gazebo is delivered in multiple boxes. Please verify all parts are present and undamaged before beginning assembly. Refer to the included parts list and diagrams for identification.

Figure 2.1: The gazebo components are typically delivered in three separate boxes.
ഭാഗങ്ങളുടെ ലിസ്റ്റ് കഴിഞ്ഞുview
Detailed parts lists with alphanumeric labels are provided in the assembly diagrams. Ensure all columns, beams, panels, and hardware are accounted for.
വീഡിയോ 2.1: ഒരു ആനിമേറ്റഡ് ഓവർview of the gazebo components and assembly steps. This video provides a visual guide to identifying parts and understanding the construction sequence.
3. സജ്ജീകരണവും അസംബ്ലി നിർദ്ദേശങ്ങളും
ശരിയായ അസംബ്ലിക്ക് ഈ ഘട്ടങ്ങൾ ശ്രദ്ധാപൂർവ്വം പാലിക്കുക. ഈ പ്രക്രിയയ്ക്ക് 3-5 പേർ ഉണ്ടായിരിക്കുന്നതാണ് ഉചിതം.
3.1 ഫ്രെയിം അസംബ്ലി
- ഘടകങ്ങൾ അൺപാക്ക് ചെയ്യുക: Carefully unpack all boxes and lay out components on a clean, flat surface. Organize parts by their labels (A1, A2, B1, etc.).
- നിരകൾ കൂട്ടിച്ചേർക്കുക: Connect the upper and lower parts of the rear columns (A1, A2, A3) and front columns (A4, A5) using the provided column inserts (J1) and fasteners (EE, FF). Ensure all connections are secure.
- ക്രോസ്ബാറുകൾ ഘടിപ്പിക്കുക: Connect the front and rear parts of the left and right crossbars (B1, B2, B3, B4) using crossbeam inserts (J2) and fasteners (FF).
- Form the Base Structure: Connect the assembled columns and crossbars to form the rectangular base frame. Use diagonal braces (H1, H2) and fasteners (GG, KK) for enhanced stability.
Video 3.1: Visual guide for assembling the main frame structure of the gazebo.
3.2 Roof Structure Assembly
- Install Intermediate Beams: Attach the long (E1) and short (E2) intermediate beams to the main frame using side beam connectors (Y1) and fasteners (GG).
- Secure Side Beams: Connect the right long (F1), right short (F2), left long (F3), and left short (F4) side beams.
- വാൾ ബ്രാക്കറ്റുകൾ ഘടിപ്പിക്കുക: Secure the retainer plates (V) to the wall-mounted side of the frame using expansion bolts (UU) and round head nails (PP).

Figure 3.1: The fully assembled gazebo, showcasing its wall-mounted design and integrated seating area.

Figure 3.2: Detail of the sturdy and stable design, showing four screws used to connect the gazebo to the wall for improved stability.
3.3 Roof Panel Installation
- Prepare Sun Panels: Remove the protective surface film from all sun panels (Q).
- Slide in Panels: Carefully slide the sun panels (Q, Q1, Q2, Q3, Q4) into the designated grooves on the roof frame. Ensure they are properly aligned and seated.
- സുരക്ഷിത പാനലുകൾ: Use sunlight panel strips (L1) and middle stoppers (L2) to secure the panels in place.
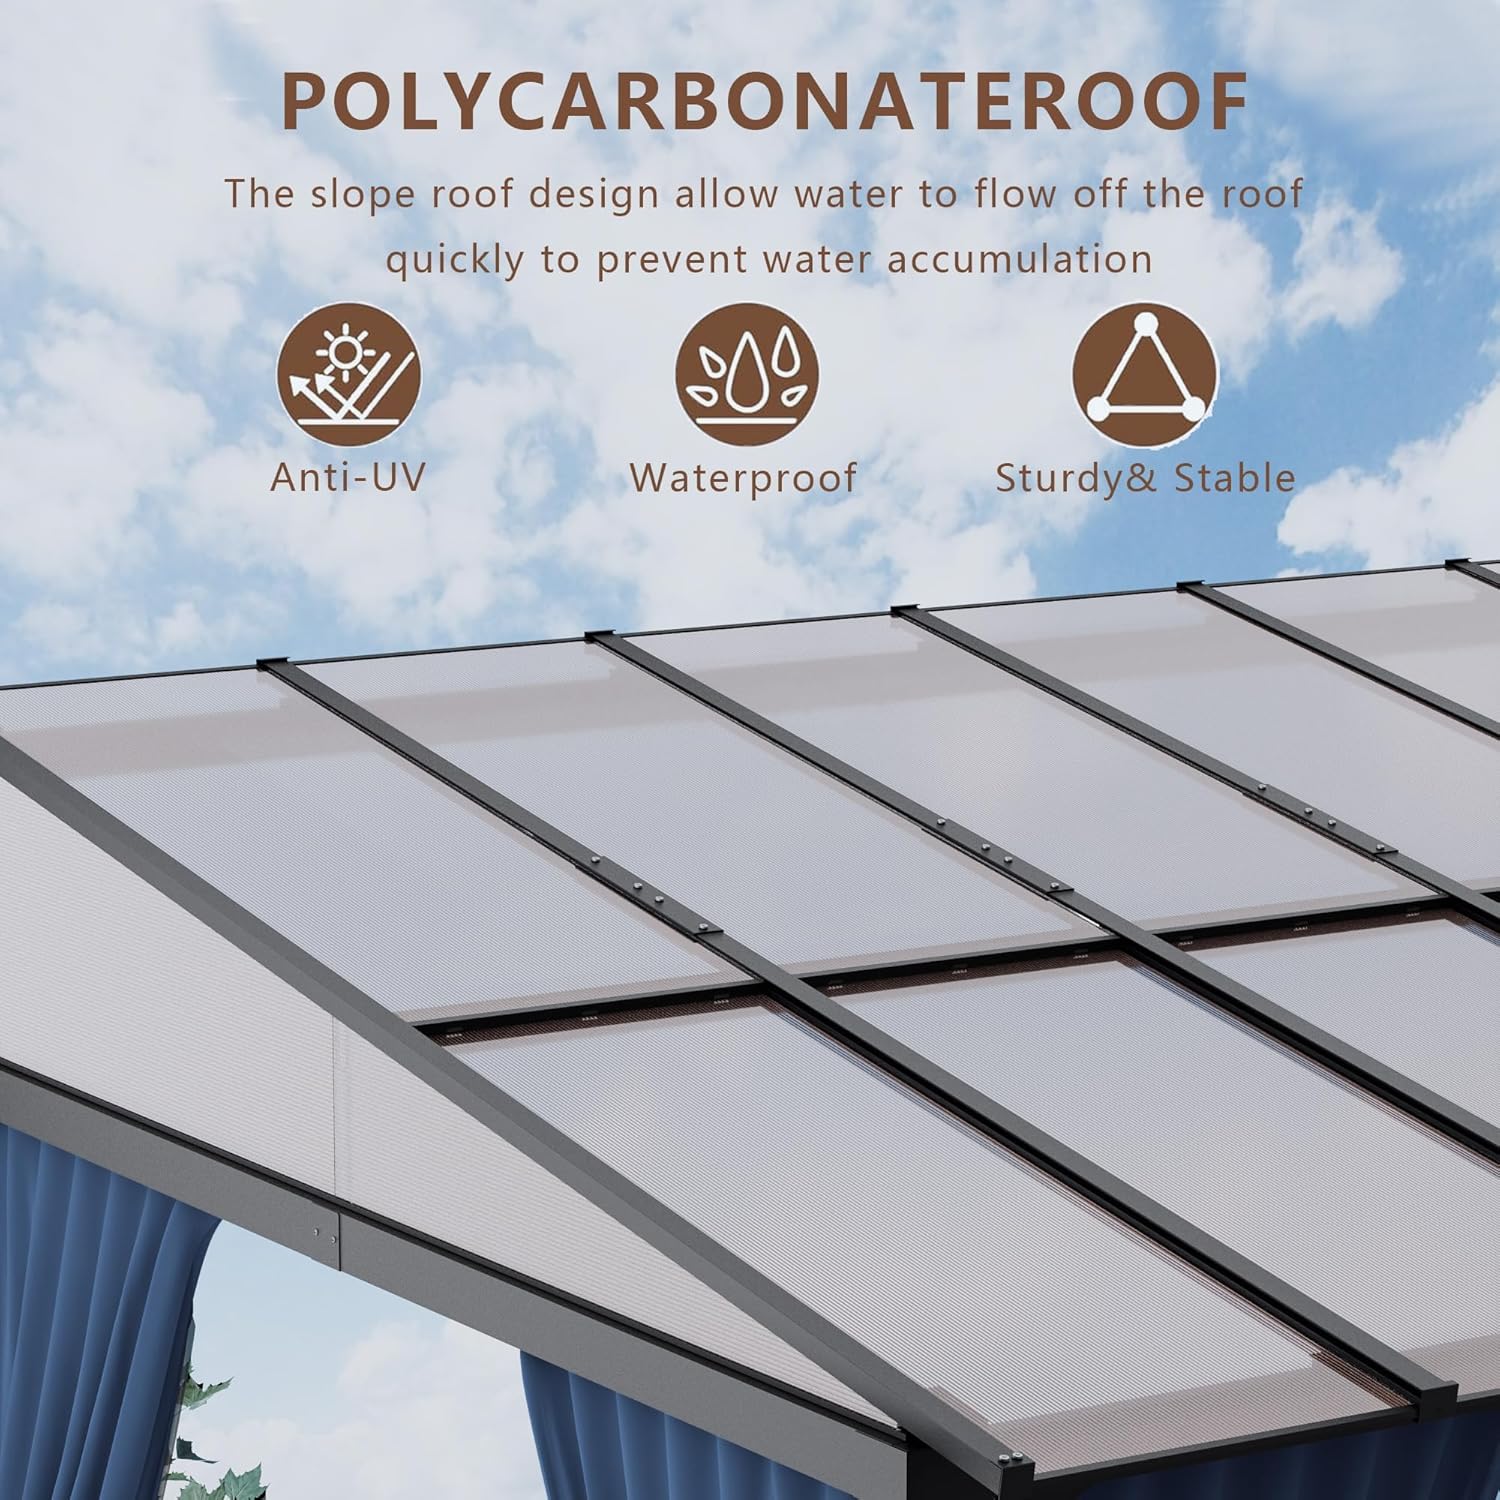
Figure 3.3: The polycarbonate roof panels are designed to be anti-UV, waterproof, and sturdy.

Figure 3.4: The sunshine panels are effective in blocking UV rays and are waterproof.
3.4 Curtains and Netting Installation
- Install Mosquito Netting Tracks: Attach the side (T1, T2) and front (T3, T4) mosquito net tubes, along with the long side (T5, T6) and long side center (T7) mosquito net tubes, using crossbeam ferrules (J6) and mosquito netting rings (HH).
- Hang Curtains and Netting: Attach the mosquito nets (V1, V2) and surrounding cloths (U1, U2) to the installed tracks using the mosquito netting rings (HH).
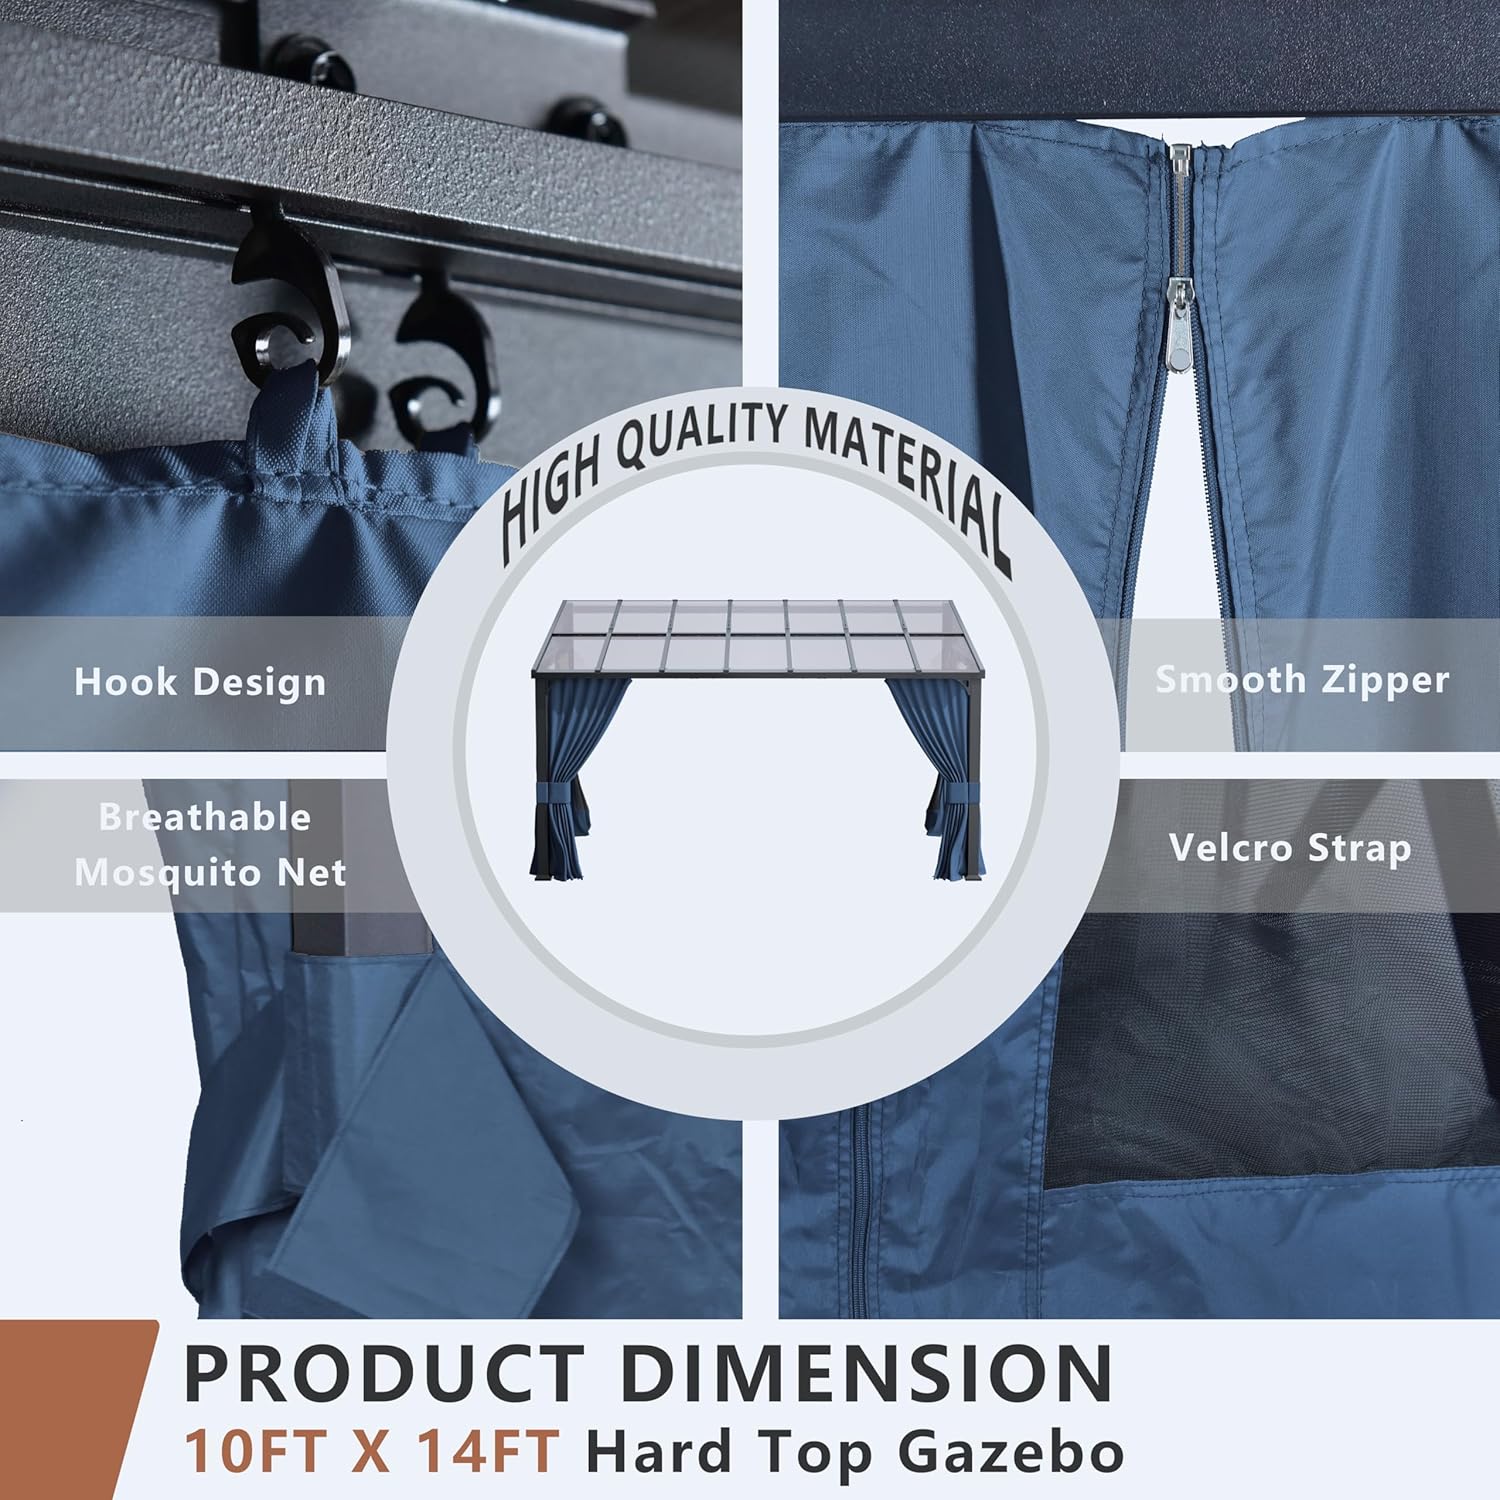
Figure 3.5: Details of the curtain and netting system, including hook design, smooth zippers, breathable mosquito net, and Velcro straps.

Figure 3.6: The removable curtains and netting offer good colorfastness, are waterproof, UV resistant, and feature a lightweight design for air circulation.
4. പ്രവർത്തന നിർദ്ദേശങ്ങൾ
Your ALAULM Hardtop Gazebo is designed for versatile outdoor use, offering shade, protection, and privacy.
4.1 Adjusting Curtains and Netting
- Dual-Track System: The gazebo features a dual-track sliding system for curtains and netting, allowing them to be used independently.
- പ്രാണി സംരക്ഷണം: Deploy the mesh netting to effectively keep out insects, creating a more comfortable and breathable environment.
- Privacy and Shade: Use the curtains for added privacy or to block direct sunlight. They can be tied back with Velcro straps when not in use.

Figure 4.1: The gazebo in a fully open configuration, allowing maximum light and air circulation.

Figure 4.2: The gazebo in a semi-open configuration, with the mesh netting providing insect protection while maintaining visibility.

Figure 4.3: The gazebo in a fully closed configuration, offering maximum privacy and protection from elements.
4.2 Roof Functionality
- UV സംരക്ഷണം: The translucent greenish-blue polycarbonate panels provide optimal UV protection, reducing sun exposure.
- കാര്യക്ഷമമായ ഡ്രെയിനേജ്: The sloped roof design ensures efficient drainage, preventing water accumulation during rain.
Video 4.1: Demonstrates the gazebo's ability to provide shelter during rainy conditions, allowing outdoor relaxation.
5. പരിപാലനം
പതിവ് അറ്റകുറ്റപ്പണികൾ ആയുസ്സ് വർദ്ധിപ്പിക്കുകയും നിങ്ങളുടെ ഗസീബോയുടെ രൂപം സംരക്ഷിക്കുകയും ചെയ്യും.
- ഫ്രെയിം വൃത്തിയാക്കൽ: Clean the aluminum-iron frame with a mild soap solution and water. Rinse thoroughly and dry to prevent water spots. Avoid abrasive cleaners.
- മേൽക്കൂര പാനലുകൾ വൃത്തിയാക്കൽ: Gently clean polycarbonate panels with a soft cloth, mild soap, and water. Do not use harsh chemicals or scrub aggressively to avoid scratching.
- ക്ലീനിംഗ് ഫാബ്രിക്: Curtains and netting can be spot cleaned with mild detergent and water. For deeper cleaning, follow care instructions on the fabric tags. Ensure they are completely dry before storing or closing for extended periods to prevent mildew.
- ഹാർഡ്വെയർ പരിശോധന: Periodically inspect all bolts, screws, and ground anchors to ensure they are tight and secure. Tighten as needed.
- സീസണൽ കെയർ: In areas with heavy snow, it is recommended to clear snow from the roof to prevent excessive weight accumulation. During strong winds or severe weather, consider removing curtains and netting to prevent damage.
6. പ്രശ്നപരിഹാരം
നിങ്ങളുടെ ഗസീബോയുമായി ബന്ധപ്പെട്ട് നിങ്ങൾ നേരിട്ടേക്കാവുന്ന പൊതുവായ പ്രശ്നങ്ങളെ ഈ വിഭാഗം അഭിസംബോധന ചെയ്യുന്നു.
- മേൽക്കൂരയിൽ വെള്ളം അടിഞ്ഞുകൂടൽ: Ensure the sloped roof is correctly installed and free of debris that might obstruct drainage.
- ഗസീബോ അസ്ഥിരത: Verify that all ground anchors are securely fastened and all frame connections are tightened. The triangular stability structure should be correctly assembled.
- കർട്ടനുകൾ/വല സുഗമമായി സ്ലൈഡുചെയ്യുന്നില്ല: Check the dual-tracks for any obstructions or damage. Ensure the mosquito netting rings are properly attached and not tangled.
- നഷ്ടമായതോ കേടായതോ ആയ ഭാഗങ്ങൾ: If any parts are missing or damaged upon delivery, please contact customer support with your product model and a description of the issue.
7 സ്പെസിഫിക്കേഷനുകൾ
| ആട്രിബ്യൂട്ട് | വിശദാംശങ്ങൾ |
|---|---|
| ബ്രാൻഡ് | ALAULM |
| മോഡൽ | 10'x 14' Outdoor Hardtop Lean-to Gazebo |
| മെറ്റീരിയൽ | Aluminum Iron Frame, Polycarbonate Roof Panels |
| ഉൽപ്പന്ന അളവുകൾ | 170.04"L x 108"W x 101.4"H (10' x 14' approximate footprint) |
| ഫ്ലോർ ഏരിയ | 140 ചതുരശ്ര അടി |
| ജല പ്രതിരോധ നില | വെള്ളത്തെ പ്രതിരോധിക്കുന്ന |
| യുവി സംരക്ഷണം | യുവി പ്രതിരോധം |
| നിറം | Dark Blue (for curtains/netting, frame is typically dark grey/black) |
| അസംബ്ലി ആവശ്യമാണ് | Yes (Recommended 3-5 people) |

Figure 7.1: Detailed product dimensions for the 10'x 14' Hardtop Gazebo.
8. വാറൻ്റിയും പിന്തുണയും
For warranty information or technical support, please refer to the contact details provided at the point of purchase or visit the official ALAULM webസൈറ്റ്. വാങ്ങിയതിന്റെ തെളിവായി നിങ്ങളുടെ വാങ്ങൽ രസീത് സൂക്ഷിക്കുക.


