ആമുഖം
This user manual provides comprehensive instructions for the installation, operation, and maintenance of your LAMTTO 4-Channel Dash Cam. Designed to capture every angle of your journey, this dash cam features 1080P recording across four channels, 360-degree coverage, 5G WiFi app control, infrared night vision, and advanced parking monitoring. Please read this manual thoroughly before using the device to ensure proper functionality and safety.
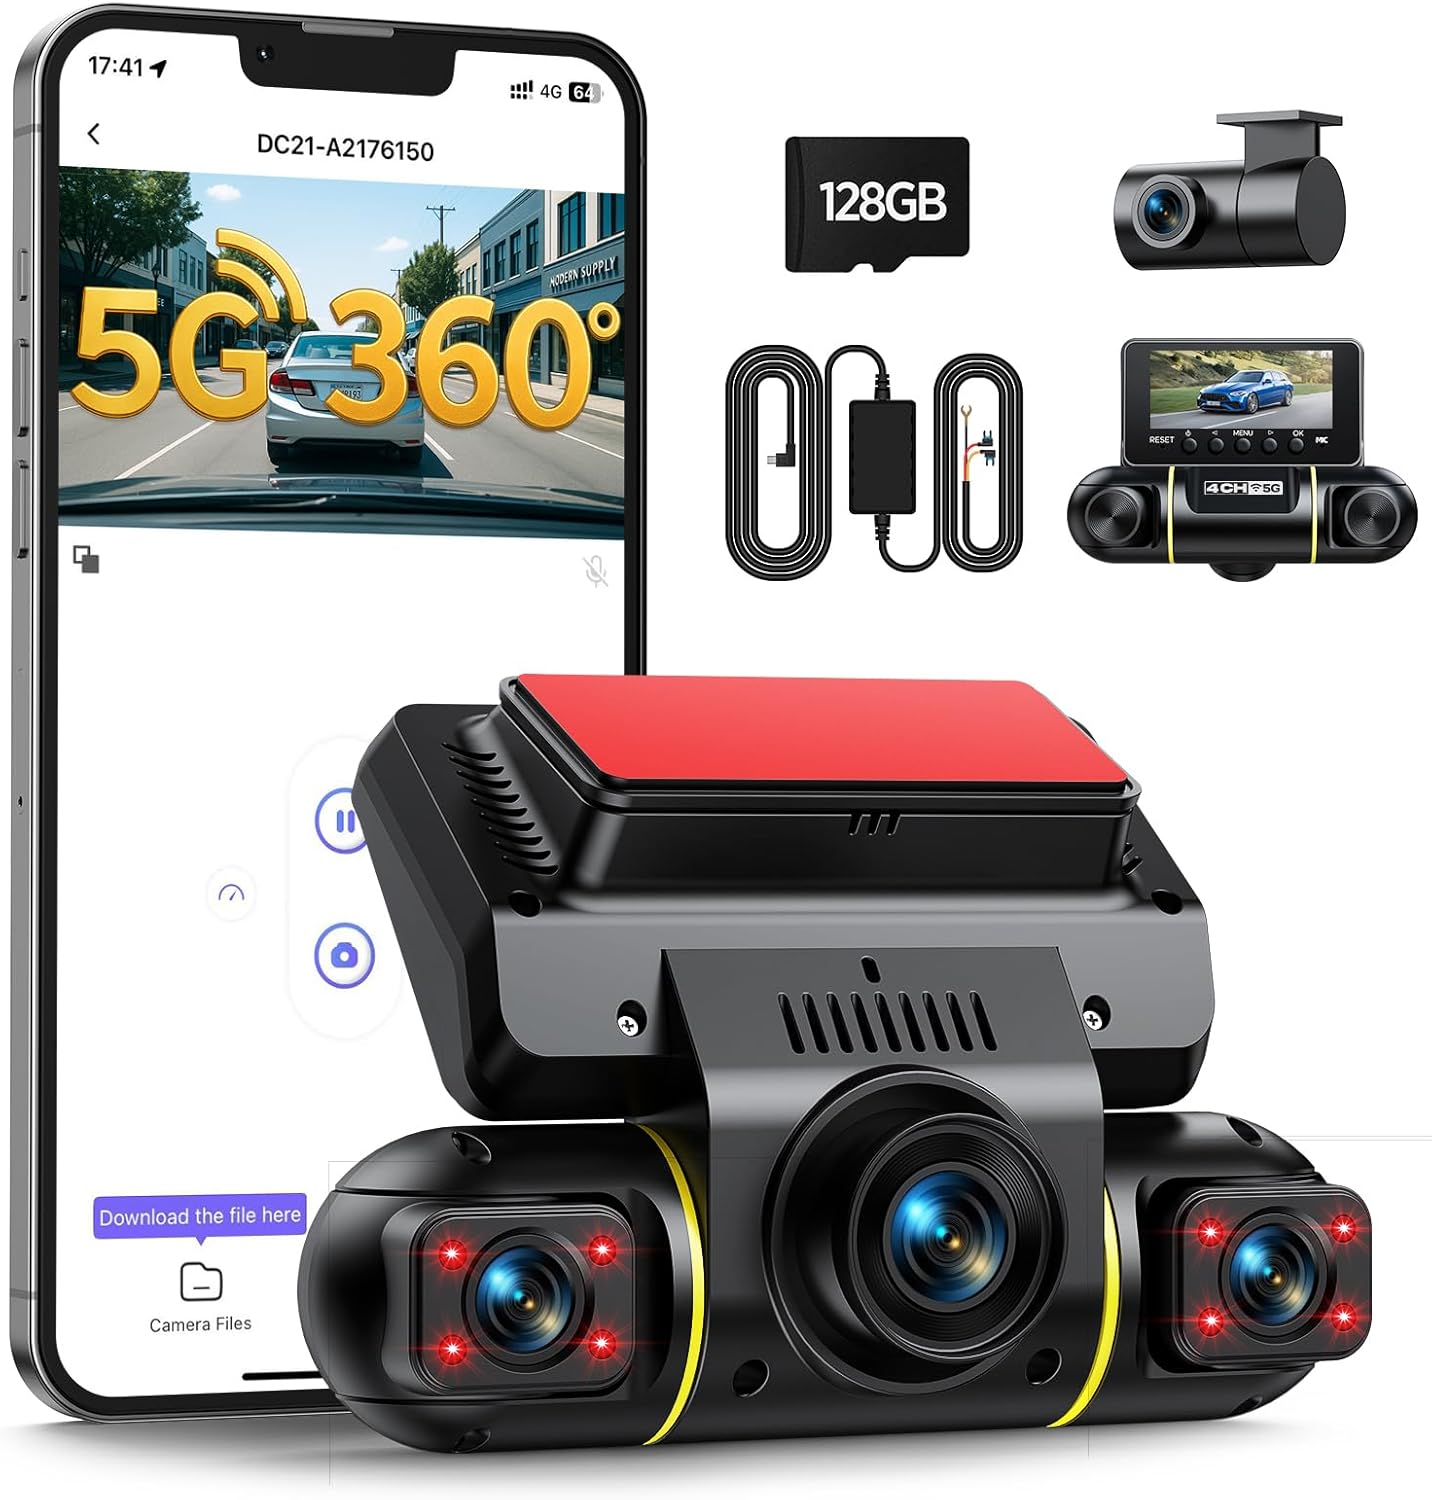
Image: The LAMTTO 4-Channel Dash Cam, showcasing its compact design, multiple lenses, and the accompanying mobile application interface. Included accessories like the 128GB SD card and wiring kit are also visible.
പാക്കേജ് ഉള്ളടക്കം
താഴെ ലിസ്റ്റ് ചെയ്തിരിക്കുന്ന എല്ലാ ഇനങ്ങളും നിങ്ങളുടെ പാക്കേജിൽ ഉൾപ്പെടുത്തിയിട്ടുണ്ടെന്ന് ദയവായി പരിശോധിക്കുക:
- LAMTTO 3-Channel Front Dash Cam (with 128GB TF Card included)
- 1080P പിൻ ക്യാമറ
- ഹാർഡ്വെയർ കിറ്റ്
- കാർ ചാർജർ
- USB ടൈപ്പ്-സി ഡാറ്റ കേബിൾ
- ഇൻസ്റ്റലേഷൻ ടൂൾ
- ദ്രുത ഗൈഡ്
- ഉപയോക്തൃ മാനുവൽ (ഈ പ്രമാണം)

Image: A visual representation of the package contents, including the main dash cam unit, rear camera, car charger, hardwire kit, USB-C cable, 128GB SD card, installation tools, and user manual.
ഉൽപ്പന്ന സവിശേഷതകൾ
- 4-Channel 1080P Recording: Captures front, rear, and both internal side views simultaneously, providing a comprehensive 360-degree recording of your vehicle's surroundings and interior.
- 24H Parking Monitoring: Utilizes the included hardwire kit to enable continuous monitoring. Detects movements or impacts and automatically saves a 15-second emergency clip to protect against theft or hit-and-runs.
- 5G WiFi & App Control: Connect your smartphone wirelessly via 5G WiFi to the dash cam. Use the free app (iOS/Android) to instantly view, download, or share footage, and manage settings directly from your phone.
- ഇൻഫ്രാറെഡ് (IR) രാത്രി കാഴ്ച: Both internal and side cameras feature F2.0 aperture and 8 infrared lights, ensuring clear black-and-white footage even in low-light conditions or during night driving.
- ലൂപ്പ് റെക്കോർഡിംഗ്: Automatically overwrites the oldest, non-important footage when the memory card is full, ensuring continuous recording without interruption.
- G-Sensor Emergency Lock: Built-in G-sensor automatically locks emergency videos triggered by sudden braking or collisions, preventing them from being overwritten.
- Dual Power Methods: Can be powered via the car cigarette lighter (for basic operation) or the included hardwire kit (for 24H parking monitoring).

ചിത്രം: ഒരു ഓവർview of the dash cam's key features, including 5G WiFi, 4-channel 1080P recording, 360-degree coverage, IR night vision, WDR, parking monitoring, G-sensor, loop recording, 128GB SD card, and hardwire kit.

Image: A diagram demonstrating the comprehensive 360-degree coverage provided by the four cameras: front, rear, left, and right views, ensuring no blind spots.
സജ്ജീകരണവും ഇൻസ്റ്റാളേഷനും
1. ഡാഷ് കാം മൌണ്ട് ചെയ്യുന്നു
Ensure the windshield surface where you plan to mount the dash cam is clean and free of dust or grease. The dash cam comes with adhesive pads for secure mounting.
- Attach the front dash cam to the windshield, ideally behind the rearview നിങ്ങളുടെ തടസ്സം ഒഴിവാക്കാൻ കണ്ണാടി view.
- Mount the rear camera on the rear windshield. Route the cable neatly along the vehicle's interior trim.
- Adjust the camera lenses to ensure optimal viewing angles for front, rear, and internal coverage. The side cameras are adjustable up to 180 degrees.

Image: An illustration demonstrating the easy installation process for the front and rear dash cameras, highlighting the adjustable angles of the front unit's side cameras.
2. പവർ കണക്ഷൻ
You have two options for powering your dash cam:
- Using the Car Charger (Cigarette Lighter):
Connect the provided car charger to your vehicle's cigarette lighter socket and the dash cam's USB Type-C port. This method is quick and easy for basic recording during driving. Note: Parking monitoring will not function with this method unless the cigarette lighter port is continuously powered when the car is off.
- Using the Hardwire Kit (for 24H Parking Monitoring):
For continuous 24-hour parking monitoring, use the included hardwire kit. Connect the hardwire kit to your car's fuse box (ACC for switched power, BAT+ for constant power, and GND for ground). This ensures the dash cam receives power even when the vehicle is turned off, enabling parking surveillance. Professional installation is recommended for hardwiring if you are unfamiliar with car electrical systems.

Image: A diagram illustrating the two power supply options: connecting via the car charger for standard use, and connecting via the hardwire kit to the fuse box for 24-hour parking monitoring.
3. SD കാർഡ് ചേർക്കൽ
The dash cam comes with a 128GB TF (MicroSD) card. Insert the card into the designated slot on the dash cam. It is highly recommended to format the SD card immediately after insertion for optimal performance. Refer to the "Maintenance" section for formatting instructions.
4. Connecting via WiFi and App
The integrated 5GHz WiFi module allows for easy connection to your smartphone via the dedicated app.
- Download the free "Vidure" app from your smartphone's app store (iOS/Android).
- Turn on the Wi-Fi on your dash cam (refer to the dash cam's on-screen menu or quick guide for specific steps).
- Open the "Vidure" app on your phone.
- Tap "Add Camera" or similar option within the app.
- Go to your phone's Wi-Fi settings and connect to the dash cam's Wi-Fi network (e.g., "DC21-xxxx").
- Enter the default password (usually "12345678").
- Return to the app; your dash cam should now be connected.

Image: A step-by-step visual guide on how to connect the dash cam to your smartphone via WiFi using the "Vidure" application.
പ്രവർത്തന നിർദ്ദേശങ്ങൾ
1. ഓട്ടോമാറ്റിക് റെക്കോർഡിംഗ്
Once powered on, the dash cam will automatically start recording. The display will show the live view from the cameras. Recording will stop automatically when the power is disconnected.
2. മൊബൈൽ ആപ്പ് ഉപയോഗിക്കുന്നത്
The "Vidure" app provides full control over your dash cam:
- തത്സമയം View: തത്സമയ foo സ്ട്രീം ചെയ്യുകtagബന്ധിപ്പിച്ച എല്ലാ ക്യാമറകളിൽ നിന്നും.
- പ്ലേബാക്ക്: Review recorded videos directly on your phone.
- ഡൗൺലോഡ്: Save important video clips to your phone's gallery.
- പങ്കിടുക: Easily share footage with others.
- ക്രമീകരണങ്ങൾ: Adjust dash cam settings such as resolution, G-sensor sensitivity, loop recording duration, and more.

Image: A smartphone displaying the dash cam's app interface, highlighting the 5GHz WiFi connection for fast data transfer and easy access to recorded footage.
3. G-Sensor and Emergency Lock
The built-in G-sensor detects sudden impacts or rapid acceleration/deceleration. When an event is detected, the current video segment is automatically locked and saved to a separate "Event" folder on the SD card, preventing it from being overwritten by loop recording. You can adjust the G-sensor sensitivity in the app settings (Low, Medium, High). It is recommended to set the sensitivity to "Medium" to avoid losing important scenes or filling the SD card too quickly with unnecessary videos.

Image: A visual explanation of the G-sensor function, showing how it detects collisions and automatically locks the corresponding video footagഇല്ലാതാക്കുന്നത് തടയാൻ ഇ.
4. ലൂപ്പ് റെക്കോർഡിംഗ്
The dash cam records video in continuous loops. When the memory card is full, the oldest unlocked video files will be automatically overwritten by new recordings. This ensures that you always have the most recent footage without manually managing storage. Emergency locked videos are protected from being overwritten.

Image: An illustration of the loop recording feature, demonstrating how the dash cam continuously records and overwrites older files when the 128GB SD card is full.
5. പാർക്കിംഗ് നിരീക്ഷണം
When the hardwire kit is installed and parking monitoring is enabled in the settings, the dash cam will automatically detect impacts or movements around your parked vehicle. It will then record a short emergency video clip and save it. The system is designed to protect your car battery from draining by automatically shutting down if the voltagഇ ഡ്രോപ്പ് വളരെ കുറവാണ്.

Image: A scenario illustrating the 24-hour parking monitoring feature, where the dash cam detects an impact (like a baseball hitting the windshield) and automatically records an emergency clip.
മെയിൻ്റനൻസ്
1. SD കാർഡ് ഫോർമാറ്റ് ചെയ്യുന്നു
Regularly formatting the SD card (e.g., once a month) is crucial for maintaining optimal recording performance and preventing data corruption. You can format the SD card through the dash cam's menu settings or via the mobile app.
- Navigate to "System Settings" or "Storage Settings" on the dash cam or in the app.
- Select "Format SD Card" or "Format Storage".
- Confirm the action. All data on the card will be erased.
2. ലെൻസുകൾ വൃത്തിയാക്കൽ
To ensure clear video quality, periodically clean the dash cam lenses with a soft, lint-free cloth. Avoid using abrasive cleaners that could scratch the lens surface.
ട്രബിൾഷൂട്ടിംഗ്
| പ്രശ്നം | സാധ്യമായ കാരണം / പരിഹാരം |
|---|---|
| ഡാഷ് ക്യാം പവർ ഓൺ ചെയ്യുന്നില്ല. |
|
| റെക്കോർഡിംഗ് അപ്രതീക്ഷിതമായി നിലയ്ക്കുന്നു. |
|
| വീഡിയോ footage മങ്ങിയതോ അവ്യക്തമോ ആണ്. |
|
| Cannot connect to Wi-Fi / App. |
|
| Parking monitoring not working. |
|
സ്പെസിഫിക്കേഷനുകൾ
| ഫീച്ചർ | വിശദാംശങ്ങൾ |
|---|---|
| ബ്രാൻഡ് | ലാംട്ടോ |
| മോഡൽ | DC21B |
| ഉൽപ്പന്ന അളവുകൾ | 3.5 x 14 x 11 സെ.മീ |
| ഇനത്തിൻ്റെ ഭാരം | 710 ഗ്രാം |
| സ്ക്രീൻ വലിപ്പം | 3.16 ഇഞ്ച് |
| ഡിസ്പ്ലേ തരം | എൽസിഡി |
| വീഡിയോ റെസല്യൂഷൻ | 1080p (പൂർണ്ണ HD) |
| Viewing ആംഗിൾ | 360 Degrees (4-channel coverage) |
| Memory Card Included | 128 GB TF Card |
| കണക്റ്റിവിറ്റി ടെക്നോളജി | USB Type-C, 5G WiFi |
| പ്രത്യേക സവിശേഷതകൾ | App Control, 24H Parking Monitor with Hardwire Kit, Automatic Incident Detection, Built-in WiFi, IR Night Vision, Loop Recording, G-Sensor |
| പിന്തുണയ്ക്കുന്ന സ്റ്റാൻഡേർഡ് | എംഒവി |
| മൗണ്ടിംഗ് തരം | ഡാഷ്ബോർഡ് മ .ണ്ട് |
വാറൻ്റിയും പിന്തുണയും
LAMTTO dash cams come with a lifetime warranty, a 30-day money-back guarantee, and 24/7 customer support in the United States. For technical assistance, installation guidance, or any other inquiries, please contact our support team through Amazon or refer to the contact information provided in your quick guide.
We are committed to providing reliable assistance and ensuring your satisfaction with your LAMTTO product.