1. ഉൽപ്പന്നം കഴിഞ്ഞുview
The Ardes ARMST02D Blowy D is an automatic shirt dryer and ironing mannequin designed to dry and iron shirts, blouses, t-shirts, and dresses in minutes. It features an innovative breathable fabric mannequin for ultra-fast drying and perfect ironing, saving time and effort. The mannequin's side zippers allow it to adapt to all sizes, from XS to XXL. Equipped with an efficient 1400 W motor, adjustable temperature and air speed settings, and a timer up to 3 hours, it can handle even delicate garments. The touch control panel simplifies operation. The unit is compact for easy storage and includes a set of 4 weight clips for optimal ironing results.

Figure 1: Ardes ARMST02D Automatic Shirt Dryer and Ironing Mannequin. This image displays the Ardes ARMST02D mannequin with its key dimensions: 102 cm height, 44 cm width, and 16.5 cm depth. It highlights features such as automatic drying and ironing in minutes, 2 air speeds, and 4 temperature levels.
പ്രധാന സവിശേഷതകൾ:
- Automatic Drying and Ironing: Dries and irons garments completely automatically in minutes, eliminating wrinkles and saving time.
- Versatile Garment Compatibility: Suitable for shirts, blouses, t-shirts, sweaters, and dresses. Adjustable hinges accommodate sizes from XS to XXL.
- Customizable Performance: Features 4 power levels, 4 temperature settings, 2 air speeds, and a 180-minute timer for tailored drying based on fabric type.
- കാര്യക്ഷമമായ മോട്ടോർ: 1400 W motor provides gentle yet powerful drying.
- ഉപയോക്തൃ സൗഹൃദ നിയന്ത്രണങ്ങൾ: എളുപ്പത്തിലുള്ള പ്രവർത്തനത്തിനായി അവബോധജന്യമായ ടച്ച് നിയന്ത്രണ പാനൽ.
- കോംപാക്റ്റ് ഡിസൈൻ: Easy to store with dimensions of 44 cm (length), 16.5 cm (depth), and 102 cm (assembled height), 26 cm (disassembled height).
- ചുളിവുകൾ നീക്കം ചെയ്യൽ: Includes 4 weight clips to ensure perfect, wrinkle-free results.
2. സജ്ജീകരണം
2.1 അൺപാക്കിംഗും പരിശോധനയും
- പാക്കേജിംഗിൽ നിന്ന് എല്ലാ ഘടകങ്ങളും ശ്രദ്ധാപൂർവ്വം നീക്കം ചെയ്യുക.
- Verify that all parts are present and undamaged. Refer to the packing list for a complete inventory.
- ഭാവിയിലെ സംഭരണത്തിനോ ഗതാഗതത്തിനോ വേണ്ടി പാക്കേജിംഗ് സൂക്ഷിക്കുക.
2.2 അസംബ്ലി
- Place the main unit (base) on a stable, flat surface.
- Insert the telescopic rod into the designated slot on the main unit. Secure it firmly.
- Attach the inflatable mannequin fabric to the top of the telescopic rod and secure it according to the instructions provided in the quick start guide. Ensure the fabric is properly aligned and sealed to allow for inflation.
- Connect the power cord to the main unit and then to a suitable electrical outlet.
2.3 പ്ലേസ്മെൻ്റ്
- ഉപകരണം വഴുതിപ്പോകാതിരിക്കാൻ സ്ഥിരതയുള്ളതും നിരപ്പായതുമായ ഒരു പ്രതലത്തിൽ സ്ഥാപിച്ചിട്ടുണ്ടെന്ന് ഉറപ്പാക്കുക.
- Position the unit in a well-ventilated area, away from walls or other objects that could obstruct airflow.
- ജലസ്രോതസ്സുകളിൽ നിന്നും കത്തുന്ന വസ്തുക്കളിൽ നിന്നും യൂണിറ്റ് അകറ്റി നിർത്തുക.
3. ഓപ്പറേഷൻ
3.1 Preparing the Garment
- Ensure the garment is clean and damp (not dripping wet). For best results, use garments that have just been spin-dried in a washing machine.
- Carefully place the garment over the inflatable mannequin. Smooth out any major creases by hand.
- Attach the 4 provided weight clips to the hem of the garment at even intervals. These clips help to stretch the fabric and ensure a wrinkle-free finish.

Figure 2: Using the 4 weight clips for optimal ironing. The image shows the set of 4 weight clips used to ensure perfect ironing results. A 'before' section displays a wrinkled shirt, while the 'after' section shows the same shirt perfectly ironed in approximately 10 minutes.
3.2 നിയന്ത്രണ പാനൽ ഉപയോഗിക്കുന്നു
- പവർ ഓൺ: Press the power button on the touch control panel to turn on the appliance.
- താപനില തിരഞ്ഞെടുക്കുക: Choose one of the 4 temperature levels (e.g., RT, 50, 60, 70, Low, High) suitable for your garment's fabric type. Refer to the garment's care label.
- Adjust Air Speed: Select one of the 2 available air speeds. A higher speed will dry faster but may be more intense for delicate fabrics.
- ടൈമർ സജ്ജമാക്കുക: Use the timer function to set the desired drying duration, from 15 to 180 minutes. The appliance will operate autonomously and shut off once the timer expires.
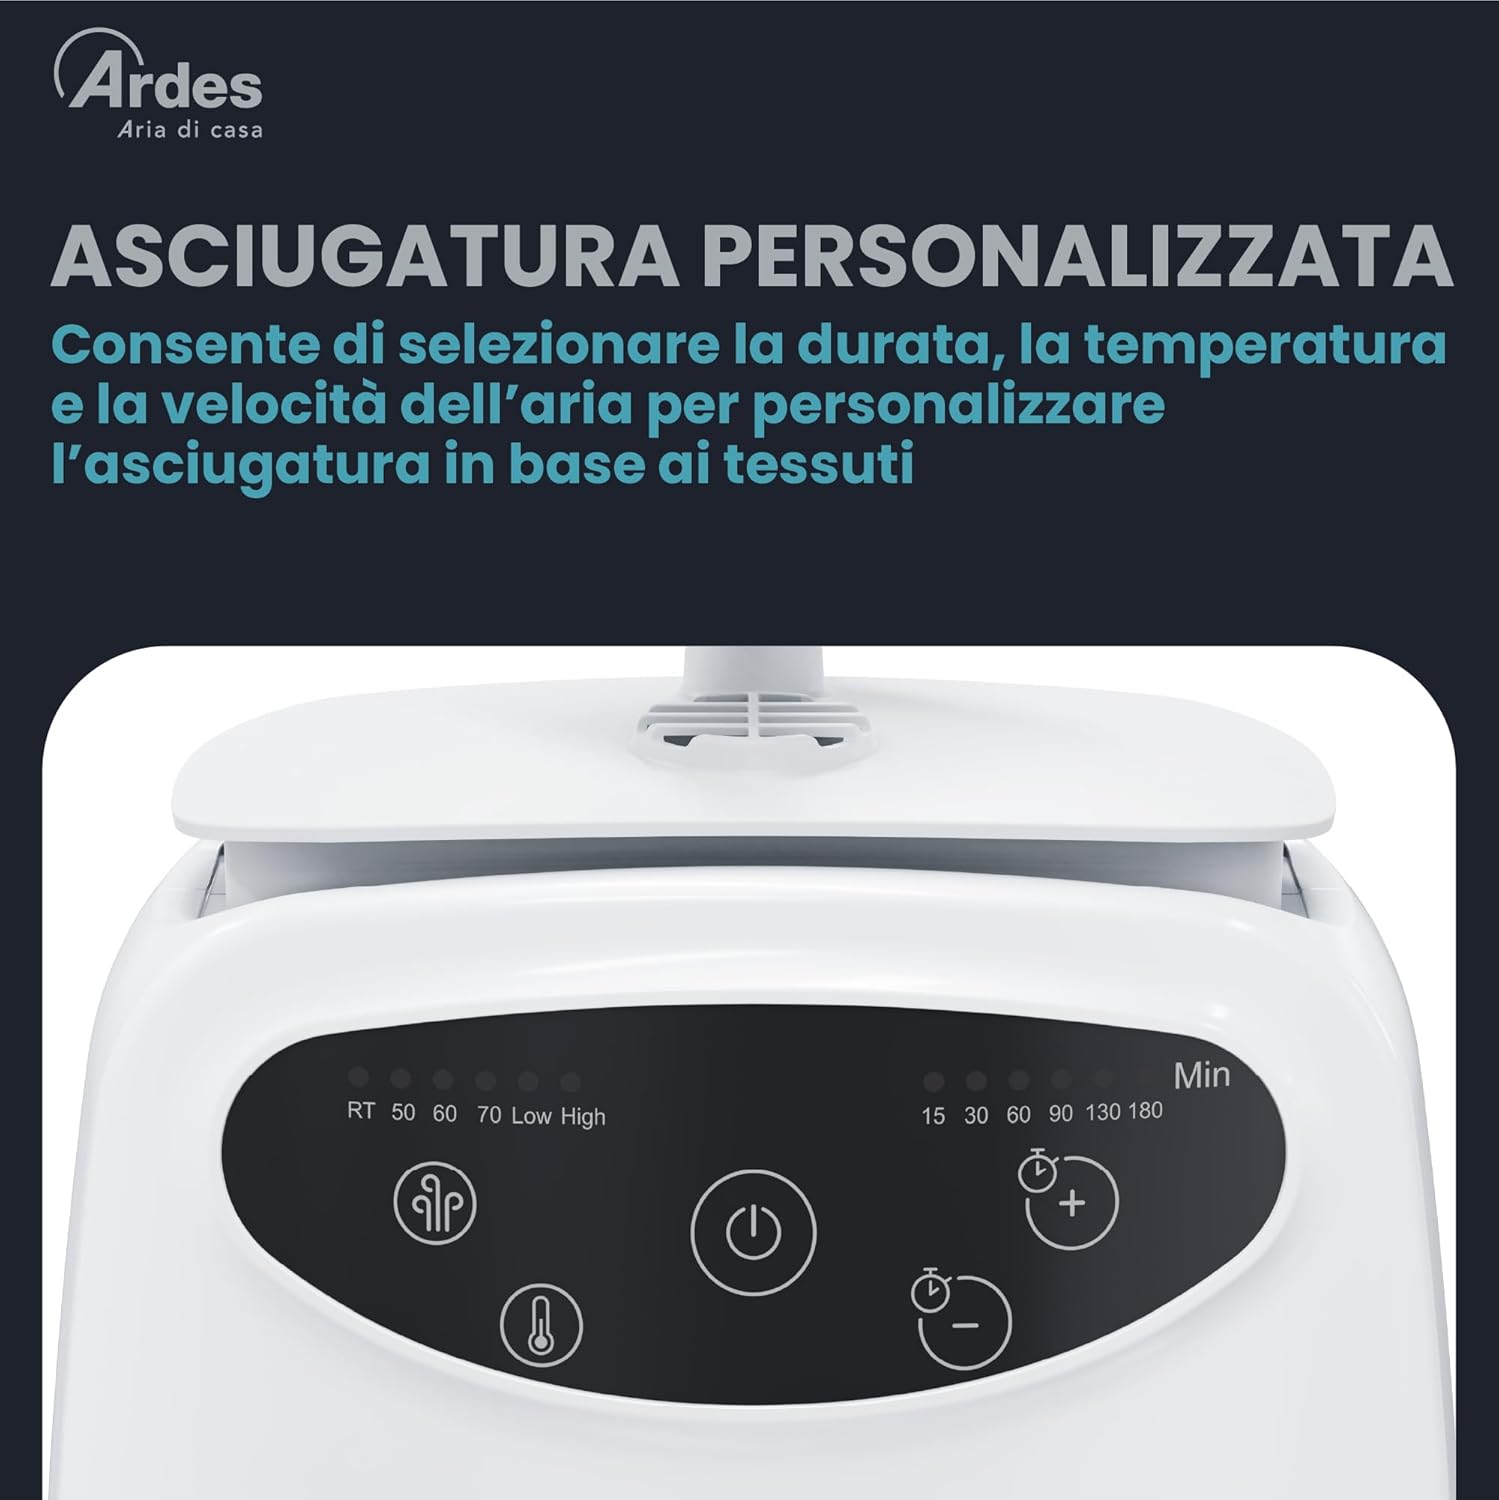
Figure 3: Touch control panel for setting duration, temperature, and air speed. A detailed view of the touch control panel, showing options to select drying duration (15 to 180 minutes), temperature levels (RT, 50, 60, 70, Low, High), and air speed settings.
3.3 Drying and Ironing Process
- Once settings are selected, the mannequin will inflate with warm air, drying and smoothing the garment.
- Monitor the process. For most shirts, perfect results can be achieved in about 10 minutes.
- The appliance will automatically shut off when the timer finishes.

Figure 4: Air inflation for automatic drying and ironing. This visual explains the core function: air inflates the mannequin to automatically dry and iron garments in minutes. It also emphasizes the super compact design with a dismountable telescopic rod for convenient storage.
3.4 Removing the Garment
- After the cycle is complete and the unit has cooled slightly, carefully remove the weight clips.
- Gently lift the garment off the mannequin. It should be dry and wrinkle-free.
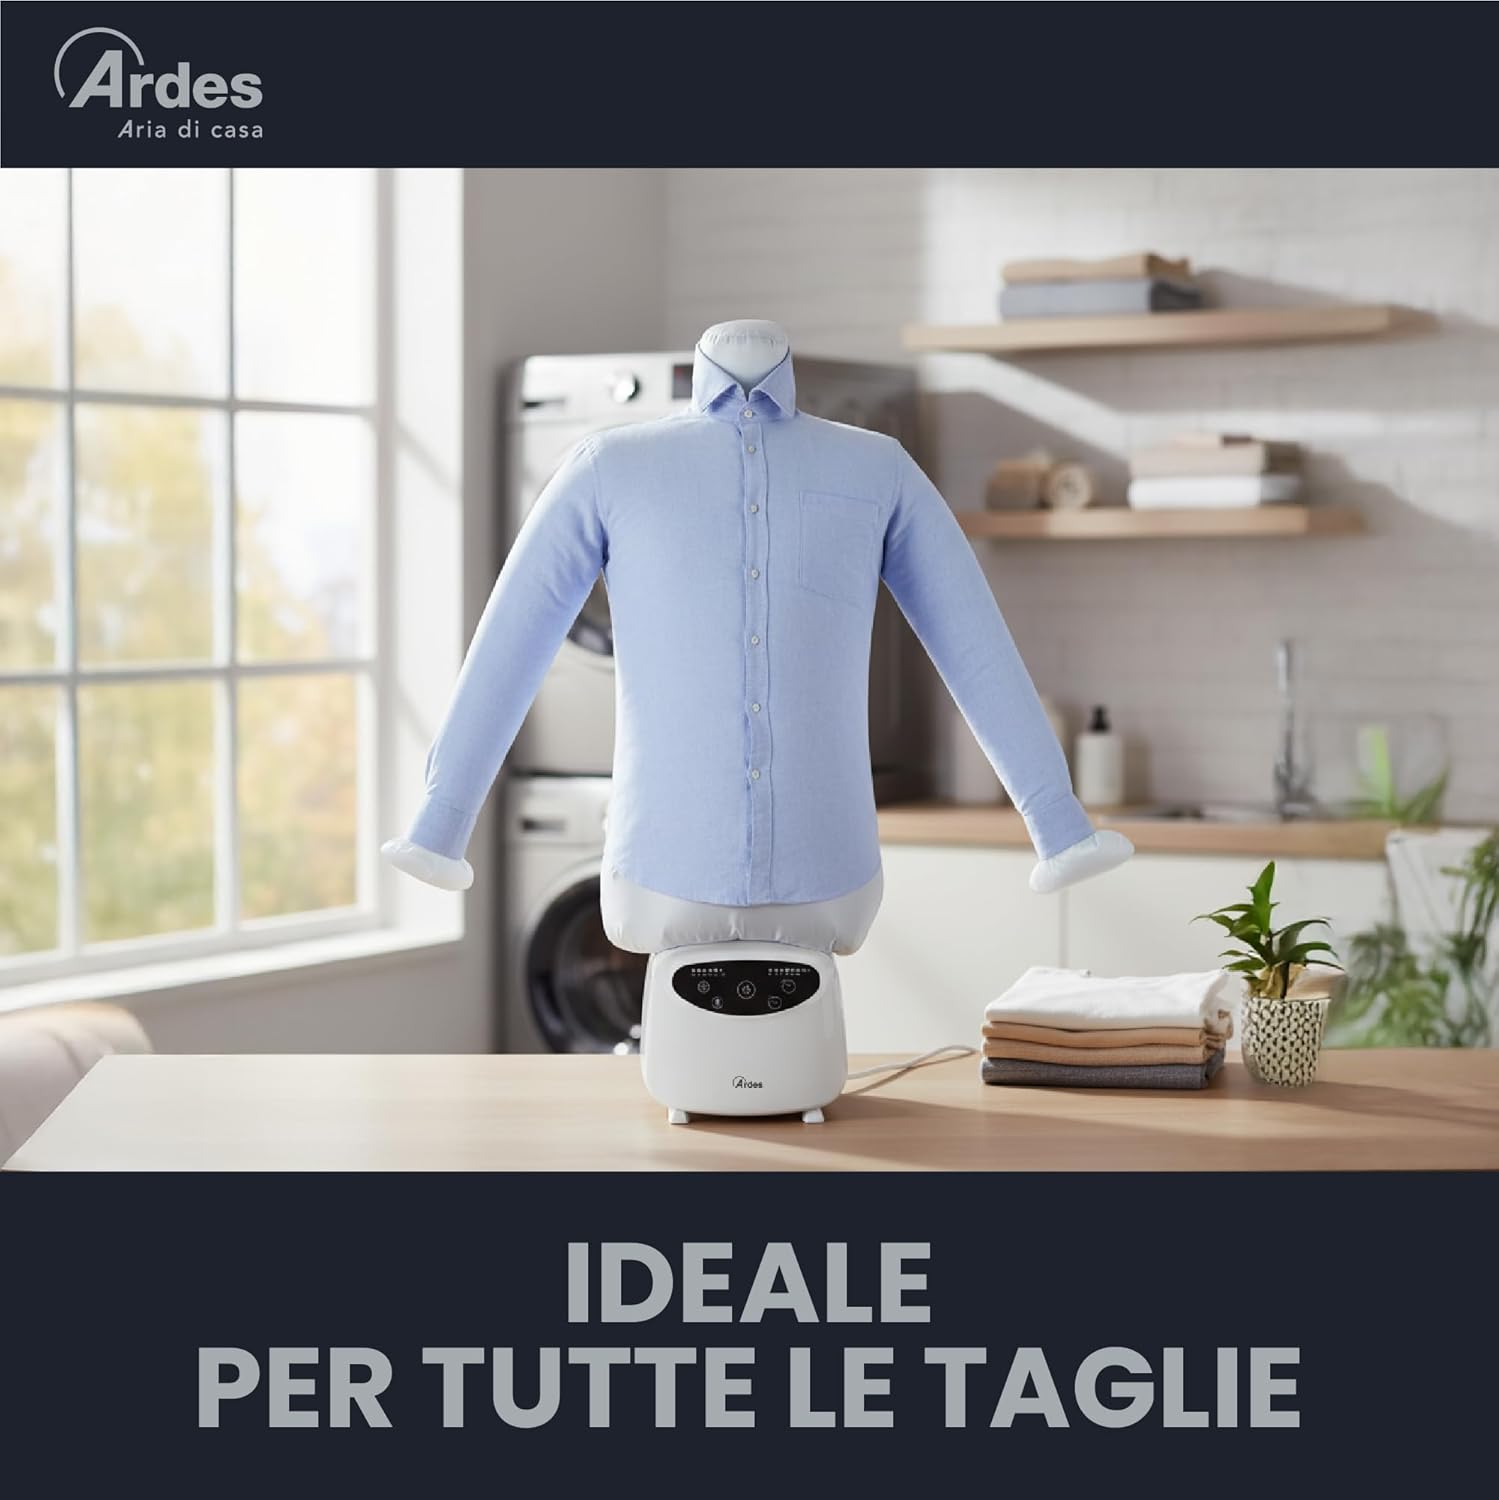
Figure 5: Mannequin in use, ideal for all sizes. The mannequin is shown in a home setting, effectively drying and ironing a shirt, reinforcing its 'Ideal for all sizes' feature due to adjustable hinges.
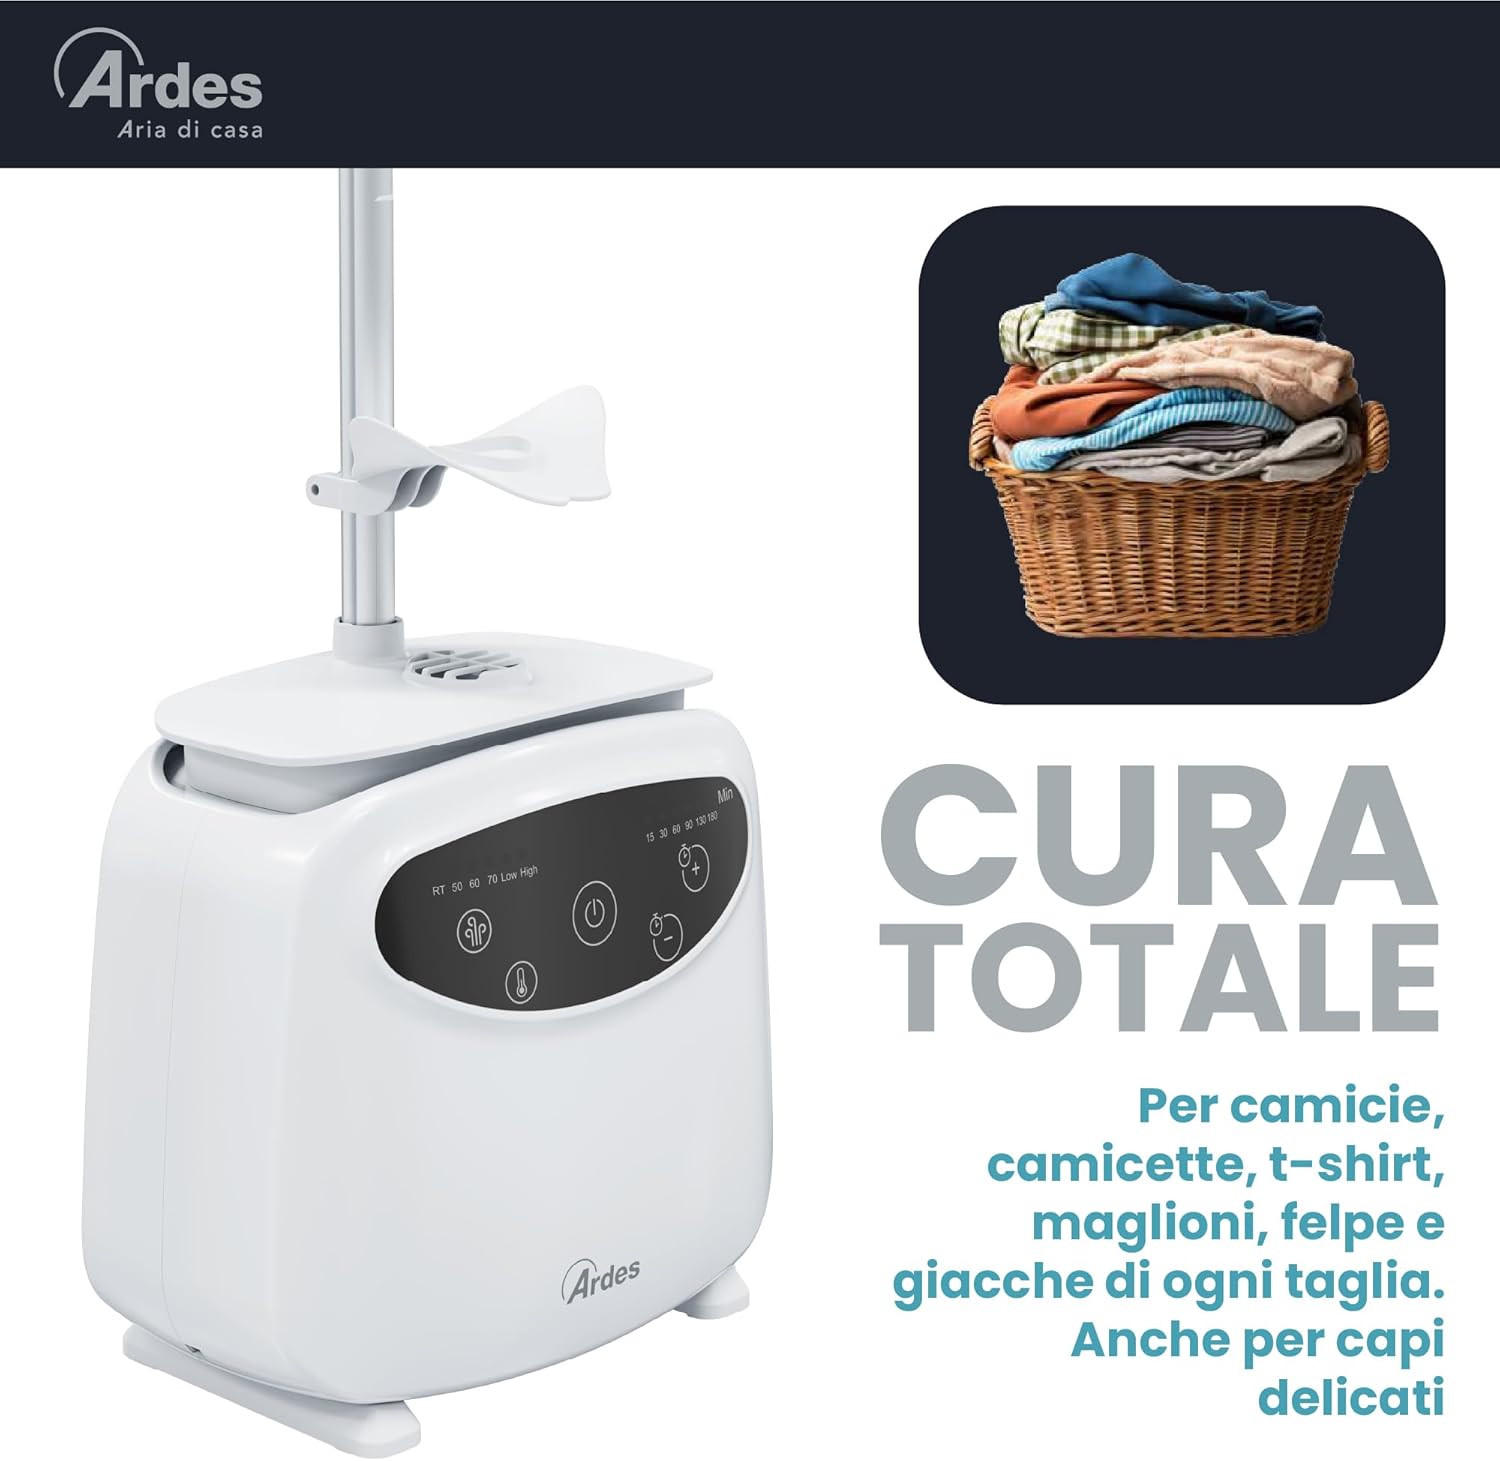
Figure 6: Versatility for various garments. This image demonstrates the versatility of the Blowy D mannequin, suitable for a wide range of garments including shirts, blouses, t-shirts, sweaters, and dresses of all sizes, even delicate items.
4. പരിപാലനം
4.1 Cleaning the Mannequin Fabric
- Ensure the appliance is unplugged and completely cool before cleaning.
- The breathable fabric of the mannequin can be gently wiped with a damp തുണി. കഠിനമായ രാസവസ്തുക്കളോ ഉരച്ചിലുകളുള്ള ക്ലീനറുകളോ ഉപയോഗിക്കരുത്.
- Allow the fabric to air dry completely before storing or next use.
4.2 ബേസ് യൂണിറ്റ് വൃത്തിയാക്കൽ
- ബേസ് യൂണിറ്റിന്റെ പുറംഭാഗം മൃദുവായ, ഡി ക്ലീനർ ഉപയോഗിച്ച് തുടയ്ക്കുക.amp തുണി.
- അടിസ്ഥാന യൂണിറ്റ് വെള്ളത്തിലോ മറ്റേതെങ്കിലും ദ്രാവകത്തിലോ മുക്കരുത്.
- വെന്റിലേഷൻ ദ്വാരങ്ങളിൽ വെള്ളം കയറുന്നില്ലെന്ന് ഉറപ്പാക്കുക.
4.3 സംഭരണം
- When not in use, disassemble the telescopic rod and mannequin fabric for compact storage.
- Store the appliance in a dry, cool place, away from direct sunlight and moisture.
5. പ്രശ്നപരിഹാരം
| പ്രശ്നം | സാധ്യമായ കാരണം | പരിഹാരം |
|---|---|---|
| ഉപകരണം ഓണാക്കുന്നില്ല. | ശരിയായി പ്ലഗ് ഇൻ ചെയ്തിട്ടില്ല. പവർ ഔട്ട്ലെറ്റ് തകരാറ്. | വർക്കിംഗ് ഔട്ട്ലെറ്റിലേക്ക് പവർ കോർഡ് സുരക്ഷിതമായി പ്ലഗ് ചെയ്തിട്ടുണ്ടെന്ന് ഉറപ്പാക്കുക. മറ്റൊരു ഔട്ട്ലെറ്റ് പരീക്ഷിക്കുക. |
| Garments are not drying/ironing effectively. | Incorrect temperature/air speed settings. Garment too wet. Mannequin fabric not properly sealed. Weight clips not used or improperly placed. | Adjust temperature and air speed settings according to fabric type. Ensure garment is damp, നനഞ്ഞില്ല. Check that the mannequin fabric is securely attached and sealed. Use all 4 weight clips and distribute them evenly. |
| Excessive wrinkles remain. | Garment not smoothed before placing on mannequin. Insufficient drying time. Weight clips not providing enough tension. | Manually smooth out major wrinkles before starting the cycle. Increase the timer duration. Ensure weight clips are securely attached and providing adequate tension to the fabric. |
| Mannequin does not inflate properly. | Air leakage from fabric or connections. Obstruction in air vents. | Check all connections and zippers on the mannequin fabric for proper sealing. Ensure air vents on the base unit are clear of debris. |
6 സ്പെസിഫിക്കേഷനുകൾ
- ബ്രാൻഡ്: ആർഡെസ്
- മോഡൽ നമ്പർ: ARMST02D
- നിറം: വെള്ള
- ഉൽപ്പന്ന അളവുകൾ: 44 x 16.5 x 102 സെ.മീ (നീളം x വീതി x ഉയരം)
- ശക്തി: 1400 വാട്ട്സ്
- വാല്യംtage: 230 വോൾട്ട് (എസി)
- മെറ്റീരിയൽ: പ്ലാസ്റ്റിക്
- ഉൽപ്പന്ന ഭാരം: 3 കി.ഗ്രാം
- ചൂടാക്കൽ സമയം: Up to 180 minutes (Timer setting)
- ശൈലി: കുത്തനെയുള്ള
7. വാറൻ്റിയും പിന്തുണയും
For warranty information and customer support, please refer to the documentation included with your product or visit the official Ardes webസൈറ്റ്. ഏതെങ്കിലും വാറന്റി ക്ലെയിമുകൾക്ക് വാങ്ങിയതിന്റെ തെളിവായി നിങ്ങളുടെ വാങ്ങൽ രസീത് സൂക്ഷിക്കുക.


