1. ആമുഖം
This manual provides detailed instructions for the installation, operation, and maintenance of your Western Digital WD Blue 12TB Internal Hard Drive, model WD120EAGZ. Designed for desktop PCs and office applications, this 3.5-inch HDD offers reliable storage with a 7200 RPM spindle speed and SATA 6 Gb/s interface. Please read this guide thoroughly before proceeding with installation or use.

Image 1.1: The Western Digital WD Blue 12TB 3.5-inch PC HDD.
2. ഉൽപ്പന്നം കഴിഞ്ഞുview
The Western Digital WD Blue internal hard drive is engineered for everyday computing needs, providing a balance of performance and reliability. Key features include:
- ശേഷി: 12TB (Terabytes) for extensive data storage.
- ഫോം ഘടകം: Standard 3.5-inch, compatible with most desktop PC cases.
- ഇൻ്റർഫേസ്: SATA 6 Gb/s for high-speed data transfer.
- ഭ്രമണ വേഗത: 7200 RPM for responsive performance.
- കാഷെ: 512 MB for improved read/write operations.
- വിശ്വാസ്യത: Built with Western Digital's quality standards.
- സോഫ്റ്റ്വെയർ: Includes free Acronis True Image WD Edition cloning software for easy data migration.
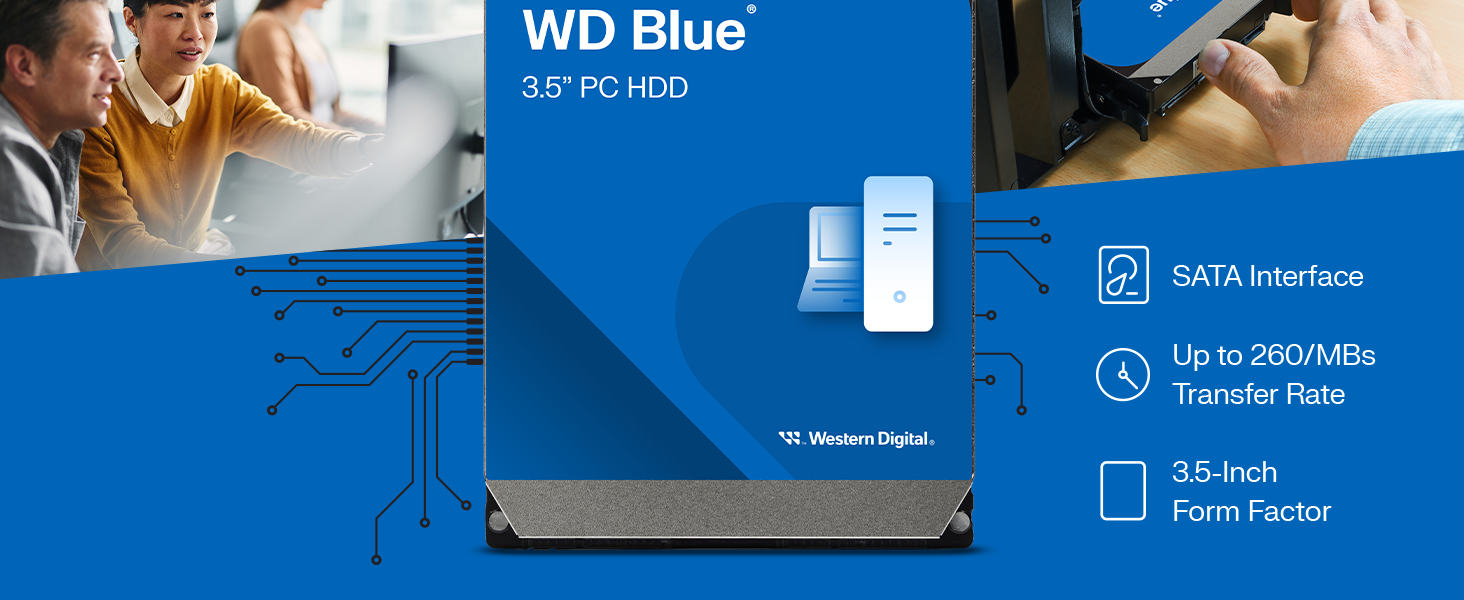
ചിത്രം 2.1: കഴിഞ്ഞുview of the WD Blue 3.5-inch PC HDD highlighting its SATA interface, transfer rate, and form factor.
3. സജ്ജീകരണവും ഇൻസ്റ്റാളേഷനും
Proper installation is crucial for the optimal performance and longevity of your hard drive. Ensure your computer is powered off and unplugged before beginning.
3.1 ഫിസിക്കൽ ഇൻസ്റ്റലേഷൻ
- പിസി കേസ് തുറക്കുക: Carefully open your computer's case to access the internal drive bays.
- Mount the Drive: Slide the WD Blue HDD into an available 3.5-inch drive bay. Secure it using appropriate mounting screws (not included with OEM drives) to prevent vibration.
- ഡാറ്റ കേബിൾ ബന്ധിപ്പിക്കുക: Attach one end of a SATA data cable (not included) to the SATA port on the hard drive and the other end to an available SATA port on your motherboard.
- പവർ കേബിൾ ബന്ധിപ്പിക്കുക: നിങ്ങളുടെ പവർ സപ്ലൈ യൂണിറ്റിൽ (പിഎസ്യു) നിന്ന് ഒരു SATA പവർ കേബിൾ ഹാർഡ് ഡ്രൈവിലെ പവർ കണക്ടറിലേക്ക് ബന്ധിപ്പിക്കുക.
- പിസി കേസ് അടയ്ക്കുക: Once all connections are secure, close your PC case.
Image 3.1: Illustrative image of a hard drive being installed into a desktop computer system.
3.2 Initial Setup (Operating System)
After physical installation, the drive needs to be initialized and formatted by your operating system.
- ഡിസ്ക് മാനേജ്മെന്റ് ആക്സസ് ചെയ്യുക: In Windows, right-click 'This PC' or 'My Computer', select 'Manage', then 'Disk Management'. On other operating systems, refer to their respective disk utility tools.
- ഡിസ്ക് ആരംഭിക്കുക: Locate the new drive (it may appear as 'Unallocated Space'). Right-click on it and select 'Initialize Disk'. For drives larger than 2TB, select GPT (GUID Partition Table) for full capacity recognition.
- പുതിയ സിമ്പിൾ വോള്യം സൃഷ്ടിക്കുക: Right-click the unallocated space on the initialized disk and select 'New Simple Volume'. Follow the wizard to assign a drive letter and format the drive.
- ഫോർമാറ്റിംഗ്: Choose NTFS for Windows systems. Ensure 'Perform a quick format' is checked for faster completion, or unchecked for a full format (which takes longer but checks for bad sectors).
- Partition Alignment: For optimal performance, especially with Advanced Format drives (4KB sectors), ensure partitions are aligned correctly. Modern operating systems (Windows 7 SP1 and later, Windows 8/10/11) typically handle this automatically during formatting. For older OS, third-party tools may be required.
- Acronis True Image WD Edition: Utilize the included Acronis True Image WD Edition software for cloning your existing drive or backing up data. This software can be downloaded from the Western Digital support webസൈറ്റ്.
4. പ്രവർത്തന നിർദ്ദേശങ്ങൾ
Once installed and formatted, your WD Blue HDD functions like any other storage device in your system.
- ഡാറ്റ സംഭരണം: Use the drive to store files, applications, and operating system data.
- ഡാറ്റ കൈമാറ്റം: വലിച്ചിടുക files, or use copy/paste functions to move data to and from the drive. The SATA 6 Gb/s interface supports fast transfer speeds.
- സിസ്റ്റം ഇൻ്റഗ്രേഷൻ: The drive can be used as a primary boot drive, a secondary storage drive, or for backup purposes.

Image 4.1: A user interacting with a computer, representing typical hard drive usage.
5. പരിപാലനവും പരിചരണവും
To ensure the longevity and optimal performance of your WD Blue hard drive, consider the following maintenance practices:
- പതിവ് ബാക്കപ്പുകൾ: Periodically back up important data to another drive or cloud storage. While reliable, no storage device is immune to failure.
- ശരിയായ ഷട്ട്ഡൗൺ: Always shut down your computer properly. Avoid sudden power loss, which can lead to data corruption or drive damage.
- താപനില നിയന്ത്രണം: Ensure adequate airflow within your PC case to prevent the drive from overheating. Operating within recommended temperature ranges prolongs drive life.
- ഡീഫ്രാഗ്മെന്റേഷൻ (HDD-കൾക്ക്): For optimal performance on Windows, periodically defragment your hard drive. This reorganizes fragmented data for faster access. (Note: This is not applicable to Solid State Drives).
- ശാരീരിക ആഘാതങ്ങൾ ഒഴിവാക്കുക: Hard drives are sensitive to physical impact. Ensure your PC is in a stable location and avoid moving it while the drive is operating.

Image 5.1: A digital clock, representing the long-term reliability and operational hours of the drive.
6. പ്രശ്നപരിഹാരം
If you encounter issues with your WD Blue hard drive, refer to the following common problems and solutions:
- ഡ്രൈവ് കണ്ടെത്തിയില്ല:
- എല്ലാ SATA ഡാറ്റയും പവർ കേബിൾ കണക്ഷനുകളും പരിശോധിക്കുക.
- Ensure the drive is enabled in your system's BIOS/UEFI settings.
- Verify the drive is initialized and formatted in Disk Management (Windows) or equivalent utility.
- മന്ദഗതിയിലുള്ള പ്രകടനം:
- അമിതമായ പശ്ചാത്തല പ്രക്രിയകൾ അല്ലെങ്കിൽ മാൽവെയർ പരിശോധിക്കുക.
- ഡ്രൈവ് ഏതാണ്ട് നിറഞ്ഞിട്ടില്ലെന്ന് ഉറപ്പാക്കുക.
- ഡിസ്ക് ഡീഫ്രാഗ്മെന്റേഷൻ (വിൻഡോസ്) നടത്തുക.
- Verify SATA cable integrity; a faulty cable can degrade performance.
- അസാധാരണമായ ശബ്ദങ്ങൾ:
- A clicking or grinding noise can indicate a potential drive failure. Back up data immediately and consider replacing the drive.
- Some drives may produce faint whirring or head-seeking sounds during operation; this is generally normal. Ensure the drive is securely mounted to minimize vibration.
- ഡാറ്റ അഴിമതി:
- ഒരു ഡിസ്ക് പരിശോധന യൂട്ടിലിറ്റി പ്രവർത്തിപ്പിക്കുക (ഉദാ.
chkdskin Windows) to scan and repair file സിസ്റ്റം പിശകുകൾ. - Ensure proper system shutdowns to prevent data corruption.
- ഒരു ഡിസ്ക് പരിശോധന യൂട്ടിലിറ്റി പ്രവർത്തിപ്പിക്കുക (ഉദാ.
For further assistance, refer to the Western Digital support webസൈറ്റ് അല്ലെങ്കിൽ അവരുടെ ഉപഭോക്തൃ സേവനവുമായി ബന്ധപ്പെടുക.
7 സ്പെസിഫിക്കേഷനുകൾ
Detailed technical specifications for the Western Digital WD Blue 12TB Internal Hard Drive (WD120EAGZ):
| ഫീച്ചർ | സ്പെസിഫിക്കേഷൻ |
|---|---|
| മോഡൽ നമ്പർ | WD120EAGZ-SPCRJB0 |
| ഡിജിറ്റൽ സ്റ്റോറേജ് കപ്പാസിറ്റി | 12 ടി.ബി |
| ഹാർഡ് ഡിസ്ക് ഫോം ഫാക്ടർ | 3.5 ഇഞ്ച് |
| ഹാർഡ് ഡിസ്ക് ഇന്റർഫേസ് | Serial ATA-600 (SATA 6 Gb/s) |
| ഹാർഡ് ഡ്രൈവ് റൊട്ടേഷണൽ സ്പീഡ് | 7200 ആർപിഎം |
| കാഷെ | 512 MB |
| അനുയോജ്യമായ ഉപകരണങ്ങൾ | Desktop, Laptop (with 3.5" bay adapter) |
| ഇൻസ്റ്റലേഷൻ തരം | ആന്തരിക ഹാർഡ് ഡ്രൈവ് |
| ഇനത്തിൻ്റെ ഭാരം | 1.65 പൗണ്ട് |
| ഉൽപ്പന്ന അളവുകൾ (LxWxH) | 5.9 x 4.2 x 1 ഇഞ്ച് |
| പ്രത്യേക സവിശേഷതകൾ | Acronis True Image, NoTouch Ramp ലോഡ് ടെക്നോളജി |
8. വാറൻ്റിയും പിന്തുണയും
Western Digital stands by the quality and reliability of its products. While specific warranty periods may vary by region and retailer, all WD Blue drives are manufactured to high standards.
- ഉൽപ്പന്ന പിന്തുണ: For technical support, driver downloads, and additional resources, please visit the official Western Digital support webസൈറ്റ്.
- Acronis True Image WD Edition: This software is provided to assist with data migration and backup. Download and activate it using the instructions on the Western Digital support site.


