ആമുഖം
Thank you for choosing the WIKICO Mini Camera Keychain HJD02. This compact and versatile device is designed for capturing high-quality 4K video and 48MP photos. Its portable design makes it ideal for various recording needs. Please read this manual carefully to ensure proper use and optimal performance of your camera.
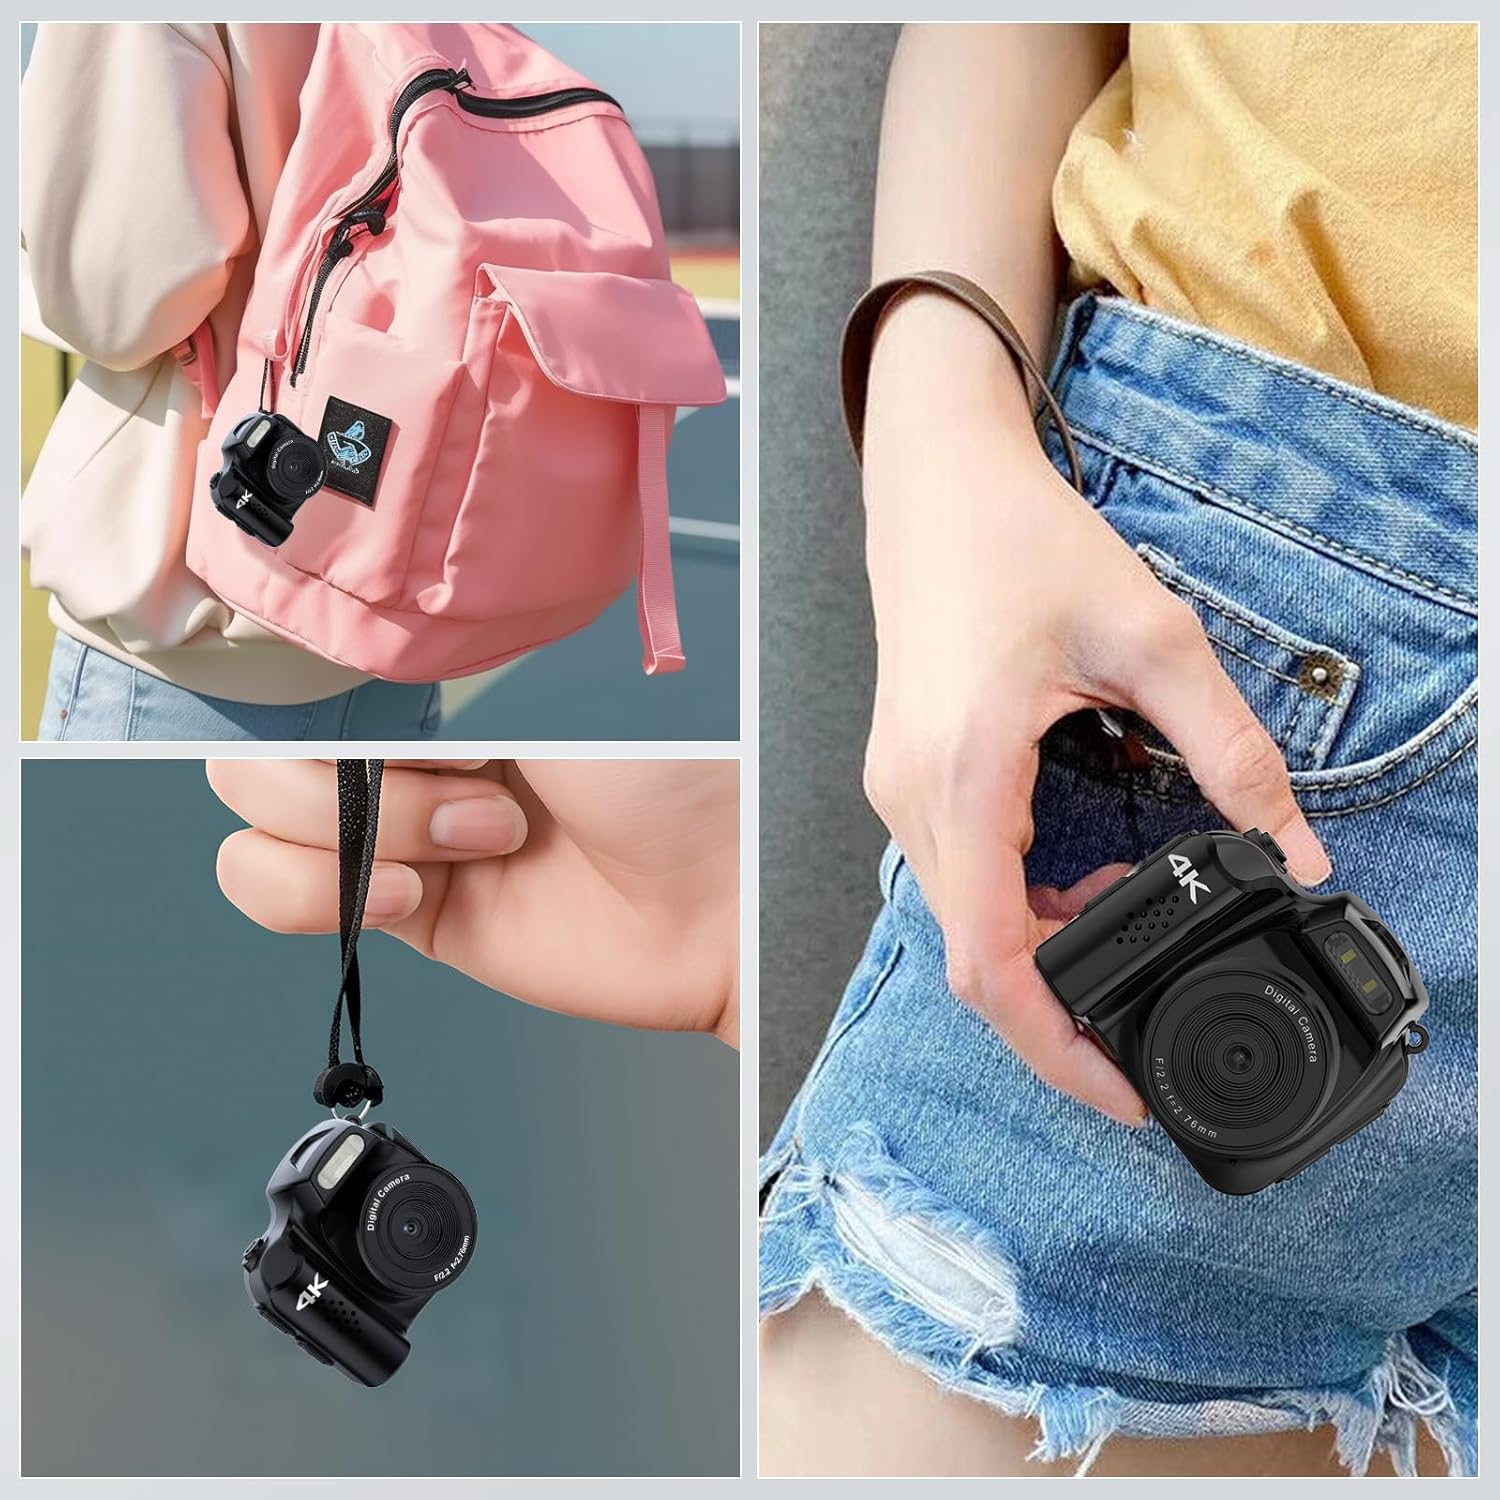
The WIKICO Mini Camera Keychain HJD02 is designed for portability, easily attaching to a backpack or fitting into a pocket.
ഉൽപ്പന്നം കഴിഞ്ഞുview
Familiarize yourself with the components and controls of your WIKICO Mini Camera Keychain HJD02.
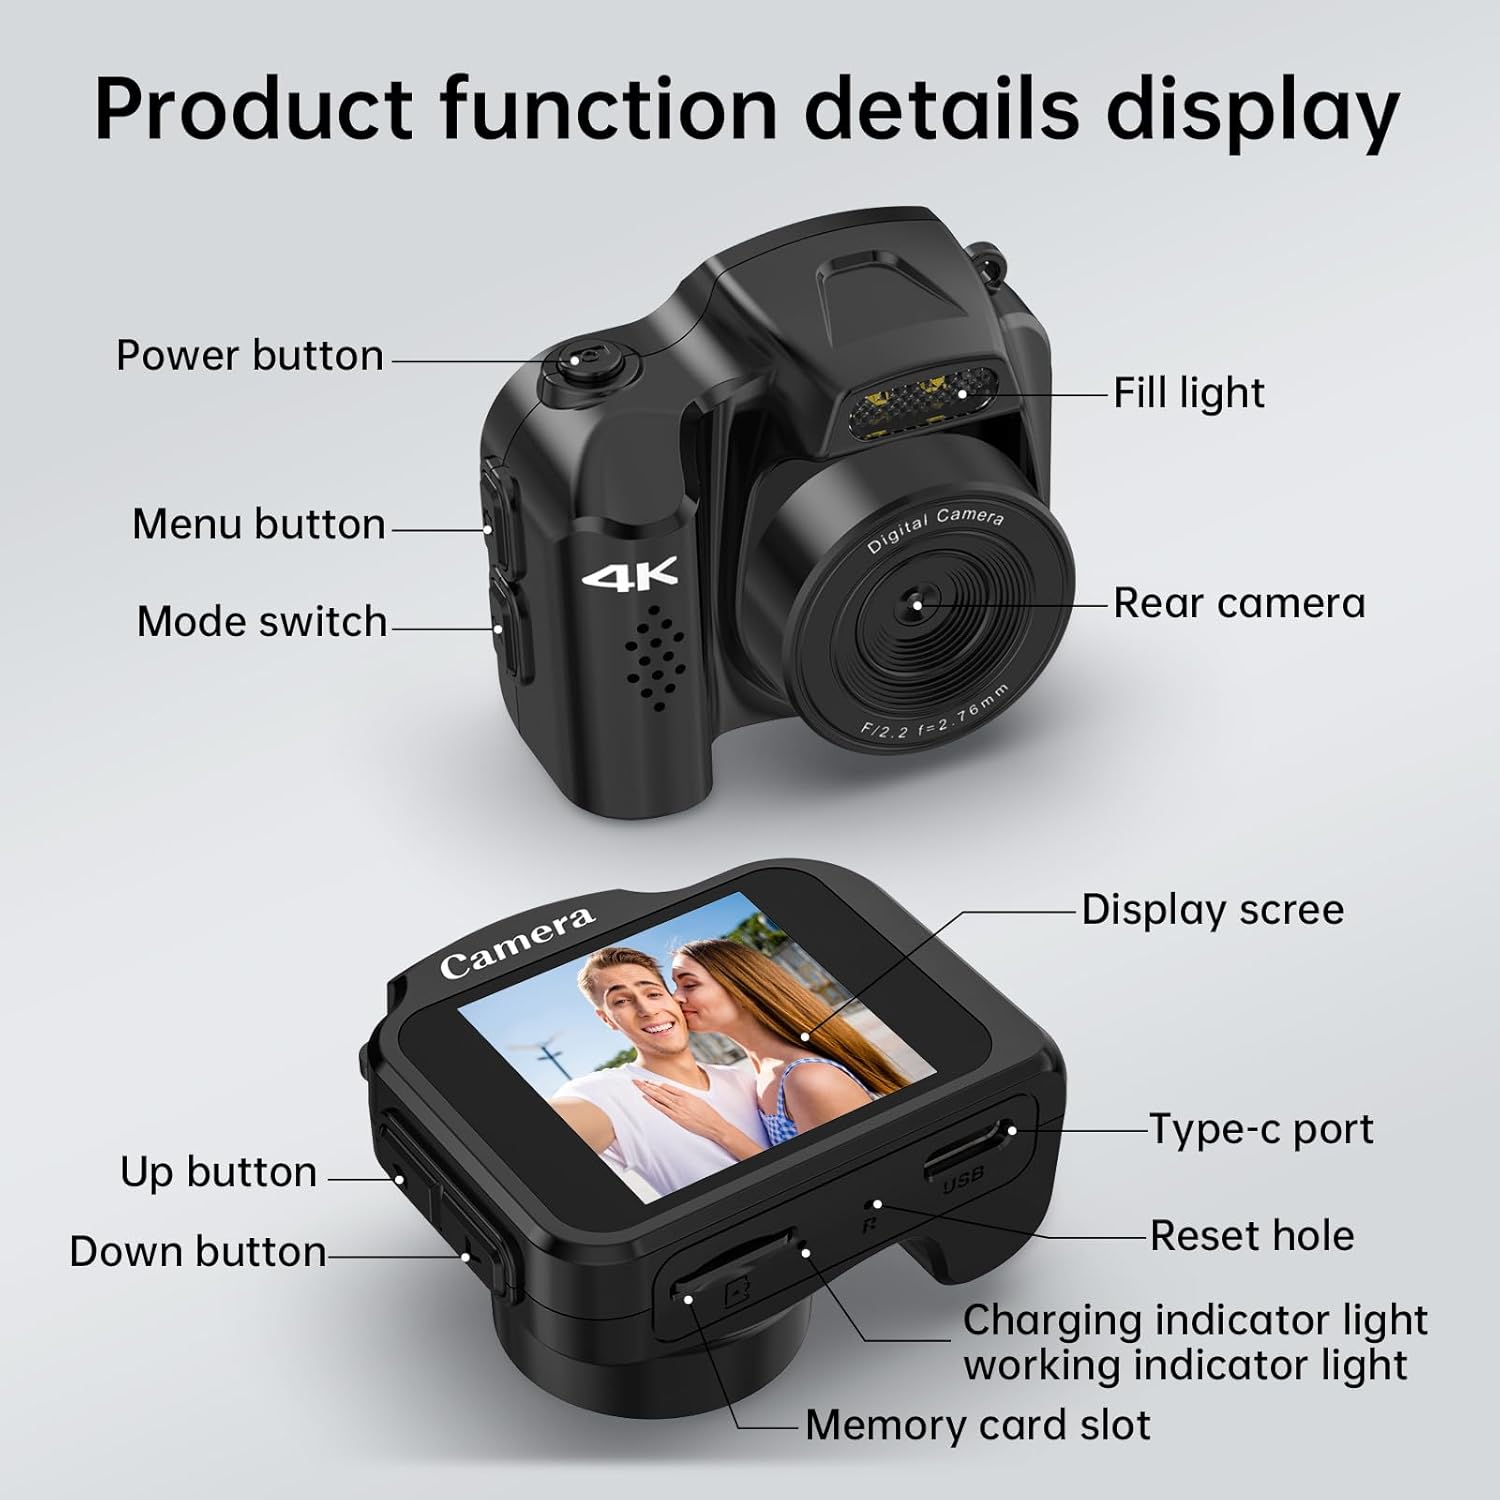
വിശദമായി view of the camera's buttons, ports, and features.
- പവർ ബട്ടൺ: ക്യാമറ ഓൺ/ഓഫ് ചെയ്യുന്നു.
- മെനു ബട്ടൺ: ക്യാമറ ക്രമീകരണങ്ങൾ ആക്സസ് ചെയ്യുന്നു.
- മോഡ് സ്വിച്ച്: Toggles between video and photo modes.
- വെളിച്ചം നിറയ്ക്കുക: കുറഞ്ഞ വെളിച്ചത്തിൽ അധിക പ്രകാശം നൽകുന്നു.
- പിൻ ക്യാമറ: Main lens for capturing images and videos.
- ഡിസ്പ്ലേ സ്ക്രീൻ: തത്സമയം കാണിക്കുന്നു view, ക്രമീകരണങ്ങൾ, പ്ലേബാക്ക്.
- ടൈപ്പ്-സി പോർട്ട്: ചാർജിംഗിനും ഡാറ്റ കൈമാറ്റത്തിനും.
- ദ്വാരം പുനഃസജ്ജമാക്കുക: For factory reset if needed.
- ചാർജിംഗ് ഇൻഡിക്കേറ്റർ ലൈറ്റ്: ചാർജിംഗ് നില സൂചിപ്പിക്കുന്നു.
- പ്രവർത്തിക്കുന്ന ഇൻഡിക്കേറ്റർ ലൈറ്റ്: Shows camera's operational status.
- മുകളിലേക്കുള്ള ബട്ടൺ: Navigation/selection in menus.
- താഴേക്കുള്ള ബട്ടൺ: Navigation/selection in menus.
- മെമ്മറി കാർഡ് സ്ലോട്ട്: For inserting a Micro SD card.
സജ്ജമാക്കുക
- മൈക്രോ എസ്ഡി കാർഡ് ചേർക്കുക: Locate the memory card slot and gently insert the provided 32GB Micro SD card (or another compatible card, up to 128GB, Class 10 or higher recommended) until it clicks into place. Ensure the camera is powered off before inserting or removing the card.
- ക്യാമറ ചാർജ് ചെയ്യുക: Connect the camera to a power source using the provided USB Type-C cable. The charging indicator light will illuminate. A full charge takes approximately 90 minutes.
- പവർ ഓൺ/ഓഫ്: അമർത്തിപ്പിടിക്കുക പവർ ബട്ടൺ ക്യാമറ ഓണാക്കാനോ ഓഫാക്കാനോ കുറച്ച് സെക്കൻഡുകൾ അമർത്തിപ്പിടിക്കുക.
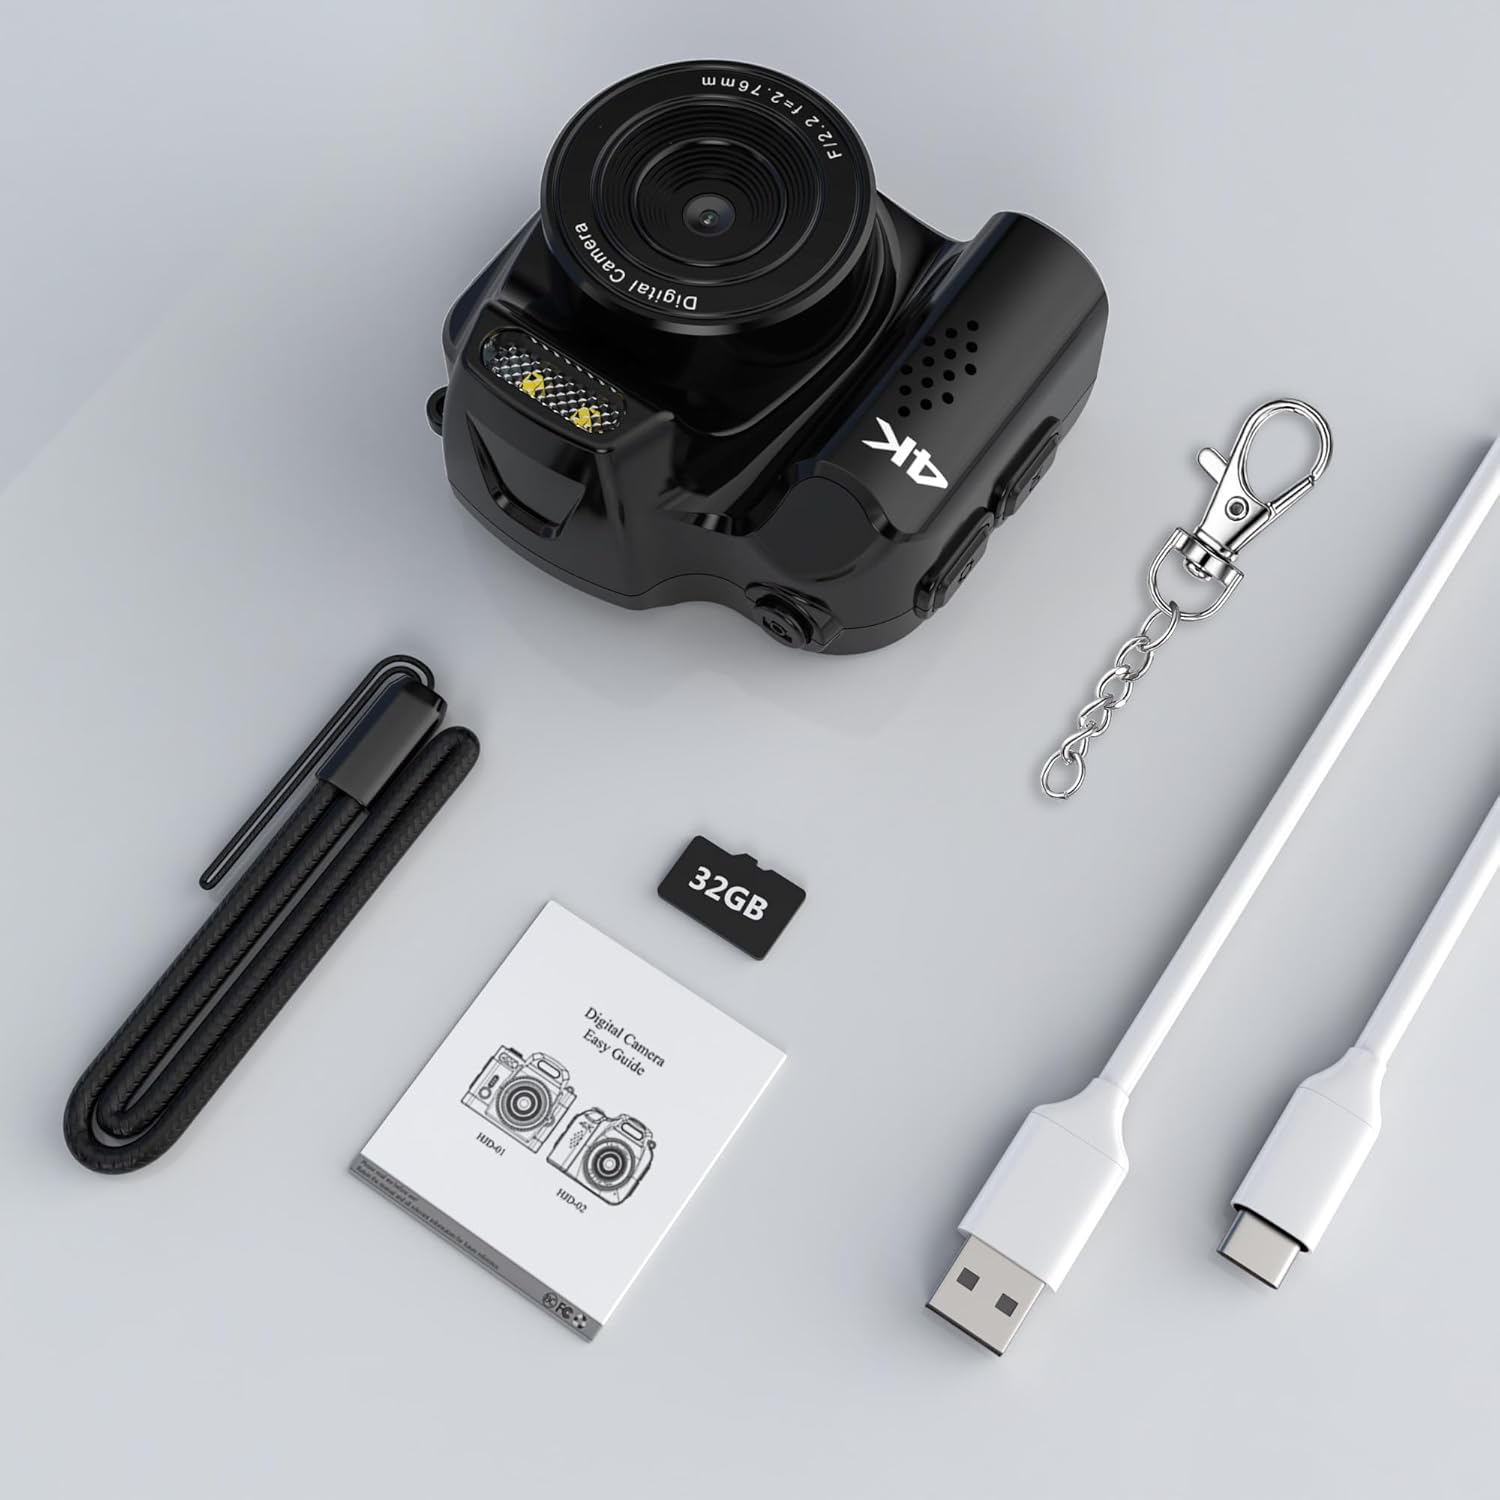
The camera comes with essential accessories, including a 32GB Micro SD card, USB-C cable, and keychain.
പ്രവർത്തന നിർദ്ദേശങ്ങൾ
1. വീഡിയോ റെക്കോർഡിംഗ്
- ഉറപ്പാക്കുക മോഡ് സ്വിച്ച് is set to video mode.
- അമർത്തുക പവർ ബട്ടൺ (or a dedicated record button if available, otherwise the power button often doubles as start/stop) once to start recording. The working indicator light will flash.
- Press the button again to stop recording. The working indicator light will stop flashing.
- The camera supports 4K video recording at 30 frames per second.

The camera captures high-definition video and photos.
2. ഫോട്ടോ ക്യാപ്ചർ
- ഉറപ്പാക്കുക മോഡ് സ്വിച്ച് is set to photo mode.
- ഡിസ്പ്ലേ സ്ക്രീൻ ഉപയോഗിച്ച് നിങ്ങളുടെ ഷോട്ട് ഫ്രെയിം ചെയ്യുക.
- അമർത്തുക പവർ ബട്ടൺ (or a dedicated shutter button) once to take a photo. The working indicator light will flash briefly.
- The camera captures photos with an effective still resolution of 48MP.
3. Using the Fill Light
- To activate the built-in fill light, locate the dedicated button or menu option (refer to the display screen for menu navigation using Up/Down buttons).
- Press the button or select the option to toggle the fill light ON or OFF.
- The fill light helps improve image quality in low-light environments.

The built-in fill light enhances visibility in dark environments.
4. Applying Filters
- Access the camera's menu using the മെനു ബട്ടൺ.
- Navigate to the filter options using the മുകളിലേക്കും താഴേക്കും ബട്ടണുകൾ.
- Select from 19 available filter functions (e.g., B/W, Negative, Antique, Red, Green, Blue) to apply different visual effects to your photos.
- Confirm your selection to apply the filter.
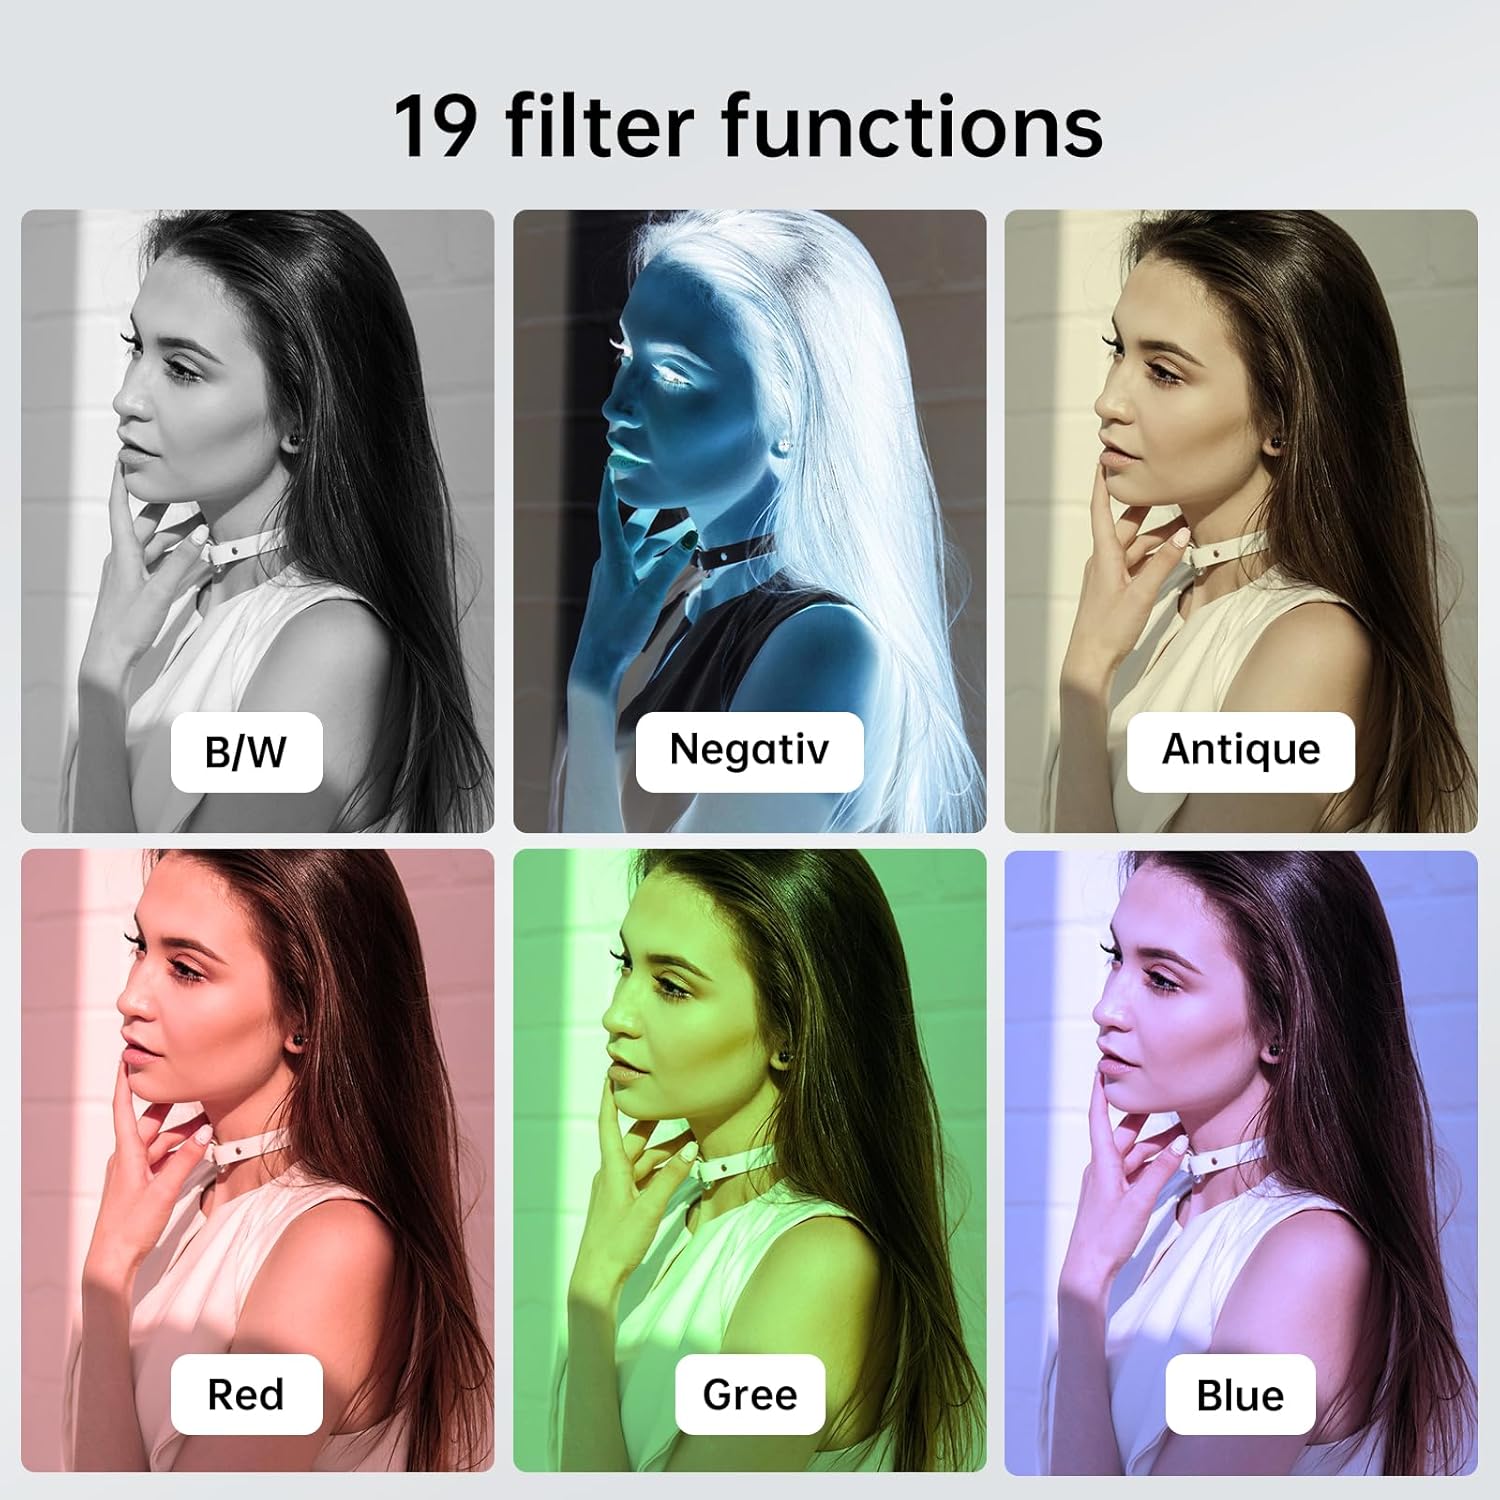
Explore various creative filters to enhance your photos.
5. ഒരു കമ്പ്യൂട്ടറിലേക്ക് ബന്ധിപ്പിക്കുന്നു
- With the camera powered on, connect it to your computer using the USB Type-C cable.
- The camera should appear as a removable disk drive on your computer.
- You can then access and transfer your recorded videos and photos.
ചാർജിംഗും ബാറ്ററി ലൈഫും
- ചാർജിംഗ് സമയം: പൂർണ്ണമായി ചാർജ് ചെയ്യാൻ ഏകദേശം 90 മിനിറ്റ്.
- Video Recording Duration: Up to 40 minutes of continuous video recording on a full charge.
- Photo Capacity: Approximately 4000 photos can be taken on a full charge.
- Always use the provided USB Type-C cable for charging to ensure compatibility and safety.

The camera offers a long-lasting battery for extended use.
മെയിൻ്റനൻസ്
- വൃത്തിയാക്കൽ: ക്യാമറ ബോഡി വൃത്തിയാക്കാൻ മൃദുവായതും ഉണങ്ങിയതുമായ തുണി ഉപയോഗിക്കുക. ലെൻസിന്, പ്രത്യേക ലെൻസ് ക്ലീനിംഗ് തുണിയും ലായനിയും ഉപയോഗിക്കുക. കഠിനമായ രാസവസ്തുക്കൾ ഒഴിവാക്കുക.
- സംഭരണം: നേരിട്ടുള്ള സൂര്യപ്രകാശവും ഉയർന്ന താപനിലയും ഏൽക്കാത്ത തണുത്തതും വരണ്ടതുമായ സ്ഥലത്ത് ക്യാമറ സൂക്ഷിക്കുക.
- ബാറ്ററി കെയർ: ബാറ്ററി ലൈഫ് പരമാവധിയാക്കാൻ, ബാറ്ററി ഇടയ്ക്കിടെ പൂർണ്ണമായും ഡിസ്ചാർജ് ചെയ്യുന്നത് ഒഴിവാക്കുക. ദീർഘനേരം ഉപയോഗിച്ചിട്ടില്ലെങ്കിൽ പോലും പതിവായി ചാർജ് ചെയ്യുക.
- ഫേംവെയർ അപ്ഡേറ്റുകൾ: നിർമ്മാതാവ് പരിശോധിക്കുക website periodically for any available firmware updates to ensure your camera has the latest features and performance improvements.
ട്രബിൾഷൂട്ടിംഗ്
| പ്രശ്നം | സാധ്യമായ കാരണം | പരിഹാരം |
|---|---|---|
| ക്യാമറ പവർ ഓൺ ചെയ്യുന്നില്ല. | Low battery; faulty power button. | Charge the camera fully. Ensure the power button is pressed correctly. |
| വീഡിയോ റെക്കോർഡ് ചെയ്യാൻ/ഫോട്ടോ എടുക്കാൻ കഴിയില്ല. | No Micro SD card; card full; card error; incorrect mode. | ഒരു മൈക്രോ എസ്ഡി കാർഡ് ഇടുക. പഴയത് ഇല്ലാതാക്കുക. files or replace the card. Format the card (this will erase all data). Ensure the camera is in the correct mode (video/photo). |
| മോശം ഇമേജ്/വീഡിയോ നിലവാരം. | ലെൻസ് വൃത്തികേടാണ്; കുറഞ്ഞ വെളിച്ചം; തെറ്റായ ക്രമീകരണങ്ങൾ. | Clean the lens. Use the built-in fill light or record in better-lit conditions. Check resolution settings in the menu. |
| ക്യാമറ മരവിക്കുന്നു അല്ലെങ്കിൽ പ്രതികരിക്കുന്നില്ല. | Software glitch; corrupted memory card. | Use a thin object to press the ദ്വാരം പുന et സജ്ജമാക്കുക. If the issue persists, try formatting or replacing the Micro SD card. |
| Computer does not recognize the camera. | Faulty USB cable; driver issue; camera not in data transfer mode. | Try a different USB Type-C cable. Ensure the camera is powered on when connected. Check your computer's device manager for driver issues. |
സ്പെസിഫിക്കേഷനുകൾ
| ഫീച്ചർ | വിശദാംശങ്ങൾ |
|---|---|
| ബ്രാൻഡ് | വിക്കികോ |
| മോഡലിൻ്റെ പേര് | HJD02 |
| ഫലപ്രദമായ സ്റ്റിൽ റെസല്യൂഷൻ | 48 എം.പി |
| പരമാവധി Webക്യാമറ ഇമേജ് റെസല്യൂഷൻ | 12 എം.പി |
| വീഡിയോ റെസല്യൂഷൻ | 4K (30fps) |
| ഫോട്ടോ സെൻസർ ടെക്നോളജി | CMOS |
| ഫോട്ടോ സെൻസർ വലുപ്പം | 1/1.2-ഇഞ്ച് |
| ഒപ്റ്റിക്കൽ സൂം | 1x |
| ഫോം ഫാക്ടർ | അൾട്രാകോംപാക്റ്റ് |
| പ്രത്യേക സവിശേഷതകൾ | Compact, Built-in Fill Light, 19 Filter Functions |
| നിറം | കറുപ്പ് |
| പാക്കേജ് അളവുകൾ | 8.08 x 7.06 x 5.28 സെ.മീ |
| ഇനത്തിൻ്റെ ഭാരം | 27.22 ഗ്രാം |
വാറൻ്റിയും പിന്തുണയും
For warranty information and technical support, please refer to the documentation included with your purchase or contact the seller directly. Keep your proof of purchase for any warranty claims.