1. ആമുഖം
This manual provides detailed instructions for the safe and effective use of your ZOLAMENTE 4K 80MP Camcorder DV10. Please read this manual thoroughly before operating the device and retain it for future reference. Proper use will ensure optimal performance and longevity of your camcorder.
2. പാക്കേജ് ഉള്ളടക്കം
താഴെ കൊടുത്തിരിക്കുന്ന എല്ലാ ഇനങ്ങളും നിങ്ങളുടെ പാക്കേജിൽ ഉണ്ടെന്ന് ഉറപ്പാക്കുക:
- ZOLAMENTE 4K 80MP Camcorder DV10
- റീചാർജ് ചെയ്യാവുന്ന ബാറ്ററികൾ (x2)
- 64GB SD കാർഡ്
- റിമോട്ട് കൺട്രോളർ
- USB കേബിൾ
- ഉപയോക്തൃ മാനുവൽ
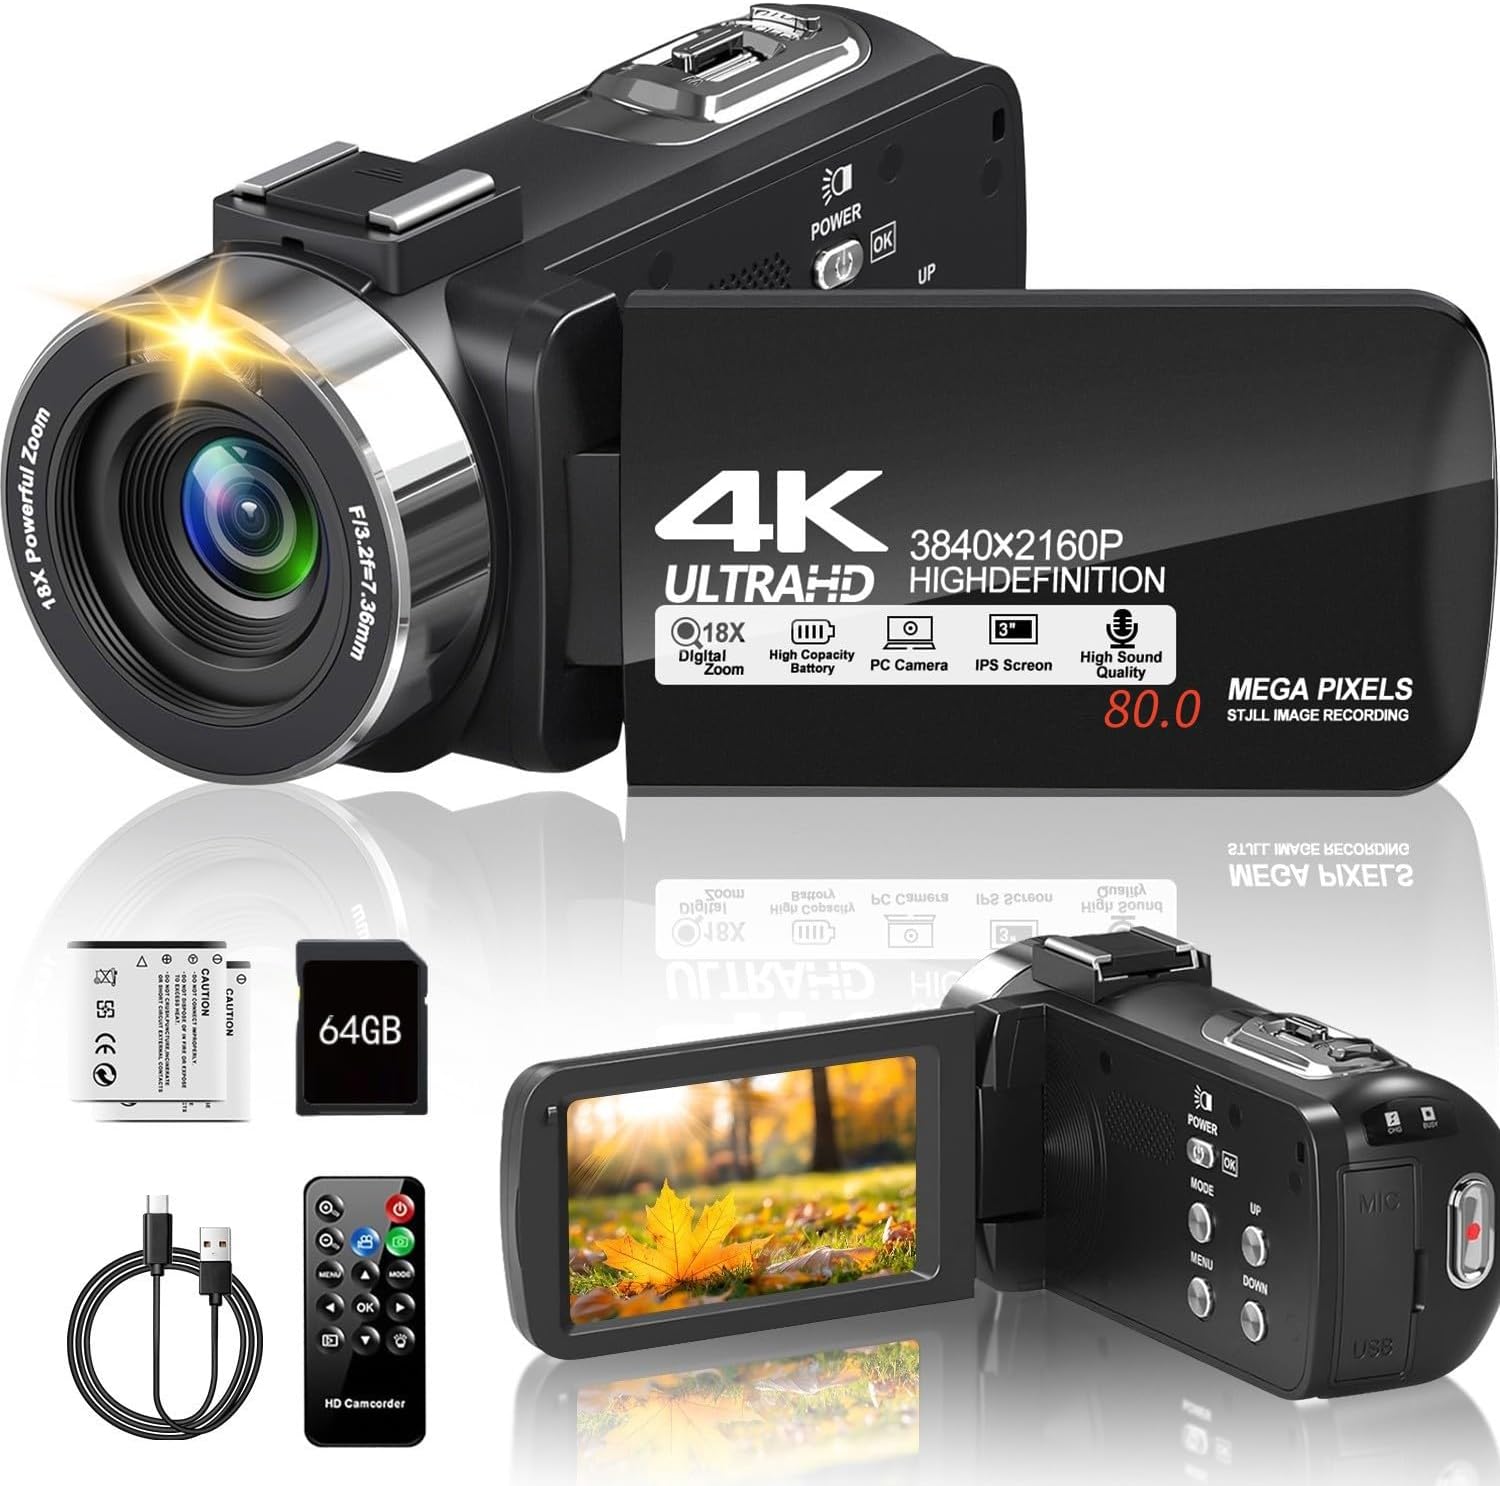
Image 2.1: The ZOLAMENTE 4K 80MP Camcorder DV10 shown with its included accessories, including two batteries, a 64GB SD card, a remote control, and a USB cable.
3. ഉൽപ്പന്നം കഴിഞ്ഞുview
Familiarize yourself with the main components of your camcorder.
3.1 പ്രധാന സവിശേഷതകൾ
- 4K Ultra HD Video Resolution (3840x2160)
- 80 Megapixel Image Resolution
- 18X ഡിജിറ്റൽ സൂം
- 3.0-inch 270° Rotatable IPS Screen
- Infrared (IR) Night Vision
- Webക്യാം പ്രവർത്തനം
- Support for external microphone (not included)

Image 3.1: The camcorder featuring its 3.0-inch IPS screen, capable of 270-degree rotation for flexible viewing angles during recording or playback.

Image 3.2: Visual representation of the camcorder's 18X digital zoom capability and its ability to capture images at 80 megapixels, highlighting detail capture.
4. സജ്ജീകരണം
4.1 ബാറ്ററി ചാർജ് ചെയ്യുന്നു
Before first use, fully charge both included batteries. A full charge may take approximately 2 hours. A fully charged battery provides approximately one hour of recording time.
- Insert a battery into the battery compartment.
- Connect the camcorder to a power source using the provided USB cable.
- ചാർജിംഗ് ഇൻഡിക്കേറ്റർ ലൈറ്റ് പ്രകാശിക്കും. ചാർജിംഗ് പൂർത്തിയായിക്കഴിഞ്ഞാൽ അത് ഓഫാകും അല്ലെങ്കിൽ നിറം മാറും.
4.2 SD കാർഡ് ചേർക്കൽ
The camcorder supports SDHC (Class 10) and SDXC (Class 10) memory cards up to 256GB. A 64GB SD card is included.
- കാംകോർഡർ ഓഫാണെന്ന് ഉറപ്പാക്കുക.
- SD കാർഡ് സ്ലോട്ട് കണ്ടെത്തുക.
- Gently push the SD card into the slot until it clicks into place. Ensure the card's metal contacts face the correct direction.
- നീക്കം ചെയ്യാൻ, കാർഡ് വീണ്ടും പുറത്തേക്ക് വരുന്നത് വരെ സൌമ്യമായി അകത്തേക്ക് തള്ളുക.
പ്രധാനപ്പെട്ടത്: When inserting an SD card for the first time, the camera may prompt you to format it. It is recommended to format the card directly through the camera's menu system (Menu > Mode > Down buttons to navigate). If the camera repeatedly asks to format the card, initially format it using a computer, then re-format it using the camera.
5. പ്രവർത്തന നിർദ്ദേശങ്ങൾ
5.1 പവർ ഓൺ/ഓഫ്
- പവർ ഓണാക്കാൻ, അമർത്തിപ്പിടിക്കുക പവർ ബട്ടൺ.
- പവർ ഓഫ് ചെയ്യുന്നതിന്, അമർത്തിപ്പിടിക്കുക പവർ വീണ്ടും ബട്ടൺ.
5.2 Basic Video Recording
- കാംകോർഡറിൽ പവർ ചെയ്യുക.
- Ensure the camcorder is in video recording mode (indicated by an icon on the screen).
- അമർത്തുക REC/STOP button to start recording. The recording indicator will flash.
- അമർത്തുക REC/STOP റെക്കോർഡിംഗ് നിർത്താൻ വീണ്ടും ബട്ടൺ.
5.3 ഫോട്ടോ എടുക്കൽ
- കാംകോർഡറിൽ പവർ ചെയ്യുക.
- Switch to photo mode.
- സ്ക്രീൻ ഉപയോഗിച്ച് നിങ്ങളുടെ ഷോട്ട് ഫ്രെയിം ചെയ്യുക.
- അമർത്തുക ഫോട്ടോ button to capture an image.
5.4 Using Digital Zoom
While recording or in standby mode, use the W/T (Wide/Telephoto) lever to adjust the digital zoom. Push towards T to zoom in and towards W സൂം ഔട്ട് ചെയ്യാൻ.
5.5 സ്ക്രീൻ റൊട്ടേഷൻ
The 3.0-inch IPS screen can rotate up to 270 degrees, allowing for various shooting angles and self-recording. Gently pivot the screen to your desired position.
5.6 പ്ലേബാക്ക്
- അമർത്തുക മോഡ് പ്ലേബാക്ക് മോഡിൽ പ്രവേശിക്കുന്നതിനുള്ള ബട്ടൺ.
- Use the navigation buttons to select the video or photo you wish to view.
- അമർത്തുക OK button to play a video or view ഒരു ഫോട്ടോ.
6. വിപുലമായ സവിശേഷതകൾ
6.1 Infrared (IR) Night Vision
The camcorder is equipped with IR night vision for recording in low-light or dark environments, capturing black and white footage.
- In video or photo mode, press the IR button to activate night vision.
- അമർത്തുക IR നിർജ്ജീവമാക്കാൻ വീണ്ടും ബട്ടൺ അമർത്തുക.

Image 6.1: The camcorder's infrared night vision feature shown capturing a clear black and white image in a dimly lit environment, with an 'ON' indicator.
6.2 Webക്യാം ഫംഗ്ഷൻ
Connect your camcorder to a computer to use it as a webതത്സമയ സ്ട്രീമിംഗിനോ വീഡിയോ കോളുകൾക്കോ വേണ്ടിയുള്ള കാം.
- Connect the camcorder to your computer using the USB cable.
- Select 'PC Camera' or 'Webcam' option on the camcorder screen (if prompted).
- Your computer should recognize the camcorder as a webcam. Select it in your video conferencing or streaming software.

Image 6.2: The camcorder connected via USB to a laptop, displaying its live feed on the laptop screen, illustrating its webcam functionality for online platforms.
6.3 റിമോട്ട് കൺട്രോൾ ഓപ്പറേഷൻ
The included remote control allows for convenient operation from a distance, useful for self-recording or group shots.
- Point the remote control directly at the camcorder's IR receiver.
- Use the corresponding buttons on the remote for functions like record, stop, zoom, and menu navigation.
6.4 Recording While Charging
The camcorder supports recording while connected to a power source, allowing for extended recording sessions without interruption.

Image 6.3: The camcorder actively recording footage while simultaneously connected to an external power bank via its USB cable, demonstrating the 'record while charging' feature.
6.5 Special Recording Modes
The camcorder offers various modes to enhance your creative possibilities:
- സമയദൈർഘ്യ റെക്കോർഡിംഗ്: Captures images at set intervals to create a sped-up video.
- പ്രവർത്തനം താൽക്കാലികമായി നിർത്തുക: Allows you to pause and resume recording within a single video file.
- സ്വയം ടൈമർ: Delays photo capture by 3, 5, or 10 seconds.
- തുടർച്ചയായ ഷൂട്ടിംഗ്: Captures multiple photos in quick succession.
- ചലനം കണ്ടെത്തൽ: Starts recording automatically when motion is detected.
- സ്ലോ മോഷൻ: Records video at a higher frame rate for slow-motion playback.

Image 6.4: A collage illustrating the diverse recording capabilities of the camcorder, including time-lapse, pause function, self-timer, continuous shooting, motion detection, timed photo, and slow motion.
7. പരിപാലനം
7.1 Cleaning the Camcorder
- കാംകോർഡർ ബോഡി വൃത്തിയാക്കാൻ മൃദുവായതും ഉണങ്ങിയതുമായ തുണി ഉപയോഗിക്കുക.
- ലെൻസിന്, ഒരു പ്രത്യേക ലെൻസ് ക്ലീനിംഗ് തുണിയും ലായനിയും ഉപയോഗിക്കുക. നിങ്ങളുടെ വിരലുകൾ കൊണ്ട് ലെൻസിൽ തൊടുന്നത് ഒഴിവാക്കുക.
- For the screen, use a soft, lint-free cloth.
7.2 ബാറ്ററി കെയർ
- ഉപയോഗത്തിലില്ലാത്തപ്പോൾ തണുത്തതും ഉണങ്ങിയതുമായ സ്ഥലത്ത് ബാറ്ററികൾ സൂക്ഷിക്കുക.
- ബാറ്ററികൾ തീവ്രമായ താപനിലയിലേക്ക് തുറന്നുകാട്ടരുത്.
- If not using the camcorder for an extended period, remove the batteries.
7.3 സംഭരണം
Store the camcorder in a protective case or bag to prevent dust and scratches. Avoid storing in direct sunlight or areas with high humidity.
8. പ്രശ്നപരിഹാരം
8.1 പൊതുവായ പ്രശ്നങ്ങളും പരിഹാരങ്ങളും
- ക്യാംകോർഡർ പവർ ഓൺ ചെയ്യുന്നില്ല:
Ensure the battery is fully charged and correctly inserted. Try using the second battery. - SD card error / Camera asks to format repeatedly:
Ensure the SD card is correctly inserted and unlocked. Format the SD card using a computer first, then re-format it using the camera's menu. Ensure the SD card is Class 10 or higher. - മോശം ഇമേജ്/വീഡിയോ ഗുണമേന്മ:
Check that the lens is clean. Ensure adequate lighting for your recording environment. Adjust settings like resolution and exposure in the menu. - ഹ്രസ്വ ബാറ്ററി ലൈഫ്:
Ensure batteries are fully charged. Battery life can be affected by continuous recording, zoom usage, and IR night vision. Consider recording while charging for extended use. - റിമോട്ട് കൺട്രോൾ പ്രവർത്തിക്കുന്നില്ല:
Ensure there are no obstructions between the remote and the camcorder's IR receiver. Check the remote's battery.
9 സ്പെസിഫിക്കേഷനുകൾ
| ബ്രാൻഡ് | സോളമെന്റ് |
| മോഡലിൻ്റെ പേര് | DV10 |
| കാംകോർഡർ തരം | വീഡിയോ ക്യാമറ |
| വീഡിയോ റെസല്യൂഷൻ | 4K അൾട്രാ എച്ച്ഡി (3840x2160) |
| ചിത്ര മിഴിവ് | 80 മെഗാപിക്സലുകൾ |
| ഡിജിറ്റൽ സൂം | 18X |
| സ്ക്രീൻ വലിപ്പം | 3.0 Inches IPS, 270° Rotatable |
| പ്രത്യേക സവിശേഷതകൾ | Night Vision, Webക്യാം ഫംഗ്ഷൻ |
| ഫ്ലാഷ് മെമ്മറി തരം | SD (Supports up to 256GB SDXC Class 10) |
| കണക്റ്റിവിറ്റി ടെക്നോളജി | USB |
| ഇനത്തിൻ്റെ ഭാരം | 1.1 പൗണ്ട് |
10. വാറണ്ടിയും പിന്തുണയും
Your ZOLAMENTE Camcorder DV10 comes with a standard manufacturer's warranty. Please refer to the warranty card included in your package for specific terms and conditions.
10.1 ഉപഭോക്തൃ പിന്തുണ
If you encounter any issues or have questions not covered in this manual, please contact our customer service team. For prompt assistance, we recommend the following steps:
- Go to your order history on the platform where you purchased the product.
- Find your order ID for the ZOLAMENTE Camcorder DV10.
- Click on the 'Contact Seller' option.
Our customer service team is dedicated to assisting you within 24 hours.


