1. ഉൽപ്പന്നം കഴിഞ്ഞുview
This manual provides essential information for the installation, operation, and maintenance of your FarDriver ND96890 BLDC Motor Controller kit, which includes a DKD Display. This high-performance controller is designed for electric motorcycles and bicycles, offering robust control and monitoring capabilities.
കിറ്റ് ഉള്ളടക്കം:
- 1 x FarDriver ND96890 V2 Controller
- 1 x DKD Display
- 1 x ബ്ലൂടൂത്ത് അഡാപ്റ്റർ
The FarDriver ND96890 controller is engineered for strong stability with multiple protections including over-voltage, over-current, and overheating. The DKD display provides a user-friendly interface for monitoring vehicle parameters.
2 സാങ്കേതിക സവിശേഷതകൾ
| ഫീച്ചർ | സ്പെസിഫിക്കേഷൻ |
|---|---|
| മോഡൽ | FarDriver ND96890 |
| Working Communication | സെൻസർ |
| Available Rated Battery Voltage | 48V-96V |
| Peak Battery Voltage | 115V |
| Available Motor Power | 8000W-9000W |
| Default Throttle Working Voltage | 0വി - 5വി |
| ഡിസി കറൻ്റ് | 410എ |
| ഘട്ടം കറൻ്റ് | 890എ |
| MOSFETs Detail | 48 FET |
| കൺട്രോളർ ഭാരം | 2.55 കി.ഗ്രാം (6.61 പൗണ്ട്) |
| Controller Installation Size | 189mm x 136mm x 67mm |
| പാക്കേജ് അളവുകൾ | 0.39 x 0.39 x 0.39 ഇഞ്ച് |
കൺട്രോളർ അളവുകൾ:
The following diagram illustrates the physical dimensions of the FarDriver ND96890 controller.

Image: Dimensions of the FarDriver ND96890 BLDC Motor Controller, showing measurements of 189mm length, 136mm width, and 67mm height, along with mounting hole details.
DKD Display Dimensions:
The following diagram illustrates the physical dimensions of the DKD display unit.

Image: Detailed diagram showing the dimensions of the DKD speedometer (162mm x 93.72mm) and its wire definitions for various functions like CAN, headlight, turn signals, and battery positive/negative.
3. സജ്ജീകരണവും ഇൻസ്റ്റാളേഷനും
Proper installation is crucial for the safe and efficient operation of your motor controller and display. It is recommended that installation be performed by a qualified technician.
3.1 Controller Placement
Mount the FarDriver ND96890 controller in a location that is protected from direct water exposure and allows for adequate airflow for cooling. The controller features a robust heat sink design (as shown below) to dissipate heat effectively.

ചിത്രം: അടിവശം view of the FarDriver ND96890 controller, highlighting the extensive heat sink fins designed for thermal management.
3.2 Wiring the DKD Display
The DKD display requires specific wiring connections to function correctly and provide accurate information. Refer to the wiring diagram below for detailed connections.
Image: Detailed diagram showing the wiring definitions for the DKD speedometer. Connections include green/black (CAN-), yellow/red (CAN+), blue (headlight), light blue (turn right), orange (turn left), purple (battery negative), and blue/white (48-84V battery positive).
- CAN- (Green/Black): Connect to the CAN- line of the controller.
- CAN+ (Yellow/Red): Connect to the CAN+ line of the controller.
- Headlight (Blue): Connect to the vehicle's headlight circuit.
- Turn Right (Light Blue): Connect to the vehicle's right turn signal circuit.
- Turn Left (Orange): Connect to the vehicle's left turn signal circuit.
- Battery Negative (Purple): Connect to the main battery negative terminal.
- Battery Positive (Blue/White): Connect to the main battery positive terminal (48V-84V).
ഷോർട്ട് സർക്യൂട്ടുകൾ തടയാൻ എല്ലാ കണക്ഷനുകളും സുരക്ഷിതമാണെന്നും ഇൻസുലേറ്റ് ചെയ്തിട്ടുണ്ടെന്നും ഉറപ്പാക്കുക.
3.3 Controller Connections
The FarDriver ND96890 controller features various ports for motor, battery, throttle, and other peripheral connections. A general overview of the controller is shown below.
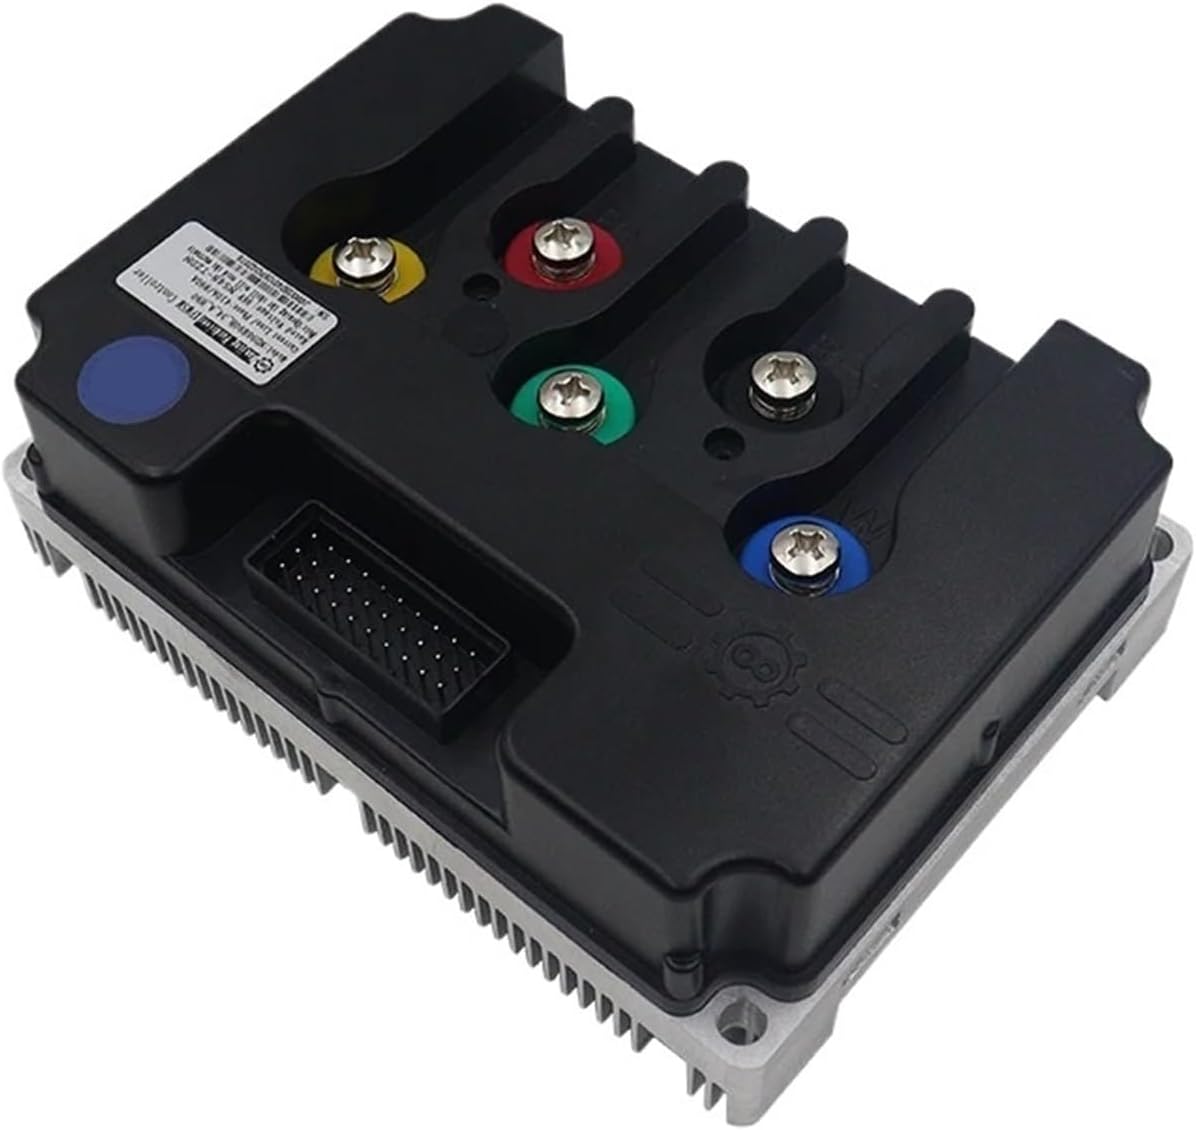
ചിത്രം: മുകളിൽ view of the FarDriver ND96890 BLDC Motor Controller, showing the main power terminals (red, yellow, green, blue) and the multi-pin connector for signal wires.
- മോട്ടോർ ഫേസ് വയറുകൾ: Connect the motor's U, V, W phase wires to the corresponding terminals on the controller (typically yellow, green, blue).
- ബാറ്ററി പവർ: Connect the main battery positive and negative terminals to the controller's battery input.
- ത്രോട്ടിൽ: Connect the throttle signal, power, and ground wires to the designated throttle port.
- Hall Sensors: Connect the motor's Hall sensor wires to the controller's Hall sensor port.
- Ignition/Key Switch: Connect the ignition wire to enable/disable the controller.
- ബ്ലൂടൂത്ത് അഡാപ്റ്റർ: Plug the provided Bluetooth adapter into its dedicated port for wireless configuration and monitoring via a mobile application.
Refer to the specific wiring diagram provided with your motor for detailed connections. Incorrect wiring can damage the controller or motor.
4. പ്രവർത്തന നിർദ്ദേശങ്ങൾ
Once the controller and display are correctly installed and wired, you can begin operating your electric vehicle.
4.1 പവർ ചെയ്യുന്നു
Turn the ignition key or power switch to the 'ON' position. The DKD display should illuminate, indicating that the system is powered on. The display will show current speed, battery level, trip distance, and other relevant information.

Image: The DKD display unit, showing a digital speed reading (0 km/h), battery charge indicator, gear indicator, and trip distance.
4.2 Using the DKD Display
The DKD display provides real-time feedback on your vehicle's status:
- വേഗത: Displays current speed in km/h.
- ബാറ്ററി നില: ശേഷിക്കുന്ന ബാറ്ററി ചാർജ് സൂചിപ്പിക്കുന്നു.
- Trip/Odometer: Shows current trip distance or total odometer reading.
- ഗിയർ സൂചകം: If applicable, displays the current gear selection.
- പിശക് കോഡുകൾ: May display error codes if a fault is detected in the system.
Consult your vehicle's specific documentation for any additional display functions or button operations.
4.3 ത്രോട്ടിൽ നിയന്ത്രണം
Gently apply the throttle to accelerate. The controller will regulate power to the motor based on your throttle input. Release the throttle to decelerate.
5. പരിപാലനം
Regular maintenance helps ensure the longevity and optimal performance of your FarDriver ND96890 controller and DKD display.
- വൃത്തിയായി സൂക്ഷിക്കു: Periodically clean the exterior of the controller and display with a soft, dry cloth. Avoid using harsh chemicals or abrasive materials.
- കണക്ഷനുകൾ പരിശോധിക്കുക: Regularly inspect all wiring connections for tightness and signs of corrosion or damage. Loose connections can lead to intermittent operation or system failure.
- പരിസ്ഥിതി സംരക്ഷണം: Ensure the controller remains protected from excessive moisture, dust, and extreme temperatures.
- ഫേംവെയർ അപ്ഡേറ്റുകൾ: നിർമ്മാതാവ് പരിശോധിക്കുക website or app for any available firmware updates for the controller, which can improve performance or add features. Use the Bluetooth adapter for updates if supported.
6. പ്രശ്നപരിഹാരം
If you encounter issues with your FarDriver ND96890 controller or DKD display, refer to the following common troubleshooting steps:
- No Power to Display:
- ബാറ്ററി കണക്ഷനുകൾ പരിശോധിച്ച് ബാറ്ററി ചാർജ്ജ് ചെയ്തിട്ടുണ്ടെന്ന് ഉറപ്പാക്കുക.
- Verify the ignition switch is on.
- Inspect the display's power wiring for loose or damaged connections.
- മോട്ടോർ പ്രതികരിക്കുന്നില്ല:
- Check all motor phase wires and Hall sensor connections.
- Ensure the throttle is correctly connected and functioning.
- Verify the controller is receiving power.
- Check for any error codes displayed on the DKD unit.
- കൃത്യമല്ലാത്ത സ്പീഡ് റീഡിംഗ്:
- Ensure the speed sensor (if external) is properly installed and connected.
- Check display wiring, especially CAN bus connections.
- അമിത ചൂടാക്കൽ:
- Ensure the controller has adequate ventilation and is not obstructed.
- Reduce continuous high-power usage if operating in extreme conditions.
For persistent issues, contact customer support or a qualified technician.
7. വാറൻ്റിയും പിന്തുണയും
Mechanivis products are designed for reliability and performance. For specific warranty terms and conditions, please refer to the documentation provided at the time of purchase or contact your retailer. General support for the FarDriver ND96890 controller and DKD display can be obtained through the Mechanivis customer service channels.
നിർമ്മാതാവ്: Mechanivis
ASIN: B0FHKC6558
ഇനം മോഡൽ നമ്പർ: Mechanivis