1. ആമുഖം
This manual provides detailed instructions for the assembly, operation, and maintenance of your KAMABOKO 120 Gallon Outdoor Resin Deck Storage Box. Please read this manual thoroughly before assembly and use to ensure proper function and longevity of your product.
The KAMABOKO 120 Gallon Deck Box is designed for outdoor storage, offering a spacious and weather-resistant solution for various items. Its robust resin construction prevents rust, peeling, and denting, ensuring durability against outdoor elements. The box features a lockable lid for security and can be used to store garden tools, pool supplies, patio cushions, and more.

Image: The KAMABOKO 120 Gallon Outdoor Resin Deck Storage Box, closed, situated on a patio.
2 സുരക്ഷാ വിവരങ്ങൾ
ഉൽപ്പന്നത്തിന് പരിക്കേൽക്കുകയോ കേടുപാടുകൾ സംഭവിക്കുകയോ ചെയ്യാതിരിക്കാൻ ഇനിപ്പറയുന്ന സുരക്ഷാ മുൻകരുതലുകൾ പാലിക്കുക:
- കുട്ടികളെ സ്റ്റോറേജ് ബോക്സിനുള്ളിൽ കളിക്കാൻ അനുവദിക്കരുത്. ഇതൊരു കളിപ്പാട്ടമല്ല.
- Ensure the lid is securely closed when not in use to prevent accidental entrapment.
- Do not climb or stand on the storage box, especially when the lid is open, unless specifically using it as a seat as intended (refer to operating instructions).
- Keep hands and fingers clear of hinges and closing mechanisms when opening or closing the lid.
- ടിപ്പിംഗ് തടയാൻ സംഭരണ പെട്ടി പരന്നതും സ്ഥിരതയുള്ളതുമായ ഒരു പ്രതലത്തിൽ വയ്ക്കുക.
- Do not store flammable or hazardous materials inside the box.
- Distribute contents evenly to maintain stability.
3. പാക്കേജ് ഉള്ളടക്കം
Before assembly, verify that all parts are present and undamaged. If any parts are missing or damaged, contact customer support.
- സൈഡ് പാനലുകൾ (2)
- ഫ്രണ്ട് പാനൽ (1)
- ബാക്ക് പാനൽ (1)
- താഴെയുള്ള പാനൽ (1)
- ലിഡ് (1)
- Hydraulic Lifting Rods/Hinges (2 sets)
- Assembly Hardware (screws, pins, etc.)
- ഇൻസ്ട്രക്ഷൻ മാനുവൽ (1)

Image: Visual representation of the deck box components and assembly steps.
4. സജ്ജീകരണവും അസംബ്ലി നിർദ്ദേശങ്ങളും
Assembly is designed to be straightforward. Follow these steps carefully:
- ഘട്ടം 1: അടിസ്ഥാനം തയ്യാറാക്കുക
Lay the bottom panel on a clean, flat surface. Identify the side panels and attach them to the bottom panel by aligning the grooves and pressing firmly until they click into place. - Step 2: Attach Front and Back Panels
Connect the front and back panels to the assembled side and bottom panels. Ensure all connections are secure. - ഘട്ടം 3: സുരക്ഷിത കണക്ഷനുകൾ
Use the provided hardware (if any, typically screws or pins) to reinforce the panel connections. Refer to the detailed diagrams in the included PDF manual for specific hardware placement. - Step 4: Install the Lid and Hydraulic Rods
Carefully place the lid onto the assembled box. Attach the hydraulic lifting rods to the designated points on the lid and the back panel of the box. Ensure they are securely fastened to allow for smooth opening and closing.
Note: Disassembling the panels violently may result in product damage. Exercise care during assembly.

Image: Step-by-step visual guide for assembling the KAMABOKO deck box.
5. പ്രവർത്തന നിർദ്ദേശങ്ങൾ
5.1 ലിഡ് തുറക്കലും അടയ്ക്കലും
To open the lid, gently lift it. The hydraulic lifting rods will assist in holding the lid open. To close, gently pull the lid down until it rests securely on the box. Ensure no items are obstructing the closing path.
5.2 ലോക്ക് ചെയ്യാവുന്ന സവിശേഷത ഉപയോഗിക്കൽ
The deck box features a lockable lid for enhanced security. A padlock (not included) can be attached through the designated hole on the front of the lid to secure your belongings.
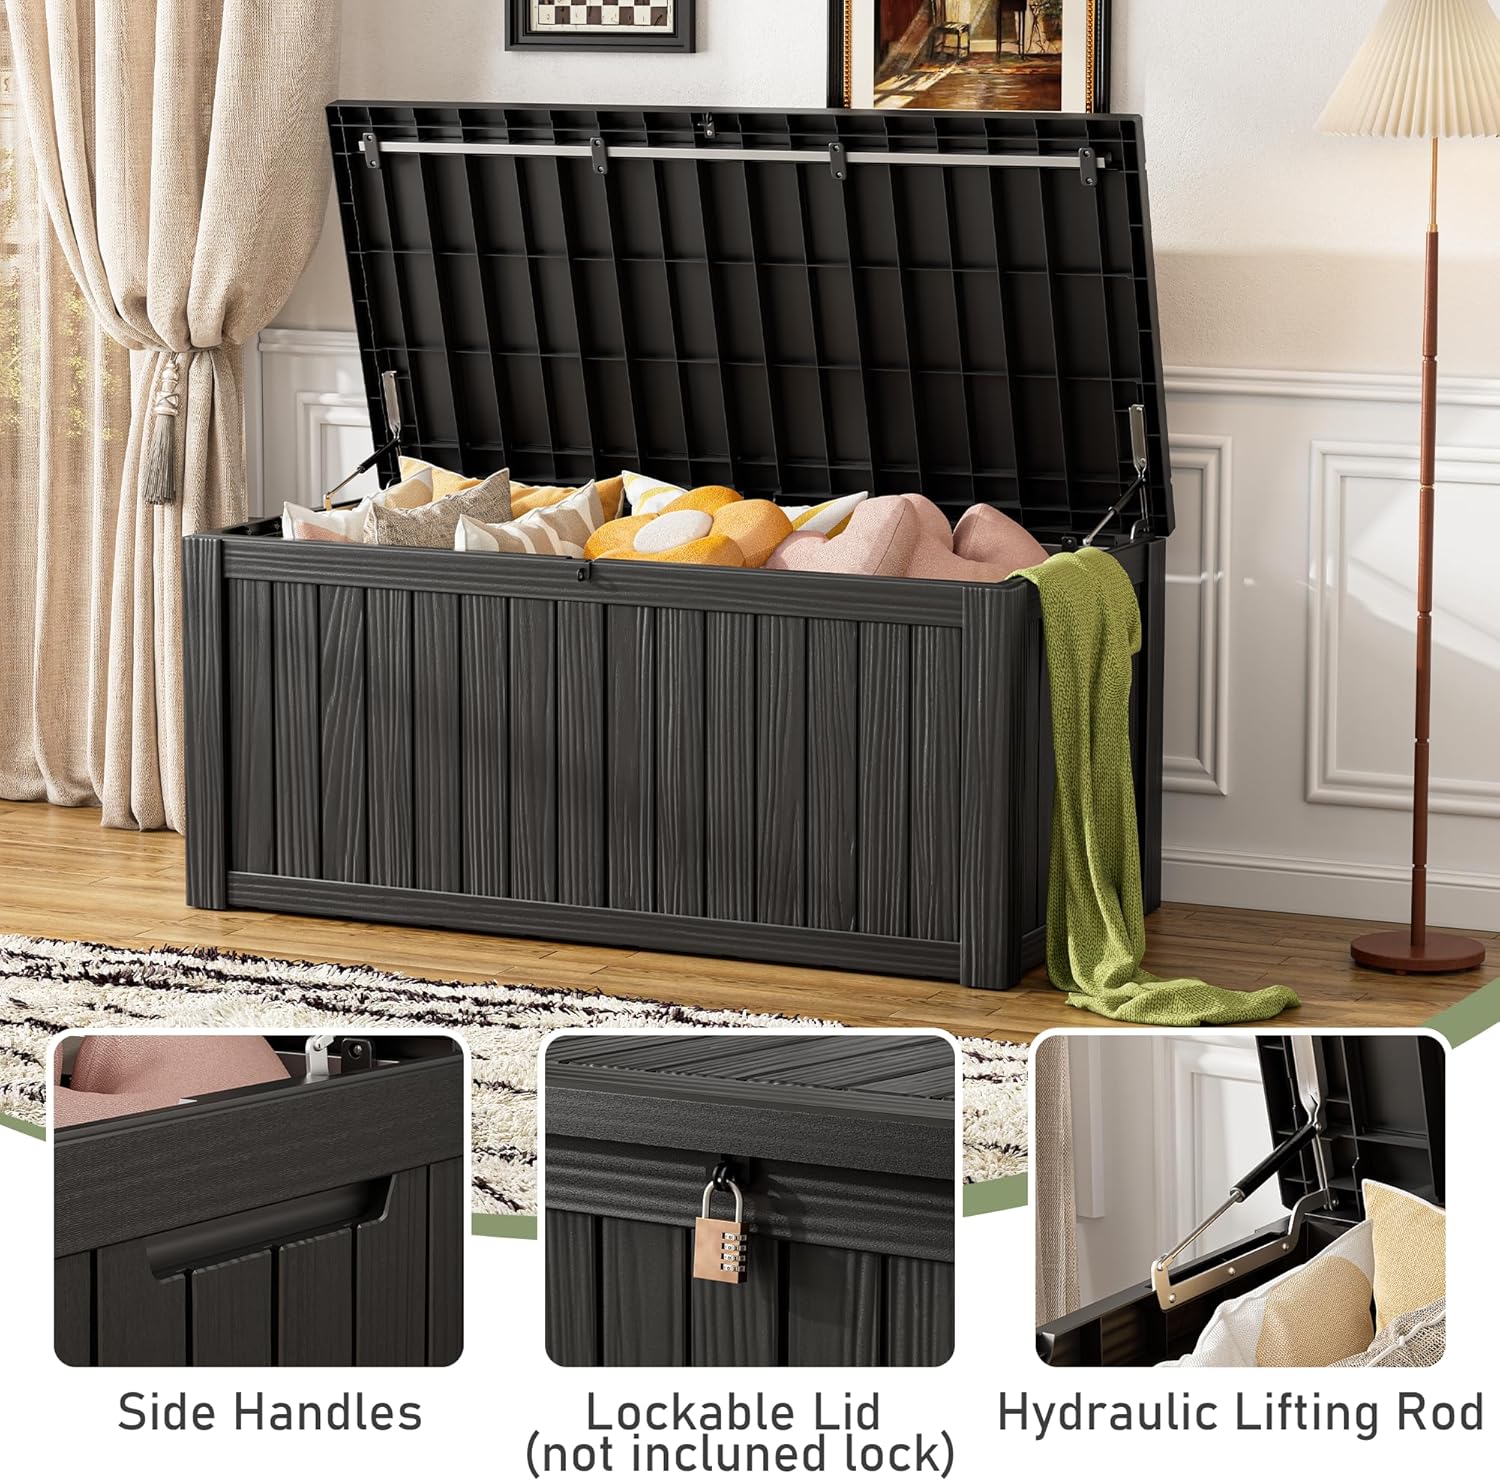
Image: Details of the deck box features, including side handles, lockable lid, and hydraulic lift mechanism.
5.3 Storage Capacity and Versatility
The 120-gallon capacity provides ample space for various outdoor items. Dividers can be used to separate compartments for sorting, or removed for larger items. The robust design allows the box to function as additional seating or a surface for light items when closed.
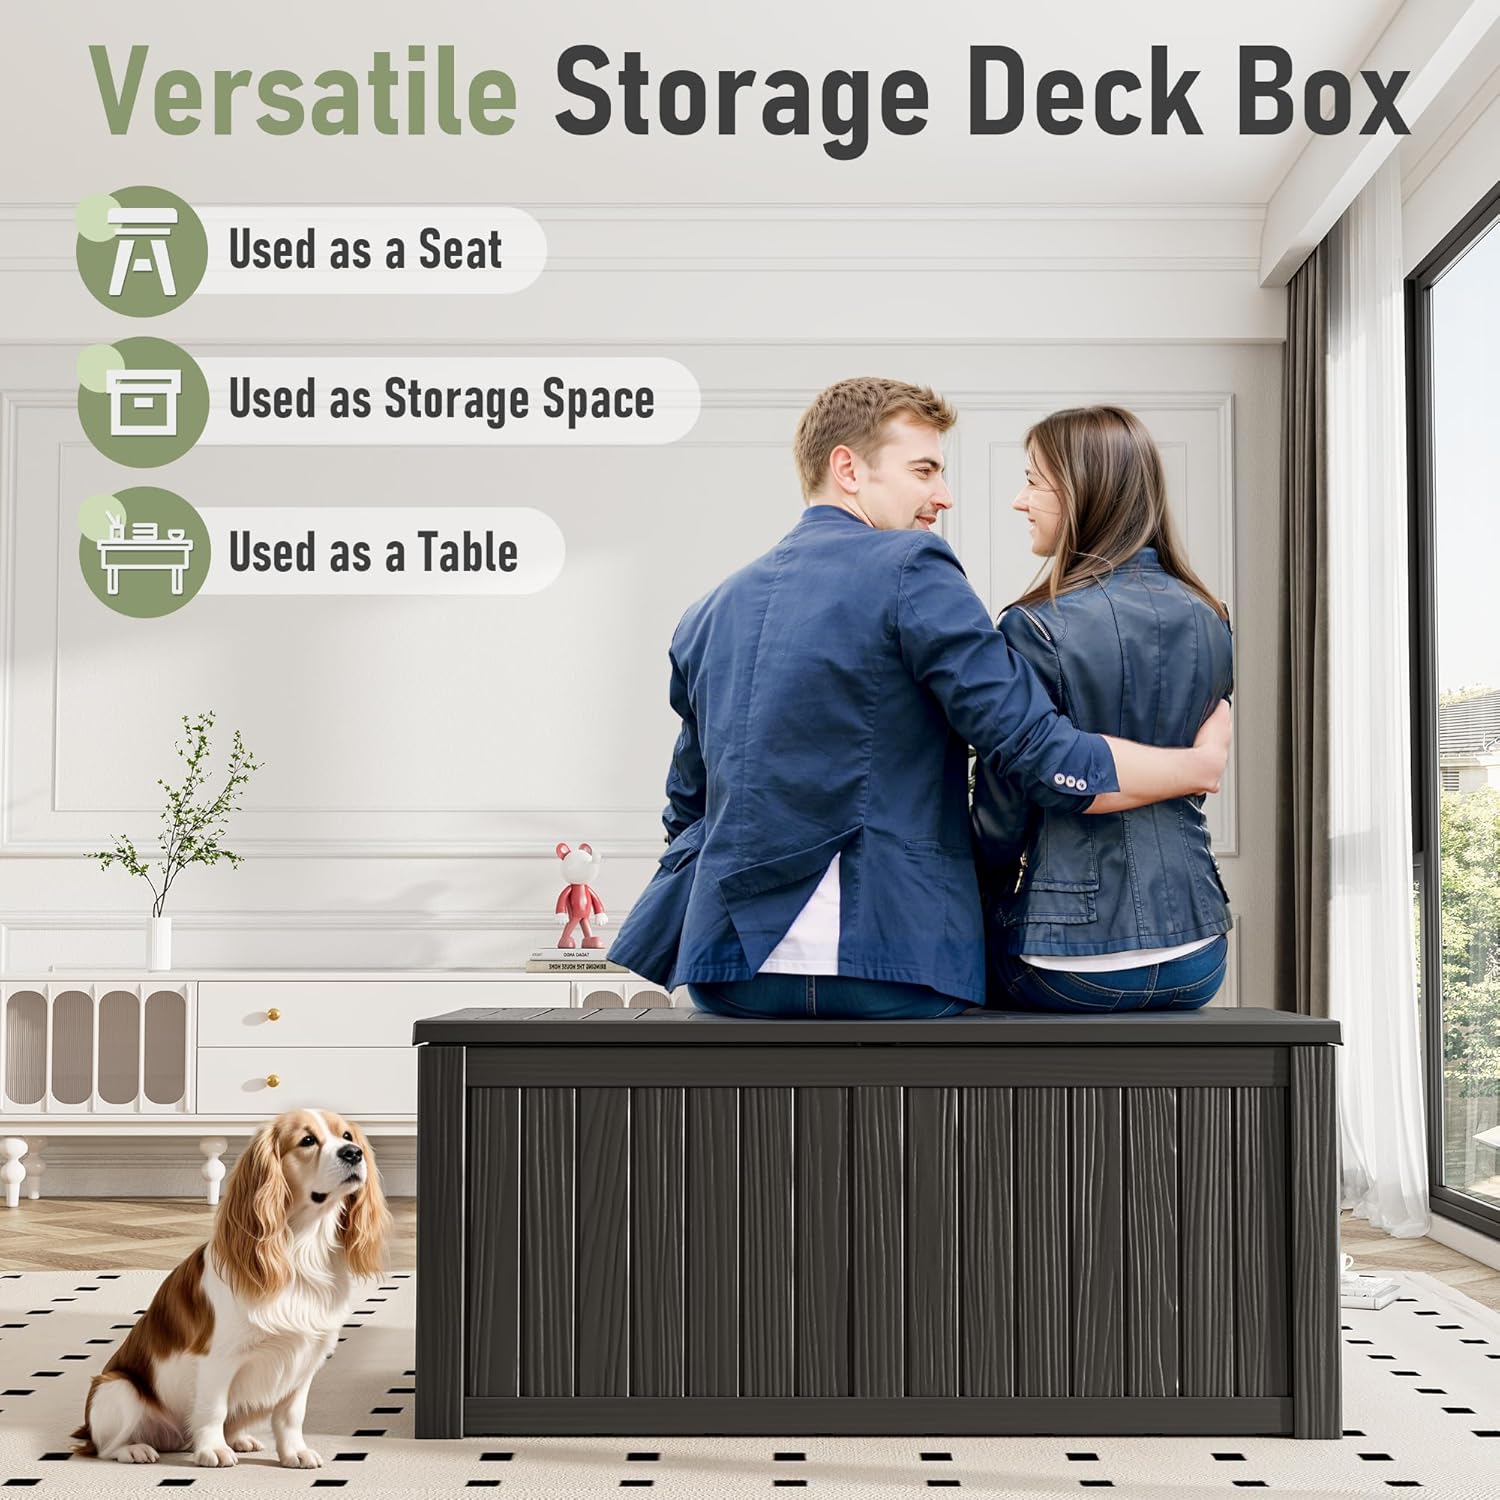
Image: Demonstrating the versatile functionality of the deck box as a seat, storage, and table.
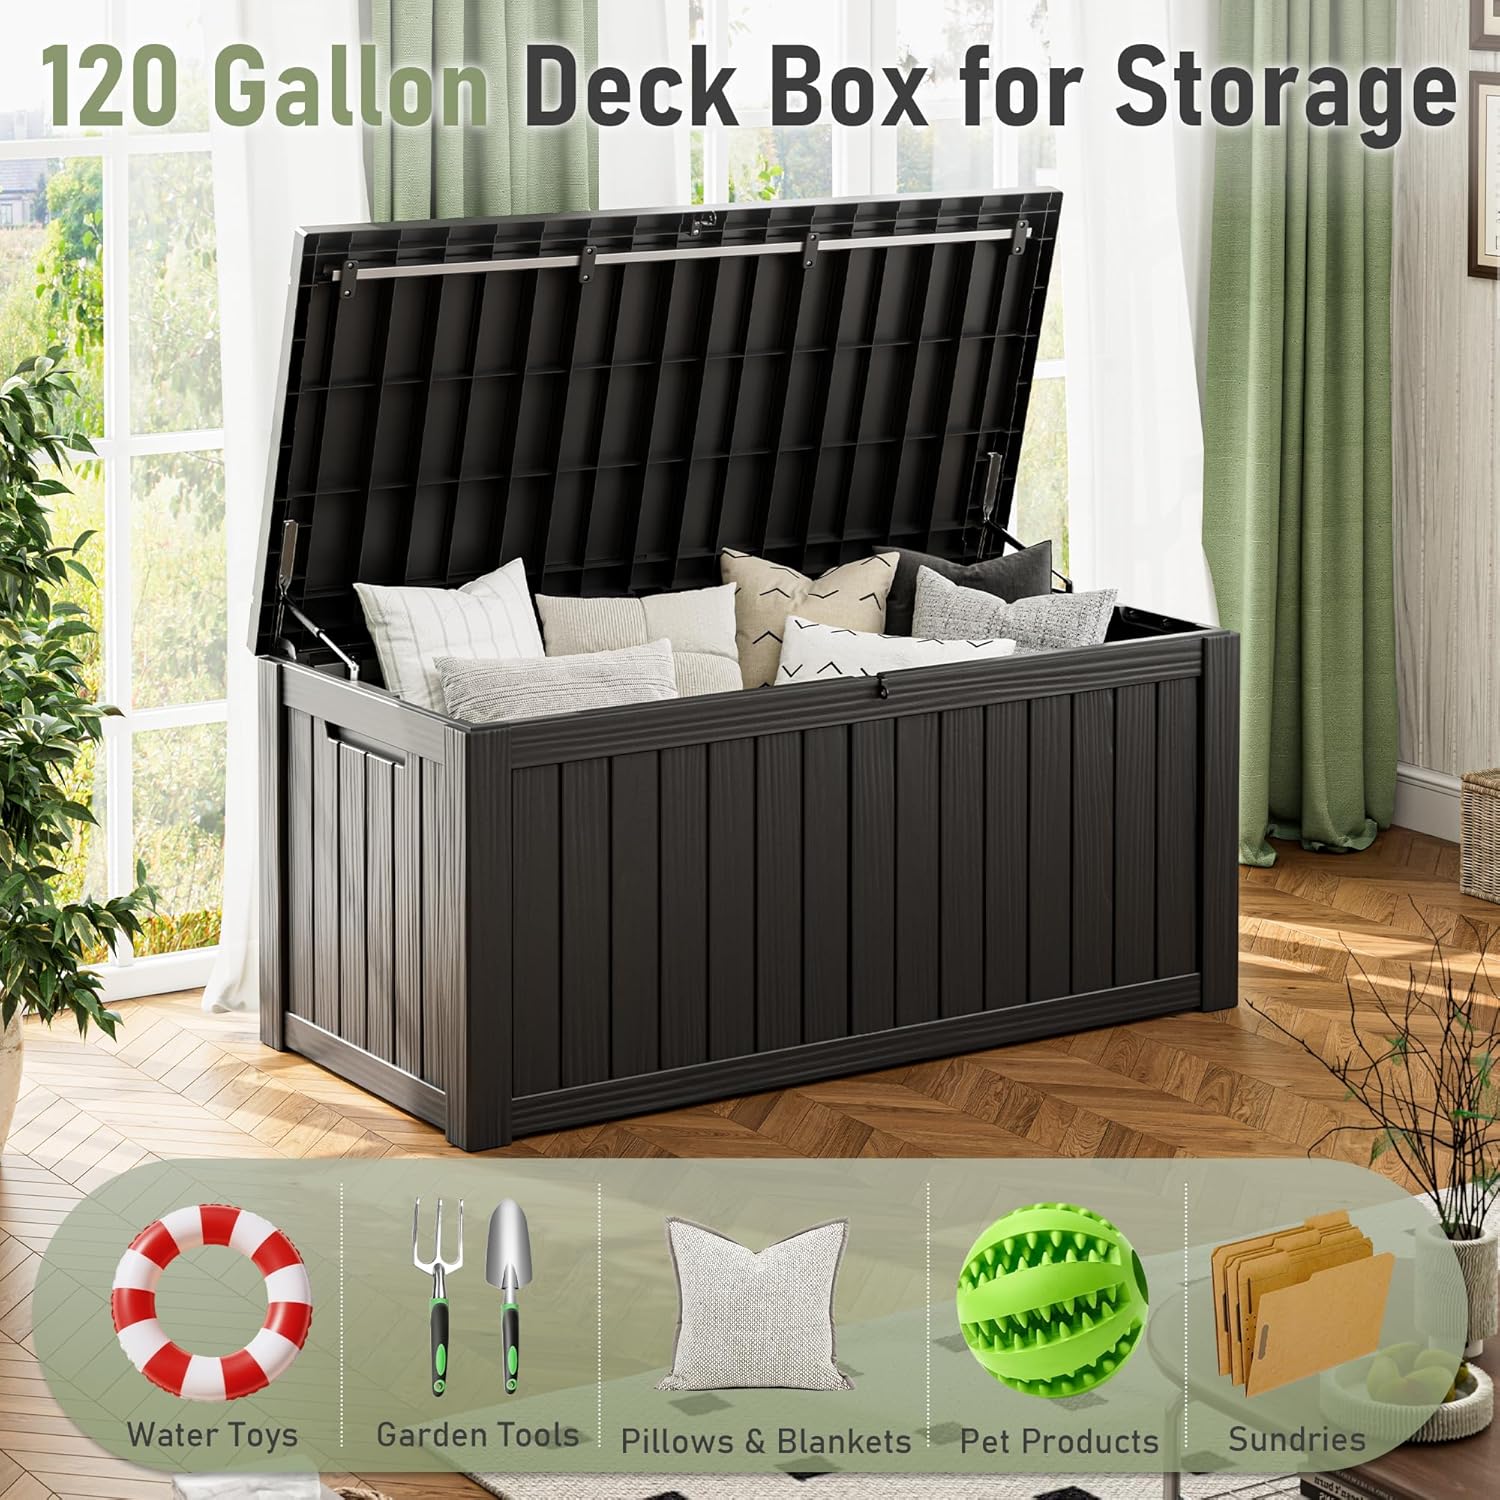
ചിത്രം: ഉദാamples of items that can be stored in the 120-gallon deck box.
6. പരിപാലനം
6.1 വൃത്തിയാക്കൽ
To clean the deck box, wipe surfaces with a damp cloth and mild soap. Rinse thoroughly with water and dry with a soft cloth. Avoid abrasive cleaners or harsh chemicals, as these can damage the resin material.
6.2 കാലാവസ്ഥാ പ്രതിരോധം
The resin construction is designed to be weather-resistant and waterproof, protecting contents from moisture. Periodically check the lid seal to ensure it remains intact for optimal waterproofing.

Image: Key features of the deck box, including its waterproof and UV-resistant properties.
7. പ്രശ്നപരിഹാരം
| പ്രശ്നം | സാധ്യമായ കാരണം | പരിഹാരം |
|---|---|---|
| ലിഡ് ശരിയായി അടയ്ക്കുന്നില്ല. | Obstruction inside the box; misaligned panels; hydraulic rods not installed correctly. | Remove any obstructions. Check panel alignment and re-secure if necessary. Verify hydraulic rod installation. |
| പെട്ടിയുടെ ഉള്ളിൽ വെള്ളം. | മൂടി പൂർണ്ണമായും അടച്ചിട്ടില്ല; സീൽ കേടായി; കഠിനമായ കാലാവസ്ഥ. | Ensure lid is completely closed. Inspect the lid seal for damage and contact support if necessary. Consider placing the box under a covered area during severe weather. |
| ബോക്സ് അസ്ഥിരമായി തോന്നുന്നു. | Uneven surface; panels not fully connected; contents unevenly distributed. | Move the box to a flat, level surface. Check all panel connections. Redistribute contents evenly. |
8 സ്പെസിഫിക്കേഷനുകൾ
- ബ്രാൻഡ്: കാമബോക്കോ
- മോഡൽ നമ്പർ: TT059-BK
- സംഭരണ വോളിയം: 120 ഗാലൻ
- മെറ്റീരിയൽ: റെസിൻ
- നിറം: കറുപ്പ്
- ഉൽപ്പന്ന അളവുകൾ (L x W x H): 53.94" x 25.98" x 24.21" (137സെ.മീ x 66സെ.മീ x 61.5സെ.മീ)
- ജല പ്രതിരോധ നില: വാട്ടർപ്രൂഫ്
- പ്രത്യേക സവിശേഷതകൾ: Portable, Waterproof, Lockable, Hydraulic Lid
- ശുപാർശ ചെയ്യുന്ന ഉപയോഗങ്ങൾ: Outdoor Storage Box for Garden Tools, Pool Supplies, Patio Furniture, Cushions

Image: Detailed dimensions of the 120 Gallon Deck Box.
9. വാറൻ്റിയും പിന്തുണയും
For warranty information and customer support, please refer to the documentation included with your purchase or contact KAMABOKO customer service directly. Return policies typically allow for returns within 30 days of purchase, but specific warranty terms may vary.
For further assistance, please visit the official KAMABOKO store or contact your retailer.
KAMABOKO Store: Visit the KAMABOKO Store on Amazon
Additional Manual: A PDF version of the user manual may be available ഇവിടെ.


