1. ആമുഖം
This manual provides instructions for the proper setup, operation, and maintenance of your Doohoeek Ultra-Slim Wired Touchpad. Please read this manual thoroughly before using the device to ensure optimal performance and longevity.
2 സുരക്ഷാ വിവരങ്ങൾ
- വെള്ളം, ഈർപ്പം, തീവ്രമായ താപനില എന്നിവയിൽ നിന്ന് ഉപകരണം അകറ്റി നിർത്തുക.
- ശക്തമായ ആഘാതങ്ങൾക്ക് ഉപകരണം ഇടുകയോ ഇടുകയോ ചെയ്യുന്നത് ഒഴിവാക്കുക.
- Do not attempt to disassemble or repair the device yourself. Contact qualified service personnel if maintenance is required.
- Use only the provided USB-C cable for connection.
3. പാക്കേജ് ഉള്ളടക്കം
നിങ്ങളുടെ പാക്കേജിൽ എല്ലാ ഇനങ്ങളും ഉണ്ടെന്ന് ഉറപ്പാക്കുക:
- Doohoeek Ultra-Slim Wired Touchpad
- USB-C Nylon Cable (integrated)
- ഉപയോക്തൃ മാനുവൽ (ഈ പ്രമാണം)
4. ഉൽപ്പന്നം കഴിഞ്ഞുview
The Doohoeek Ultra-Slim Wired Touchpad is designed for enhanced navigation and control on Windows 10 and 11 operating systems. It features a large, smooth glide surface and supports multi-finger gestures.

Image 4.1: High Precision Tracking. The touchpad offers precise cursor control and supports various settings like cursor speed and touchpad sensibility.

Image 4.2: Product Features Overview. This image highlights the touchpad's key attributes including plug & play functionality, high precision, multi-touch control, and wide compatibility with Windows 10/11.

Image 4.3: Full-Sized Touchpad. The touchpad measures approximately 4.7 inches by 4.3 inches, offering a significantly larger surface area compared to typical laptop touchpads.
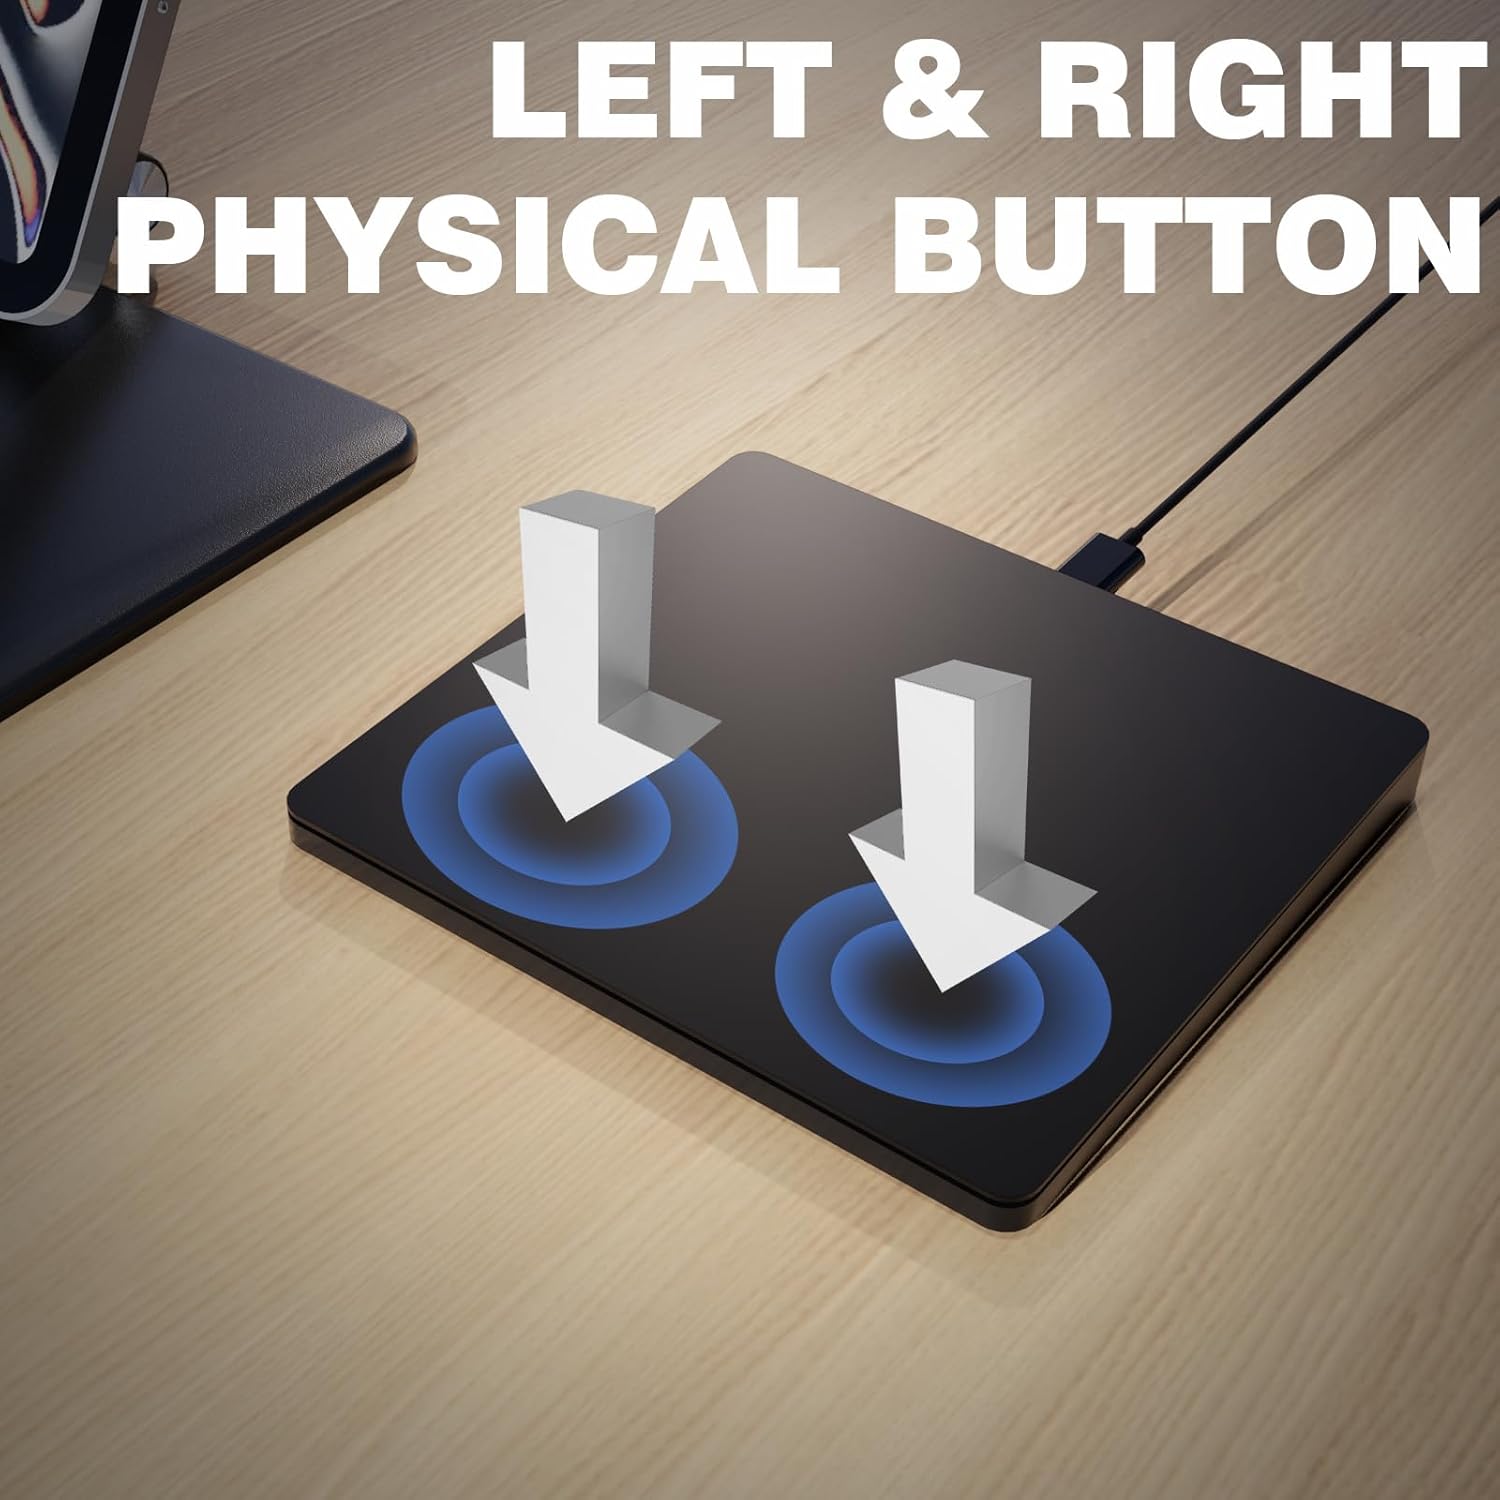
Image 4.4: Left & Right Physical Buttons. The touchpad includes dedicated physical buttons for left and right clicks, providing tactile feedback.
5. സജ്ജീകരണം
The Doohoeek Ultra-Slim Wired Touchpad is designed for plug-and-play compatibility with Windows 10 and 11 operating systems. No additional drivers are required for basic functionality.
5.1 Connecting the Touchpad
- Locate an available USB-A port on your computer (laptop or desktop).
- Connect the USB-C end of the integrated cable to the touchpad's USB-C port.
- Connect the USB-A end of the cable to your computer's USB-A port.
- The operating system will automatically detect and install the necessary drivers. The touchpad will be ready for use within a few seconds.

Image 5.1: Wired Connection. The touchpad connects directly to your computer via the integrated USB-C cable, ensuring a stable and lag-free connection.
6. പ്രവർത്തന നിർദ്ദേശങ്ങൾ
The touchpad supports standard cursor control and multi-touch gestures for Windows 10/11. Familiarize yourself with the following operations:
6.1 അടിസ്ഥാന പ്രവർത്തനങ്ങൾ
- കഴ്സർ നീക്കുക: Slide one finger across the touchpad surface.
- ഇടത് ക്ലിക്ക്: Tap once with one finger on the touchpad surface, or press the physical left button.
- വലത് ക്ലിക്കിൽ: Tap once with two fingers on the touchpad surface, or press the physical right button.
- വലിച്ചിടുക: Double-tap and hold with one finger, then drag the item. Release to drop.
6.2 Multi-Touch Gestures (Windows 10/11)
The touchpad is optimized for Windows 10 and 11 multi-touch gestures:

Image 6.1: Multi-Touch Gestures. This diagram shows common gestures such as tap to click, smart zoom, secondary click, zoom in/out, scrolling, three-finger drag, control center, and mission control.
- രണ്ട് വിരലുകളുള്ള സ്ക്രോൾ: Place two fingers on the touchpad and slide them up or down to scroll vertically, or left or right to scroll horizontally.
- സൂം ചെയ്യാൻ പിഞ്ച് ചെയ്യുക: Place two fingers on the touchpad and pinch them together or spread them apart to zoom in or out.
- മൂന്ന് വിരലുകൾ ഉപയോഗിച്ച് മുകളിലേക്ക് സ്വൈപ്പ് ചെയ്യുക: ടാസ്ക് തുറക്കുന്നു View (Windows 10) or Task View/Widgets (Windows 11).
- Three-Finger Swipe Down: ഡെസ്ക്ടോപ്പ് കാണിക്കുന്നു.
- മൂന്ന് വിരലുകൾ ഉപയോഗിച്ച് ഇടത്തോട്ടോ വലത്തോട്ടോ സ്വൈപ്പ് ചെയ്യുക: തുറന്ന ആപ്ലിക്കേഷനുകൾക്കിടയിൽ മാറുന്നു.
- Four-Finger Tap: Opens Action Center (Windows 10) or Notification Center/Quick Settings (Windows 11).

Image 6.2: Physical Left & Right Click. This image demonstrates the use of the physical buttons for precise selection, dragging, and dropping.
7. പരിപാലനം
To ensure the longevity and optimal performance of your touchpad, follow these maintenance guidelines:
- വൃത്തിയാക്കൽ: Use a soft, dry, lint-free cloth to wipe the touchpad surface. For stubborn smudges, slightly dampen the cloth with water or a mild screen cleaner. Avoid abrasive materials or harsh chemicals.
- സംഭരണം: When not in use, store the touchpad in a clean, dry environment.
- കേബിൾ കെയർ: The integrated nylon USB-C cable is designed for durability. Avoid sharp bends or excessive pulling on the cable.
8. പ്രശ്നപരിഹാരം
If you encounter issues with your Doohoeek Ultra-Slim Wired Touchpad, refer to the following common problems and solutions:
| പ്രശ്നം | സാധ്യമായ കാരണം | പരിഹാരം |
|---|---|---|
| ടച്ച്പാഡ് പ്രതികരിക്കുന്നില്ല | Loose connection, incorrect USB port, driver issue. | Ensure the USB-C cable is securely connected to both the touchpad and the computer. Try a different USB port. Restart your computer. |
| കഴ്സർ ചലനം ക്രമരഹിതമാണ് | Dirty touchpad surface, interference. | Clean the touchpad surface with a soft cloth. Ensure no objects are obstructing the touchpad. |
| Gestures not working | Operating system settings, incompatible software. | Check your Windows Touchpad settings (Settings > Devices > Touchpad) to ensure gestures are enabled. Ensure your Windows OS is up to date. |
| Physical buttons not clicking | Physical obstruction, internal issue. | Ensure no debris is lodged around the buttons. If the issue persists, contact customer support. |
9 സ്പെസിഫിക്കേഷനുകൾ
| ഫീച്ചർ | വിശദാംശങ്ങൾ |
|---|---|
| മോഡൽ | B0FNWHLQTF |
| ബ്രാൻഡ് | Doohoeek |
| കണക്റ്റിവിറ്റി | വയേർഡ് (USB-C) |
| അനുയോജ്യത | വിൻഡോസ് 10, വിൻഡോസ് 11 |
| മെറ്റീരിയൽ | അലുമിനിയം |
| അളവുകൾ (L x W x H) | 5.4 x 4 x 0.1 ഇഞ്ച് (ഏകദേശം) |
| ഇനത്തിൻ്റെ ഭാരം | 11.3 ഔൺസ് |
| പ്രത്യേക ഫീച്ചർ | Lightweight, Multi-Touch Gestures |
10. വാറൻ്റിയും പിന്തുണയും
For warranty information and customer support, please refer to the product packaging or contact Doohoeek customer service through the retailer where the product was purchased. Keep your purchase receipt for warranty claims.

