ആമുഖം
Thank you for choosing the Greenvelly Biometric Wall Gun Safe. This manual provides essential information for the safe and proper installation, operation, and maintenance of your new wall-mounted gun safe. Please read these instructions carefully before use and retain them for future reference.
പ്രധാനപ്പെട്ട സുരക്ഷാ വിവരങ്ങൾ
- Always store firearms unloaded and separate from ammunition.
- Keep emergency keys in a secure location away from the safe and out of reach of children. Do not store them inside the safe.
- Ensure the safe is securely mounted to a structural element of your wall to prevent unauthorized removal.
- Do not allow children or unauthorized individuals to access the safe.
- Regularly check battery levels and replace them as needed to ensure continuous operation of the electronic lock.
- This safe is designed to deter theft and unauthorized access. It is not fireproof or waterproof unless explicitly stated.
പാക്കേജ് ഉള്ളടക്കം
ഇൻസ്റ്റാളേഷന് മുമ്പ് എല്ലാ ഘടകങ്ങളും ഉണ്ടെന്ന് ഉറപ്പാക്കുക:
- Greenvelly Biometric Wall Gun Safe
- എമർജൻസി കീകൾ (2)
- Expansion Screws for mounting
- ക്രമീകരിക്കാവുന്ന ഷെൽഫുകൾ (3)
- നിർദ്ദേശ മാനുവൽ (ഈ പ്രമാണം)
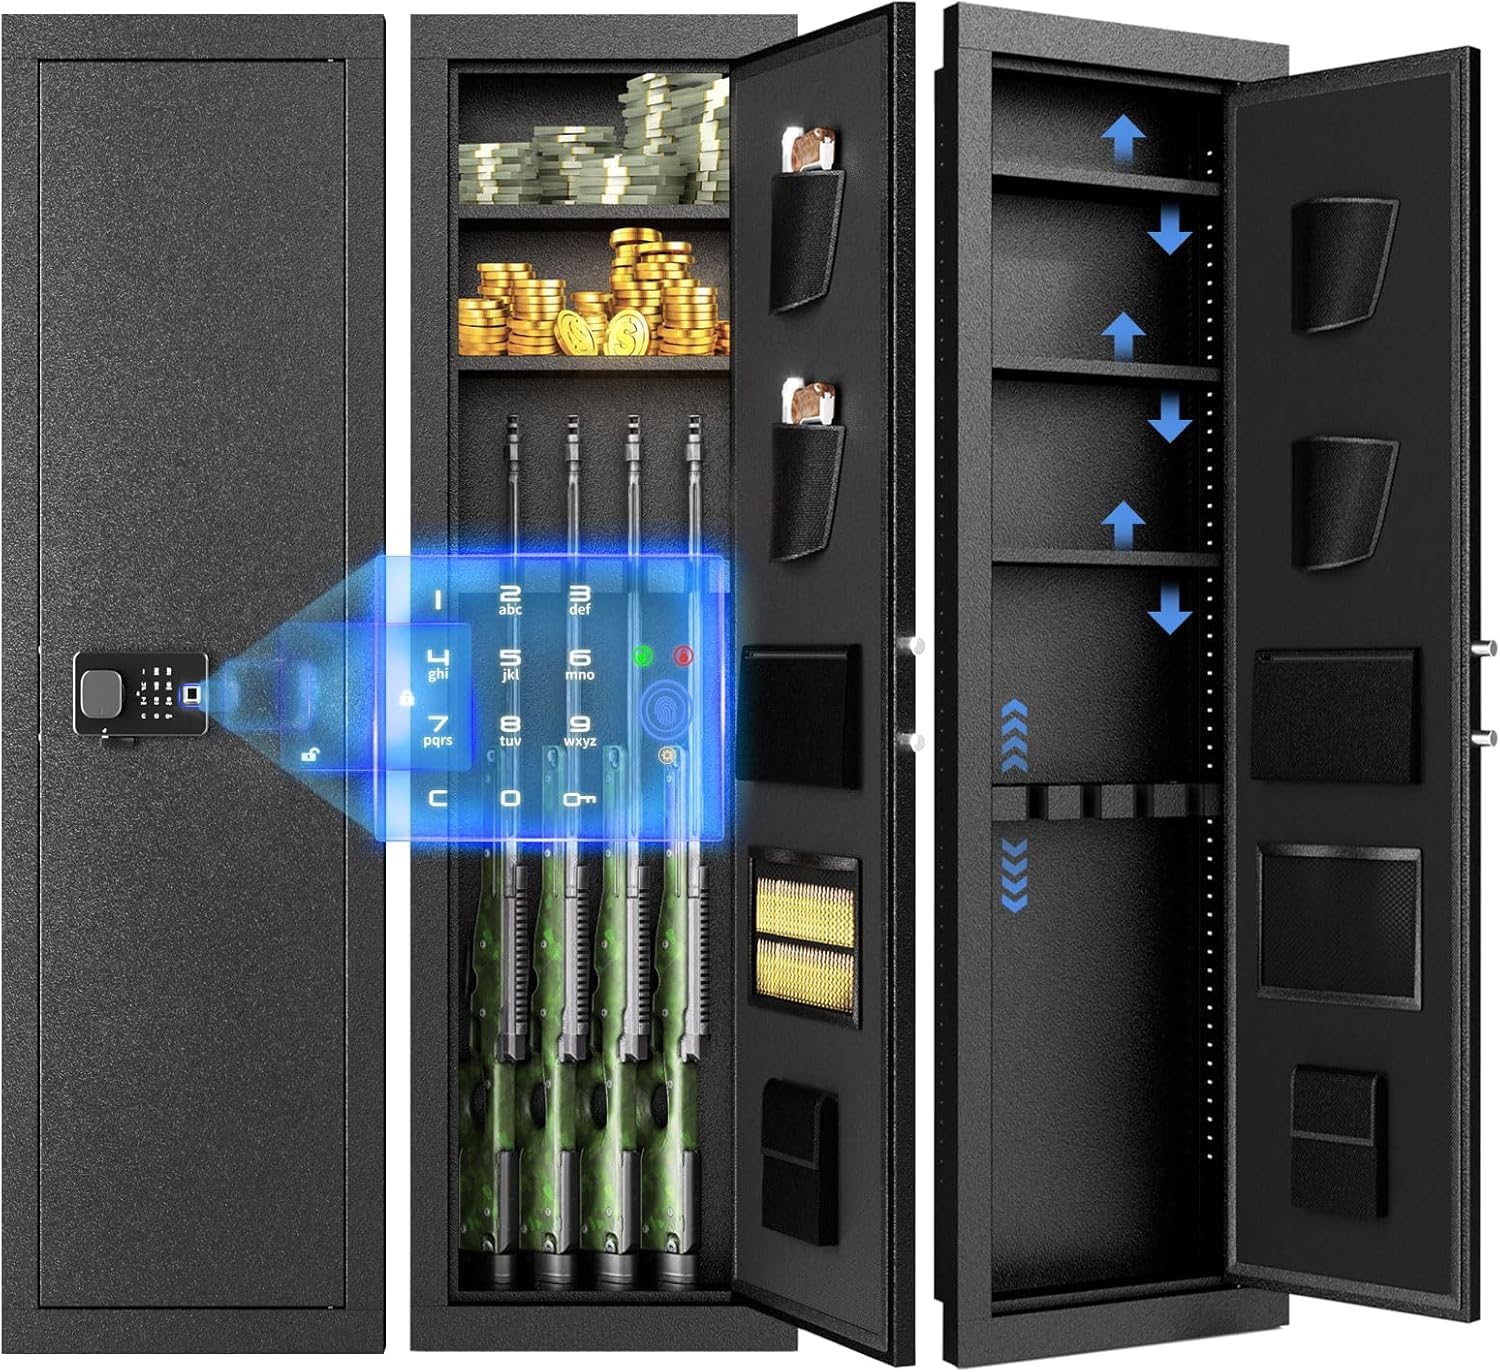
Figure 1: Safe dimensions and included accessories.
സ്പെസിഫിക്കേഷനുകൾ
| ഫീച്ചർ | വിശദാംശങ്ങൾ |
|---|---|
| ബ്രാൻഡ് | ഗ്രീൻവെല്ലി |
| മോഡൽ നമ്പർ | 784227749156 |
| ഉൽപ്പന്ന അളവുകൾ (D x W x H) | 6" x 18" x 53" |
| ലോക്ക് തരം | Biometric, Keypad, Key |
| നിറം | കറുപ്പ് |
| ശേഷി | 648 ക്യുബിക് ഇഞ്ച് |
| മെറ്റീരിയൽ | ലോഹം |
| മൗണ്ടിംഗ് തരം | മതിൽ മൗണ്ട് |
സജ്ജീകരണവും ഇൻസ്റ്റാളേഷനും
The Greenvelly Biometric Wall Gun Safe is designed for discreet installation between standard wall studs. No assembly is required for the safe itself.
1. ഇൻസ്റ്റലേഷൻ സ്ഥലം തിരഞ്ഞെടുക്കുന്നു
Select a location within your home that offers sufficient space between wall studs (typically 16 inches on center) and allows for the full height of the safe (53 inches). Consider areas where the safe can be concealed, such as behind a mirror, painting, or within a closet.

ചിത്രം 2: ഉദാample of safe installation in a closet.

ചിത്രം 3: ഉദാample of safe installation in a room.
2. മതിൽ തുറക്കൽ തയ്യാറാക്കൽ
- Locate two adjacent wall studs using a stud finder.
- Mark the outline for the safe's opening on the wall, ensuring it is slightly larger than the safe's dimensions (18" W x 53" H) to allow for easy insertion.
- Carefully cut out the marked section of drywall or other wall material. Ensure no electrical wires or plumbing are present in the cutting area.
3. സേഫ് മൌണ്ട് ചെയ്യുന്നു
- Slide the safe into the prepared wall opening. Ensure it sits flush with the wall surface.
- Using the pre-drilled holes on the safe's frame, secure the safe to the wall studs with the provided expansion screws. Use a drill to create pilot holes if necessary.
- Tighten all screws firmly to ensure the safe is stable and cannot be easily removed.

Figure 4: Securing the safe to the wall studs.
പ്രവർത്തന നിർദ്ദേശങ്ങൾ
Your Greenvelly Biometric Wall Gun Safe offers three methods of access: biometric fingerprint, digital keypad, and emergency key.

ചിത്രം 5: ഓവർview of unlocking methods.
1. ബാറ്ററി ഇൻസ്റ്റാളേഷൻ
The electronic lock requires [Number] AA batteries (not included). Locate the battery compartment on the inside of the safe door. Insert the batteries, ensuring correct polarity. Close the compartment cover.
പ്രധാനപ്പെട്ടത്: If the batteries are depleted, the safe can still be opened using the emergency key. An external battery pack may also be available for temporary power (refer to product specifications for availability).
2. Initial Access with Emergency Key
Before programming any electronic access, familiarize yourself with the emergency key access:
- Locate the emergency keyhole, usually concealed behind a cover on the keypad panel.
- Insert one of the provided emergency keys and turn it to unlock the safe.
- Turn the knob to open the safe door.
മുന്നറിയിപ്പ്: Store emergency keys in a secure, separate location, away from the safe and out of reach of children.
3. Programming a User Code (Keypad Access)
- With the safe door open, press the internal programming button (usually a red button or a button marked "SET" or "PROG"). The keypad will beep, and an indicator light will illuminate.
- Enter your desired 4-8 digit user code.
- Press the "#" or "ENTER" button to confirm. The safe will beep to indicate successful programming.
- വാതിൽ അടയ്ക്കുന്നതിന് മുമ്പ് തുറന്നിരിക്കുമ്പോൾ പുതിയ കോഡ് പരിശോധിക്കുക.
4. Registering Fingerprints (Biometric Access)
The safe can store multiple fingerprints. Refer to the specific instructions provided with your safe for the exact number and procedure, as this can vary slightly by model.
- With the safe door open, press the internal programming button. The fingerprint scanner will activate, and an indicator light will flash.
- Place your finger firmly on the scanner. Lift and repeat several times from different angles until the safe confirms successful registration (usually with a series of beeps or a green light).
- Repeat for additional fingers or users as desired.
- Test registered fingerprints with the door open before closing it.
5. സേഫ് തുറക്കൽ
- ബയോമെട്രിക്: Place a registered finger on the scanner. If recognized, the lock will disengage. Turn the knob to open.
- കീപാഡ്: Enter your programmed user code, then press "#" or "ENTER". If correct, the lock will disengage. Turn the knob to open.
- എമർജൻസി കീ: Use the emergency key as described in "Initial Access with Emergency Key" above.
6. ക്രമീകരിക്കാവുന്ന ഷെൽഫുകൾ
The safe includes three adjustable shelves to customize your storage space. To adjust, simply unclip or slide the shelves from their current position and re-insert them into the desired slots along the internal rails. This allows for flexible organization of firearms, ammunition, and other valuables.
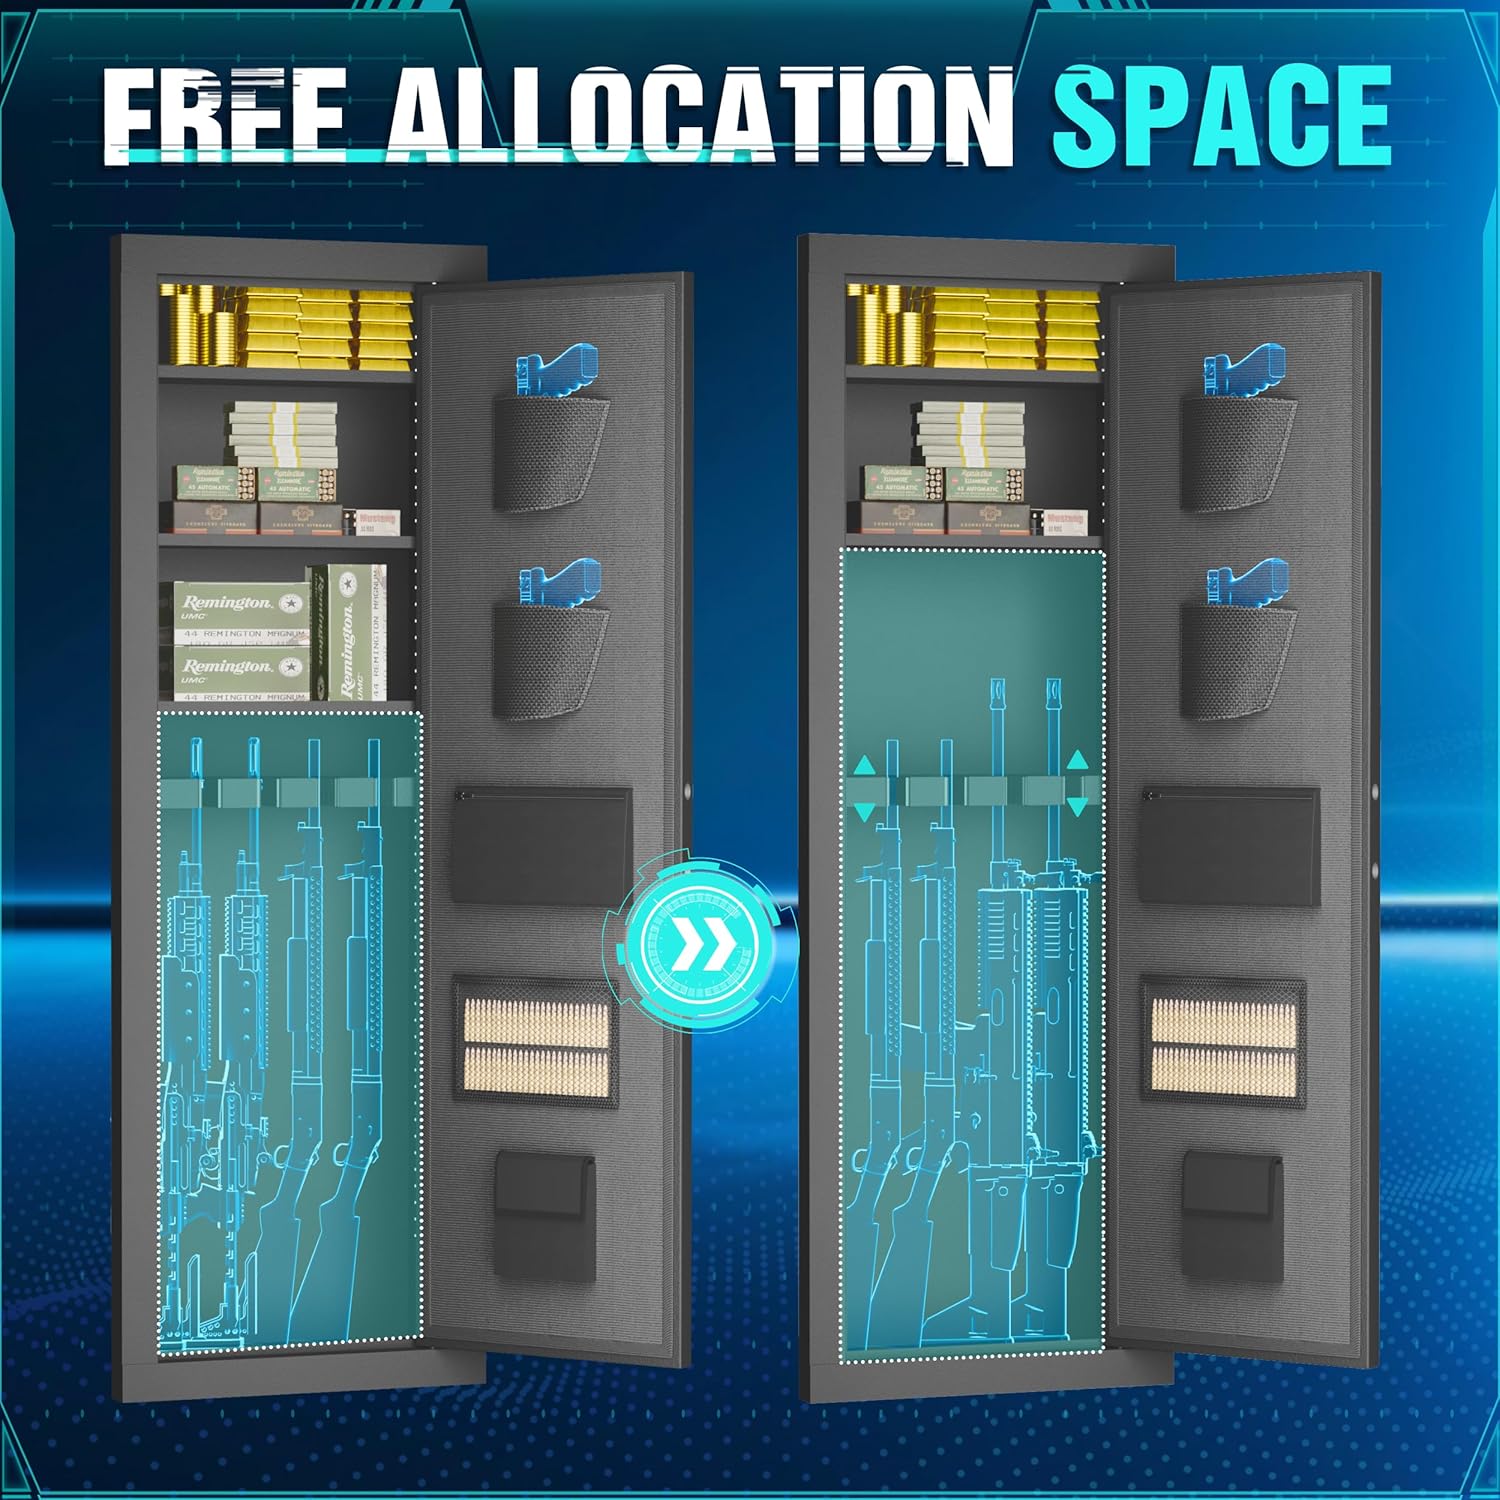
Figure 6: Customizable internal storage with adjustable shelves.
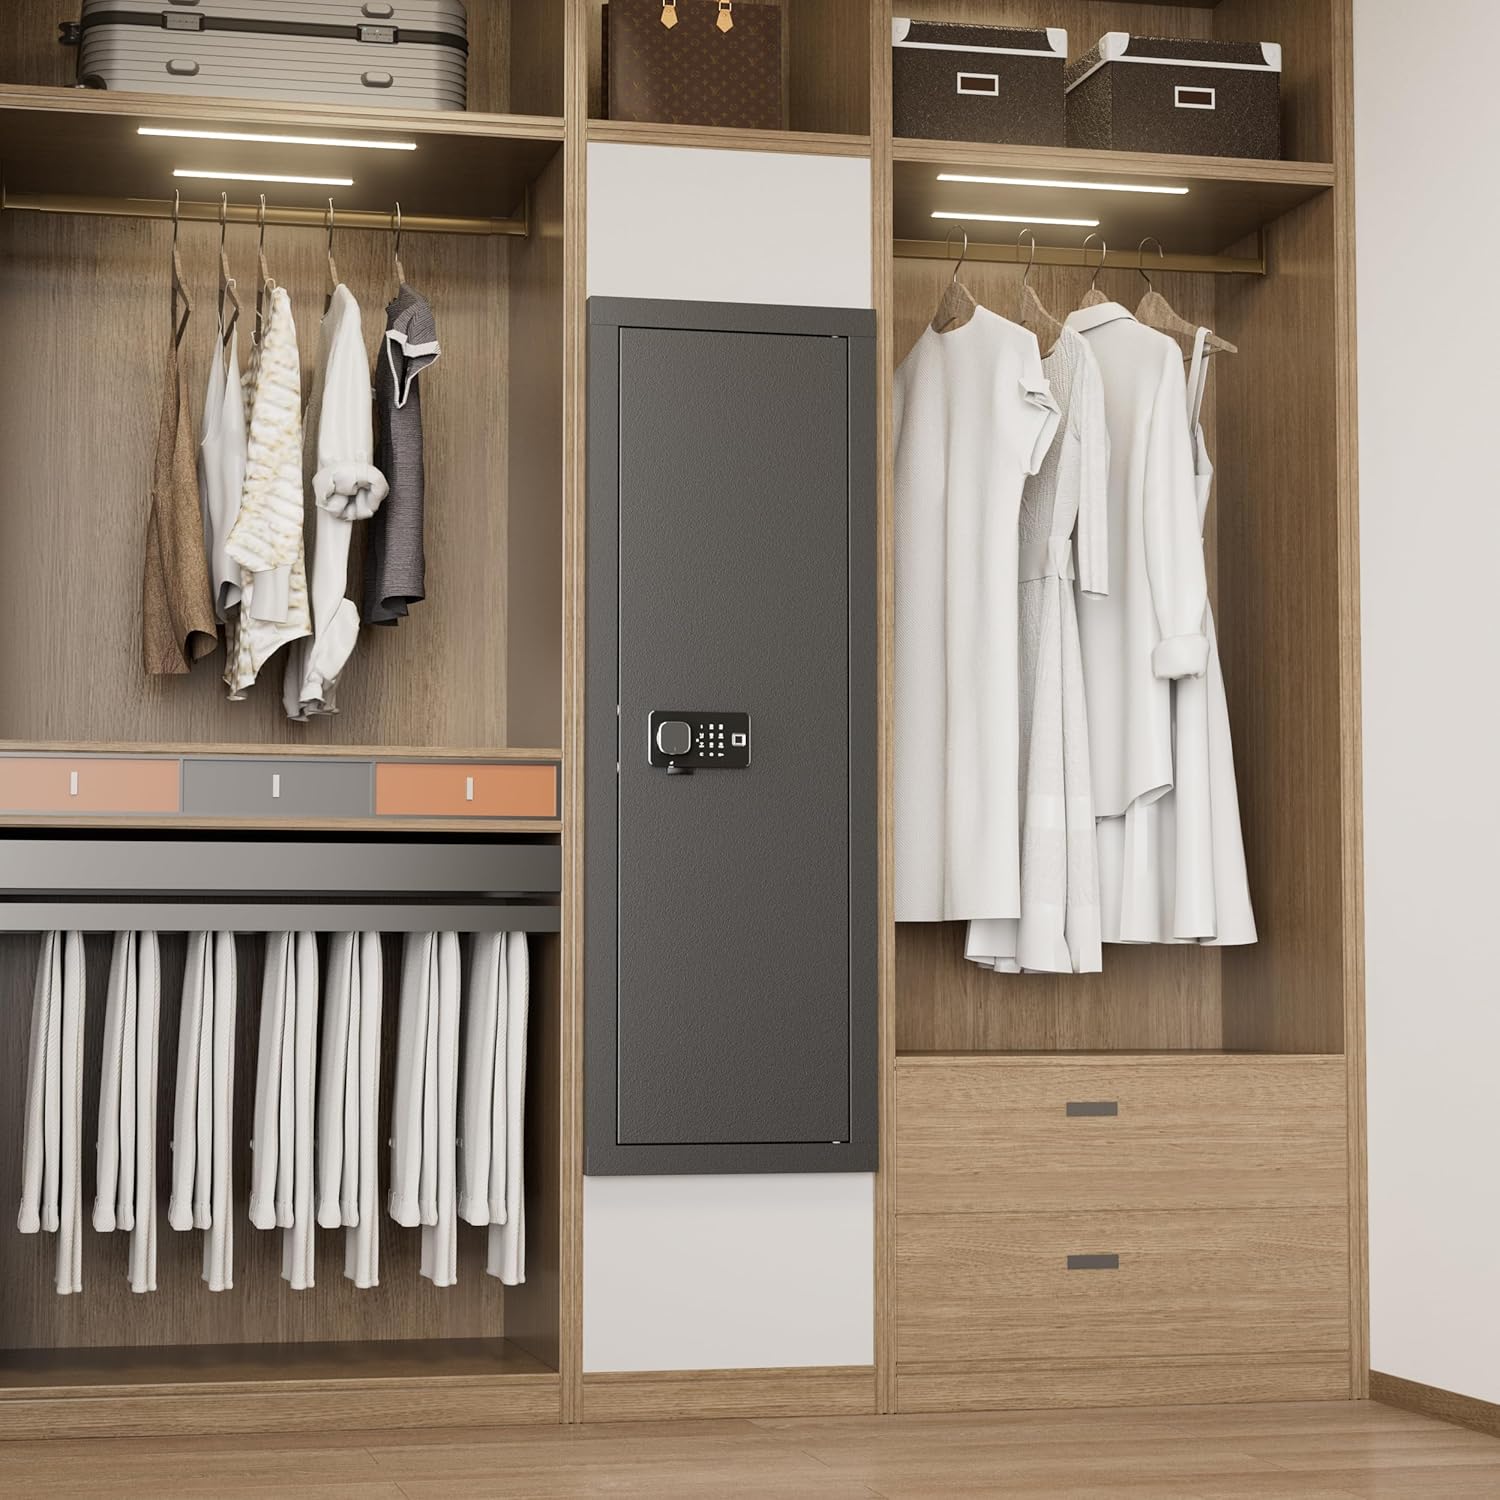
Figure 7: Internal components and storage options.
മെയിൻ്റനൻസ്
- ബാറ്ററി മാറ്റിസ്ഥാപിക്കൽ: Replace all batteries annually or when the low battery indicator activates. Use high-quality alkaline batteries.
- വൃത്തിയാക്കൽ: Wipe the exterior and interior of the safe with a soft, dry cloth. Do not use abrasive cleaners or solvents. Keep the fingerprint scanner clean and dry for optimal performance.
- ലോക്ക് മെക്കാനിസം: ലോക്ക് മെക്കാനിസം ലൂബ്രിക്കേറ്റ് ചെയ്യരുത്. പ്രശ്നങ്ങൾ നേരിടുകയാണെങ്കിൽ, ഉപഭോക്തൃ പിന്തുണയുമായി ബന്ധപ്പെടുക.
ട്രബിൾഷൂട്ടിംഗ്
| പ്രശ്നം | സാധ്യമായ കാരണം | പരിഹാരം |
|---|---|---|
| Safe does not open with keypad/fingerprint. | Low batteries, incorrect code/fingerprint, scanner dirty. | Replace batteries. Re-enter code carefully. Clean scanner. Use emergency key. |
| Alarm sounds repeatedly. | Multiple incorrect entries (wrong access alarm), door left unlocked (timeout unlocked alarm). | Enter correct code/fingerprint. Close and lock the safe door. |
| പുതിയ കോഡ്/വിരലടയാളം പ്രോഗ്രാം ചെയ്യാൻ കഴിയില്ല. | Incorrect programming sequence, low batteries. | Ensure door is open. Follow programming steps precisely. Replace batteries. |
| അടിയന്തര കീ പ്രവർത്തിക്കുന്നില്ല. | Keyhole obstructed, wrong key. | Ensure keyhole is clear. Use the correct emergency key. Do not force the key. |
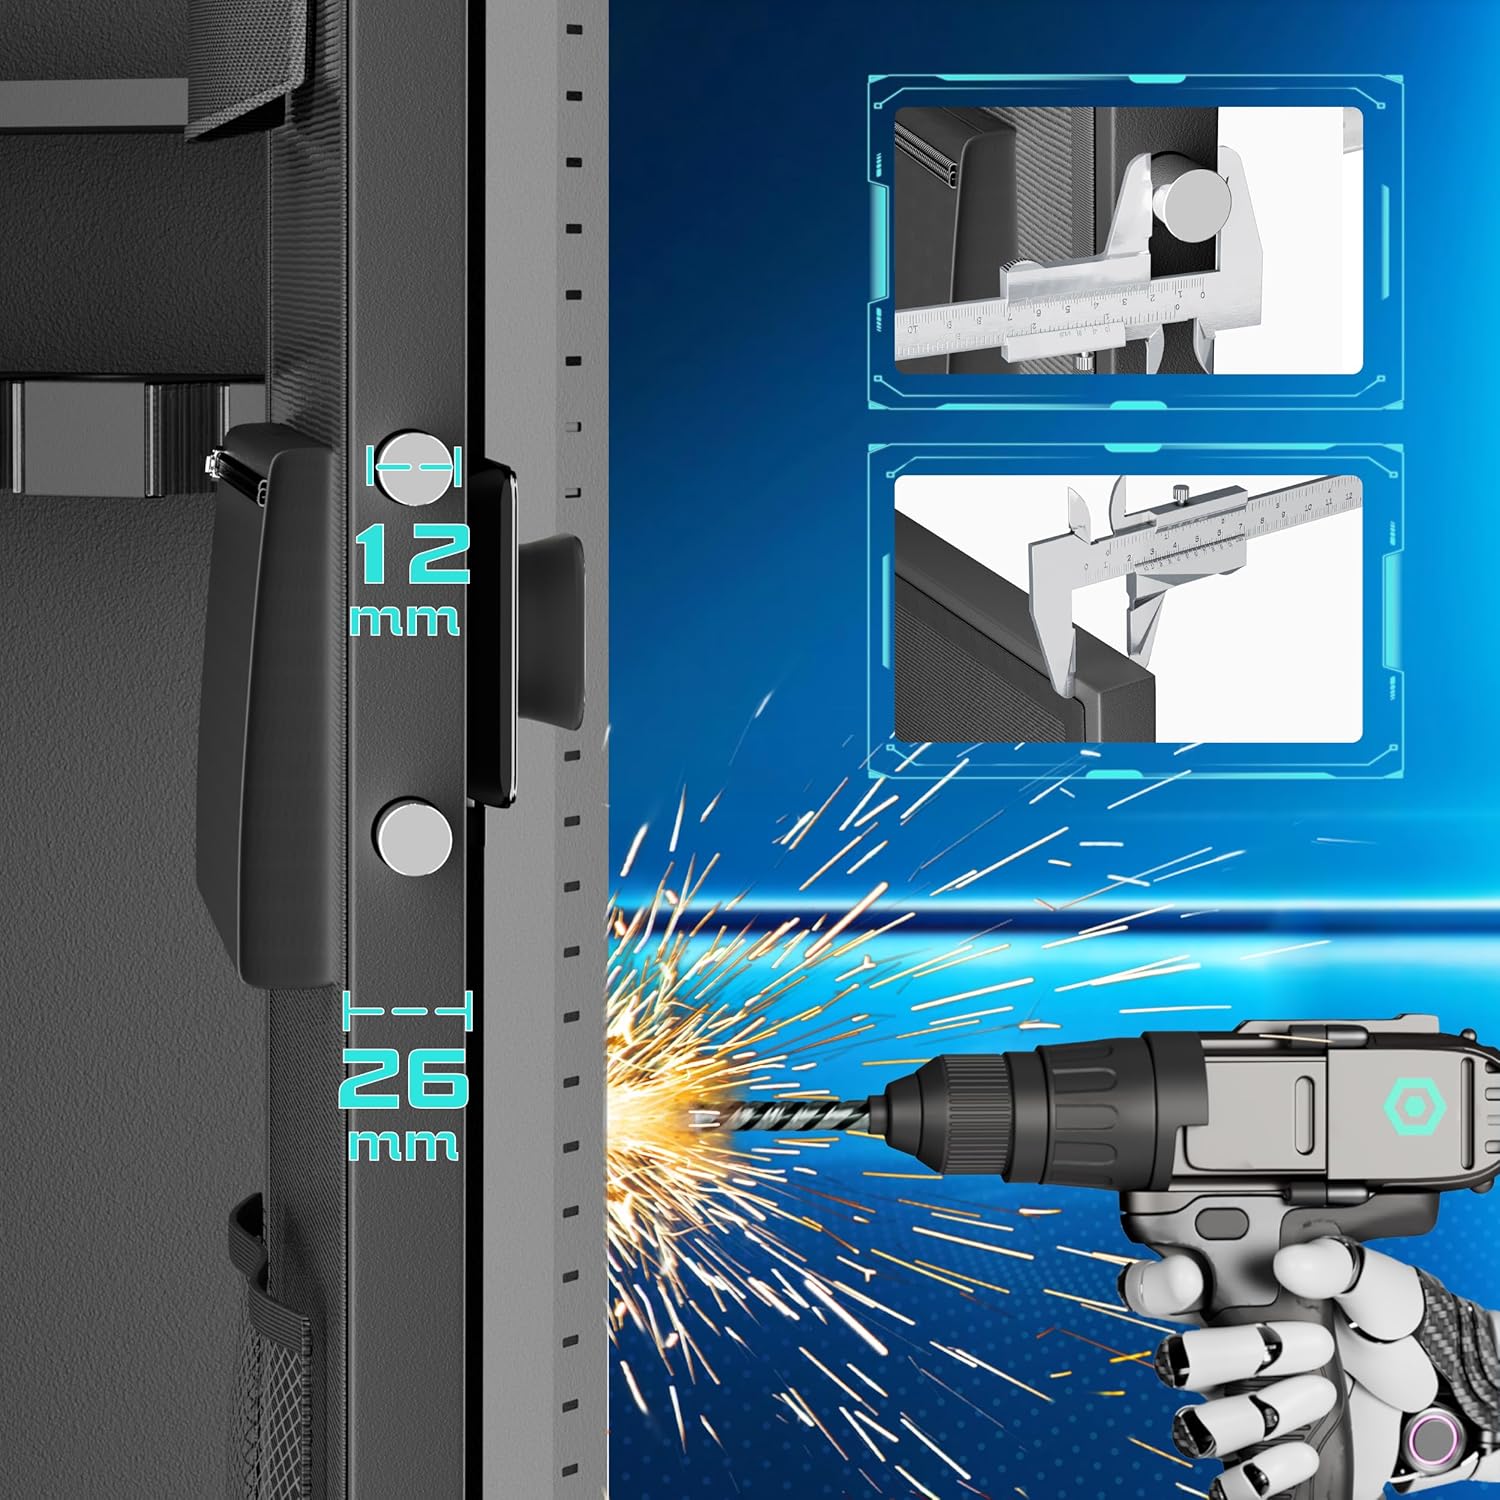
Figure 8: Alarm system features and triggers.
വാറൻ്റിയും പിന്തുണയും
Greenvelly products are manufactured to high-quality standards. For warranty information, technical support, or assistance with your product, please contact Greenvelly customer service. Please have your model number (784227749156) and purchase date available when contacting support.
Contact information can typically be found on the Greenvelly official webസൈറ്റ് അല്ലെങ്കിൽ നിങ്ങളുടെ റീട്ടെയിലർ വഴി.