ആമുഖം
Thank you for choosing the Garvee 20V Electric Cordless Leaf Blower. This manual provides essential information for the safe operation, maintenance, and troubleshooting of your new tool. Please read this manual thoroughly before first use and keep it for future reference.
പ്രധാനപ്പെട്ട സുരക്ഷാ വിവരങ്ങൾ
തീ, വൈദ്യുത ആഘാതം, വ്യക്തിഗത പരിക്കുകൾ എന്നിവയുടെ അപകടസാധ്യത കുറയ്ക്കുന്നതിന് എല്ലായ്പ്പോഴും അടിസ്ഥാന സുരക്ഷാ മുൻകരുതലുകൾ പാലിക്കുക.
- ഉപകരണം പ്രവർത്തിപ്പിക്കുന്നതിന് മുമ്പ് എല്ലാ നിർദ്ദേശങ്ങളും വായിക്കുക.
- കണ്ണ് സംരക്ഷണം, കേൾവി സംരക്ഷണം എന്നിവയുൾപ്പെടെ ഉചിതമായ വ്യക്തിഗത സംരക്ഷണ ഉപകരണങ്ങൾ (പിപിഇ) ധരിക്കുക.
- Keep children and bystanders away while operating the blower.
- Do not operate the blower in wet conditions or near water.
- ഉപയോഗിക്കുന്നതിന് മുമ്പ് ബാറ്ററി പൂർണ്ണമായി ചാർജ്ജ് ചെയ്തിട്ടുണ്ടെന്ന് ഉറപ്പാക്കുക.
- ബ്ലോവർ നോസൽ ഒരിക്കലും ആളുകളുടെയോ മൃഗങ്ങളുടെയോ നേരെ ചൂണ്ടരുത്.
- ഓരോ ഉപയോഗത്തിനും മുമ്പ് ബ്ലോവറിൽ എന്തെങ്കിലും കേടുപാടുകൾ സംഭവിച്ചിട്ടുണ്ടോ എന്ന് പരിശോധിക്കുക. കേടുപാടുകൾ സംഭവിച്ചിട്ടുണ്ടെങ്കിൽ അത് പ്രവർത്തിപ്പിക്കരുത്.
- Store the blower and battery in a dry, secure location away from direct sunlight and extreme temperatures.
ബോക്സിൽ എന്താണുള്ളത്
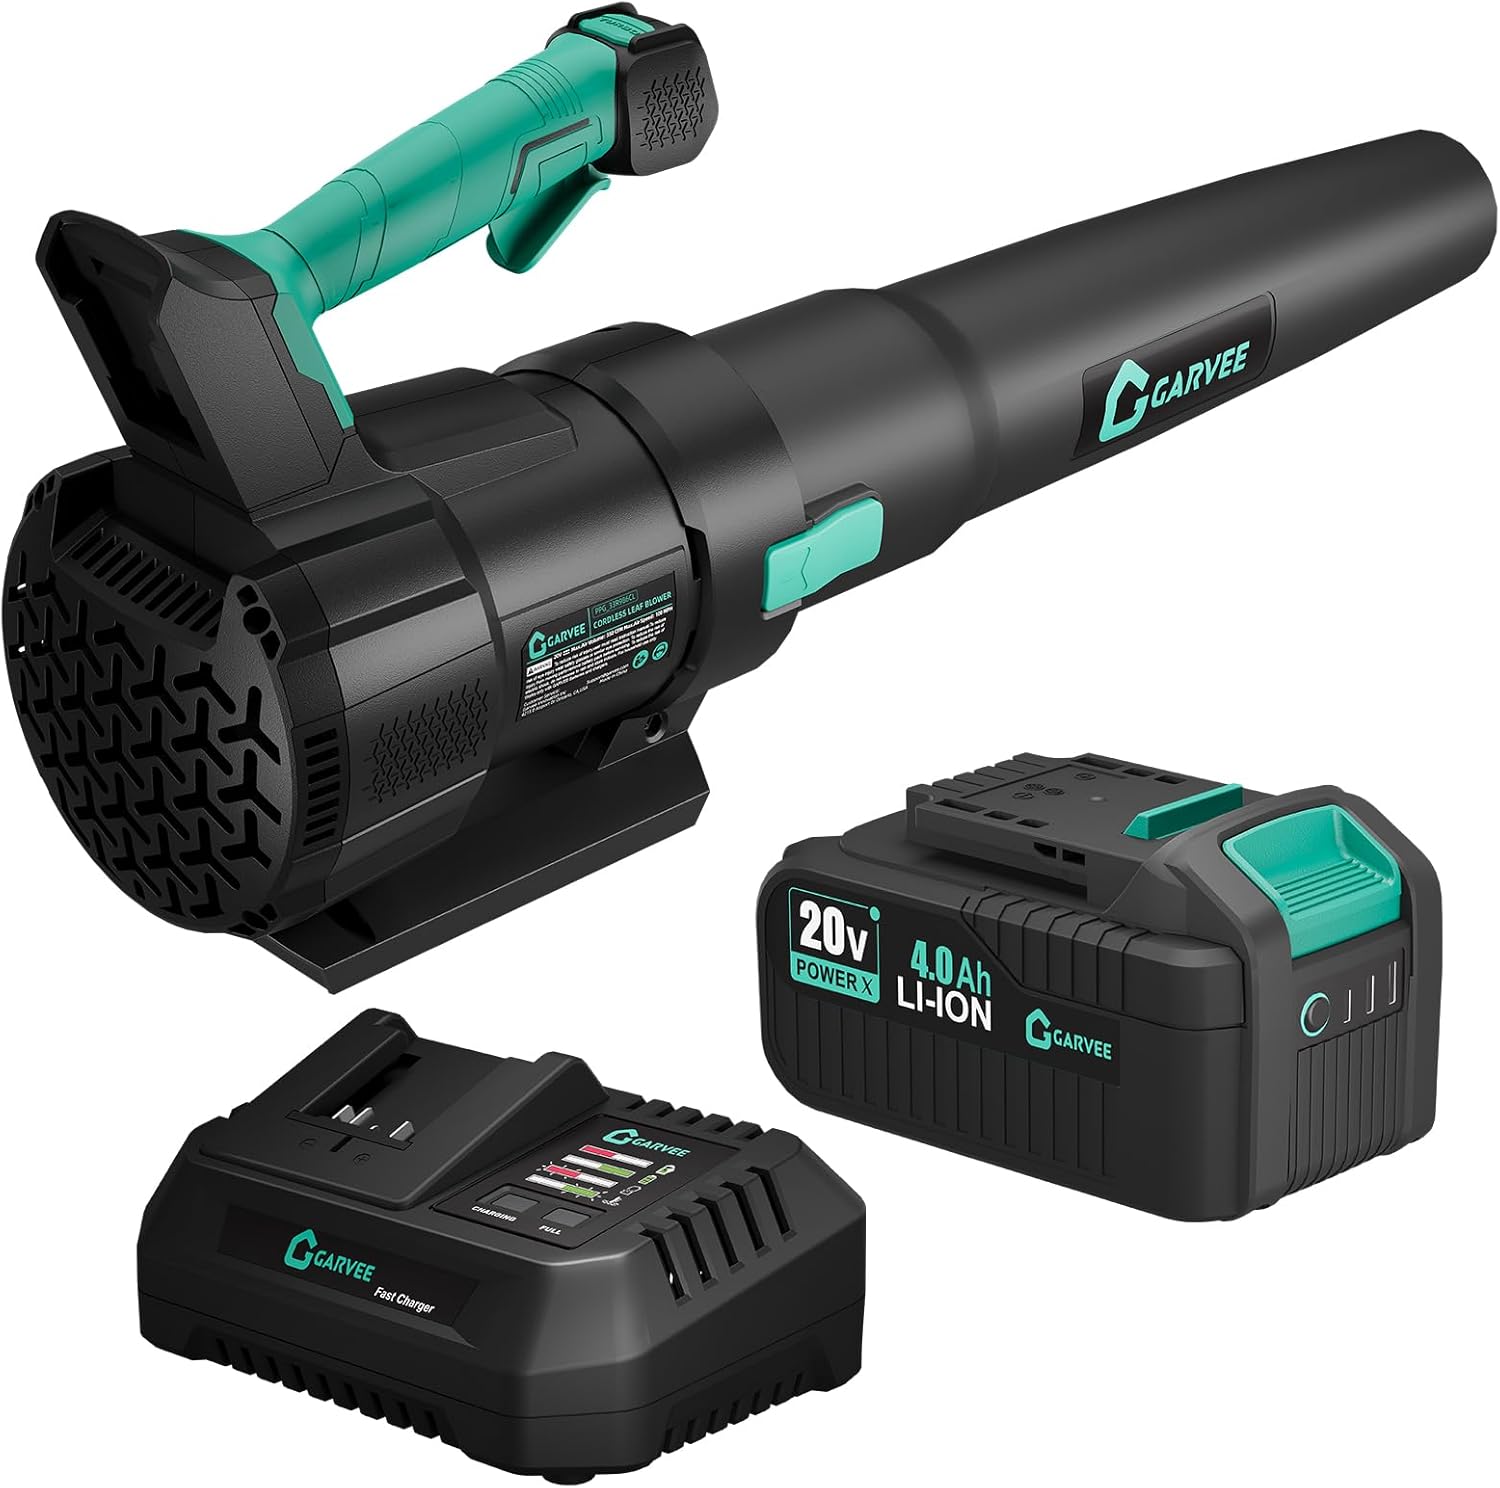
Your Garvee Leaf Blower package includes the following components:
- Garvee Cordless Leaf Blower Unit
- 20V 4.0Ah Li-ion Battery (1x)
- Fast Charge Base (1x)
- ഉപയോക്തൃ മാനുവൽ (1x)
സജ്ജമാക്കുക
1. Assembling the Blower Tube
- Align the blower tube with the main unit's outlet.
- Push the tube firmly onto the unit until it clicks into place. Ensure it is securely attached before operation.
2. ബാറ്ററി ചേർക്കുന്നു
- ബ്ലോവർ ഓഫ് ചെയ്തിട്ടുണ്ടെന്ന് ഉറപ്പാക്കുക.
- Slide the 20V 4.0Ah Li-ion battery into the battery slot on the blower unit until it locks securely.
- നീക്കം ചെയ്യാൻ, ബാറ്ററി റിലീസ് ബട്ടൺ അമർത്തി ബാറ്ററി പുറത്തേക്ക് സ്ലൈഡ് ചെയ്യുക.
3 ബാറ്ററി ചാർജ് ചെയ്യുന്നു
- Connect the fast charge base to a standard electrical outlet.
- Slide the 20V 4.0Ah Li-ion battery onto the charge base.
- The LED indicator on the charger will show red during charging and turn green when fully charged.
- A full charge typically takes approximately 1 hour.
- പ്രധാനപ്പെട്ടത്: For optimal battery lifespan, fully charge the battery before first use and allow a 5-minute cooldown after use. For long-term storage, recharge the battery every six months.

പ്രവർത്തന നിർദ്ദേശങ്ങൾ
1. Powering On/Off and Speed Modes
- To power on the blower, press the trigger.
- The blower features two speed modes:
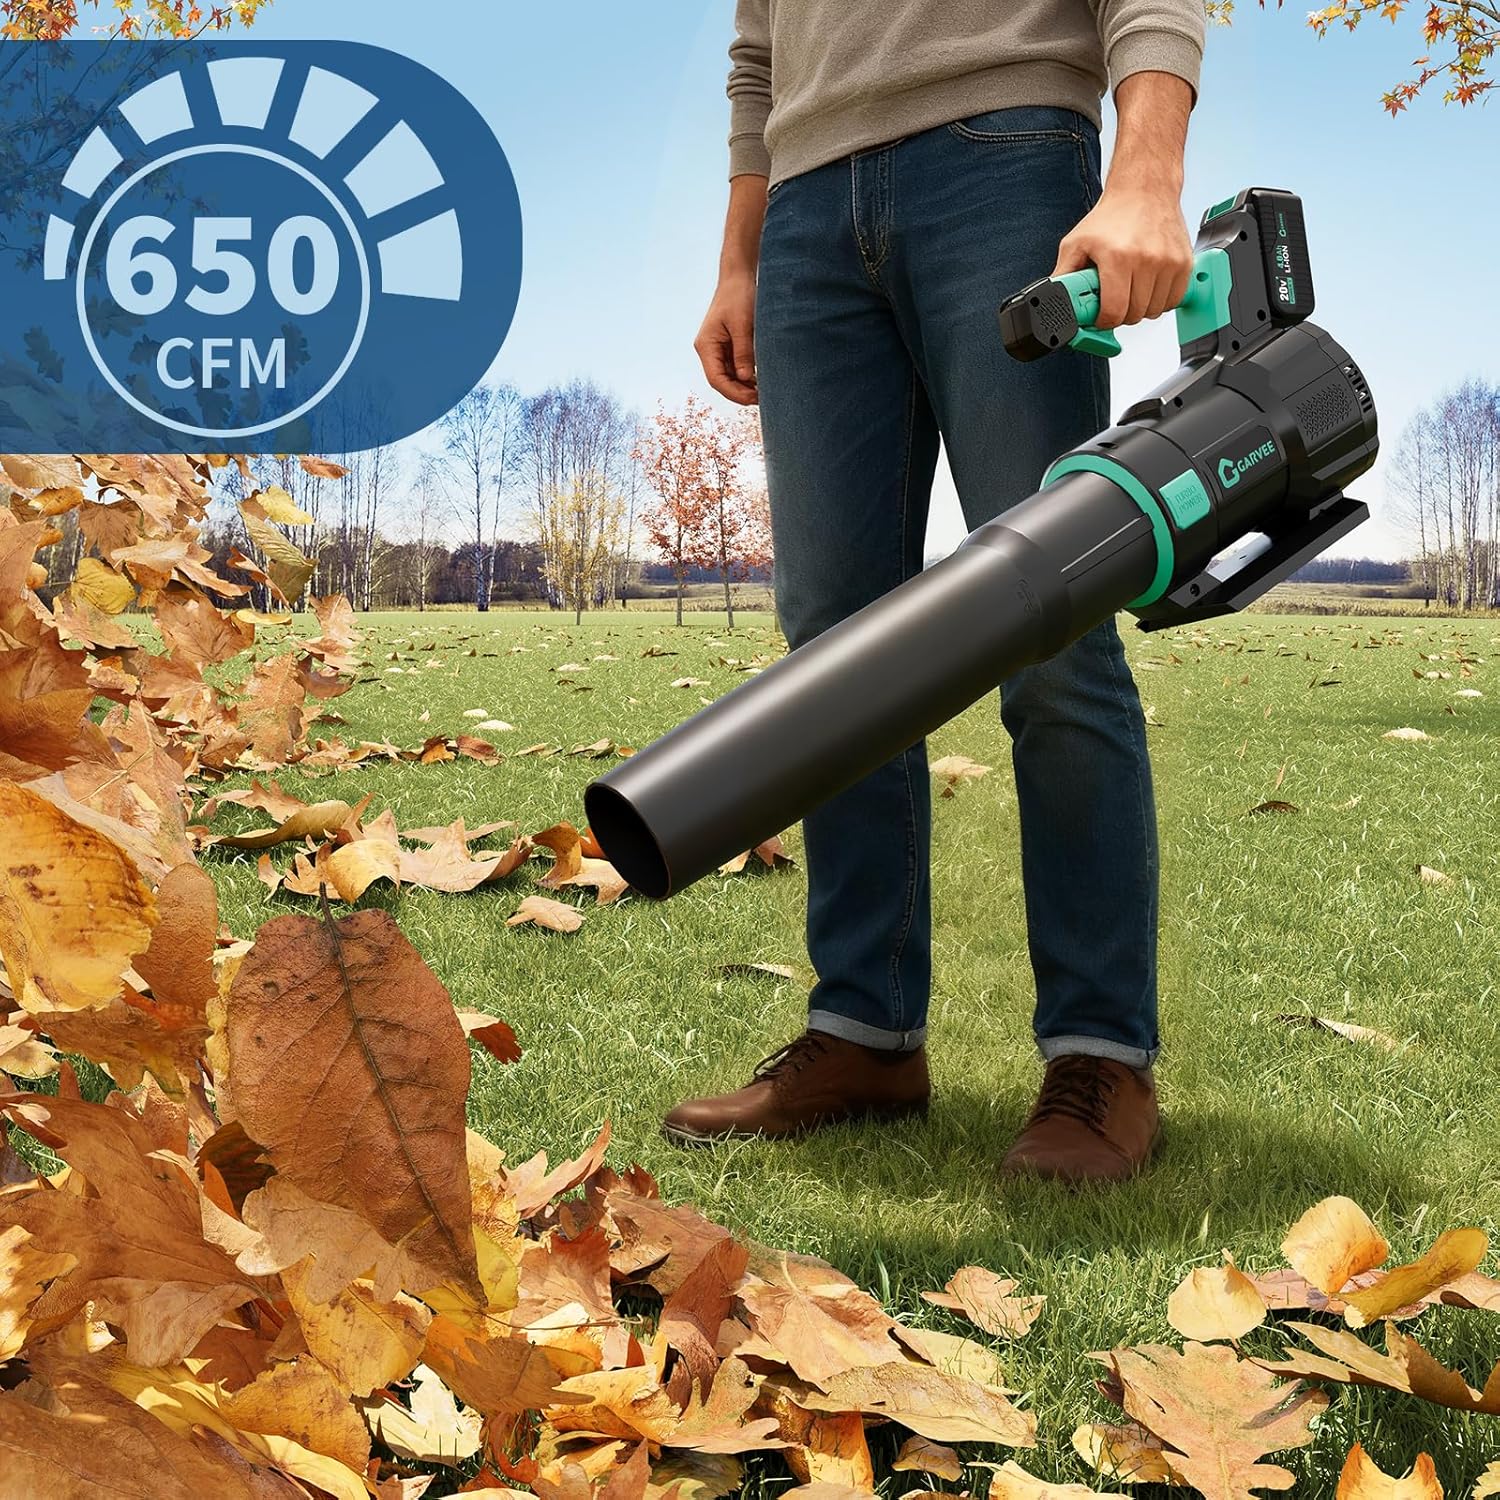
- വേഗത 1 (കുറഞ്ഞത്): Ideal for light debris and dust, offering up to 100 MPH air speed.
- Speed 2 (High/Turbo): For stubborn, wet leaves and heavier debris, boosting air speed up to an impressive 200 MPH. This mode consumes more battery power.
- Adjust the speed by using the speed selector switch located on the handle.
- To power off, release the trigger.

2. പൊതുവായ ഉപയോഗ നുറുങ്ങുകൾ
- For optimal performance, use the blower on dry surfaces.
- Start with the lower speed setting for general cleanup and switch to higher speed for tougher tasks.
- Maintain a comfortable distance from the debris to maximize airflow effectiveness.
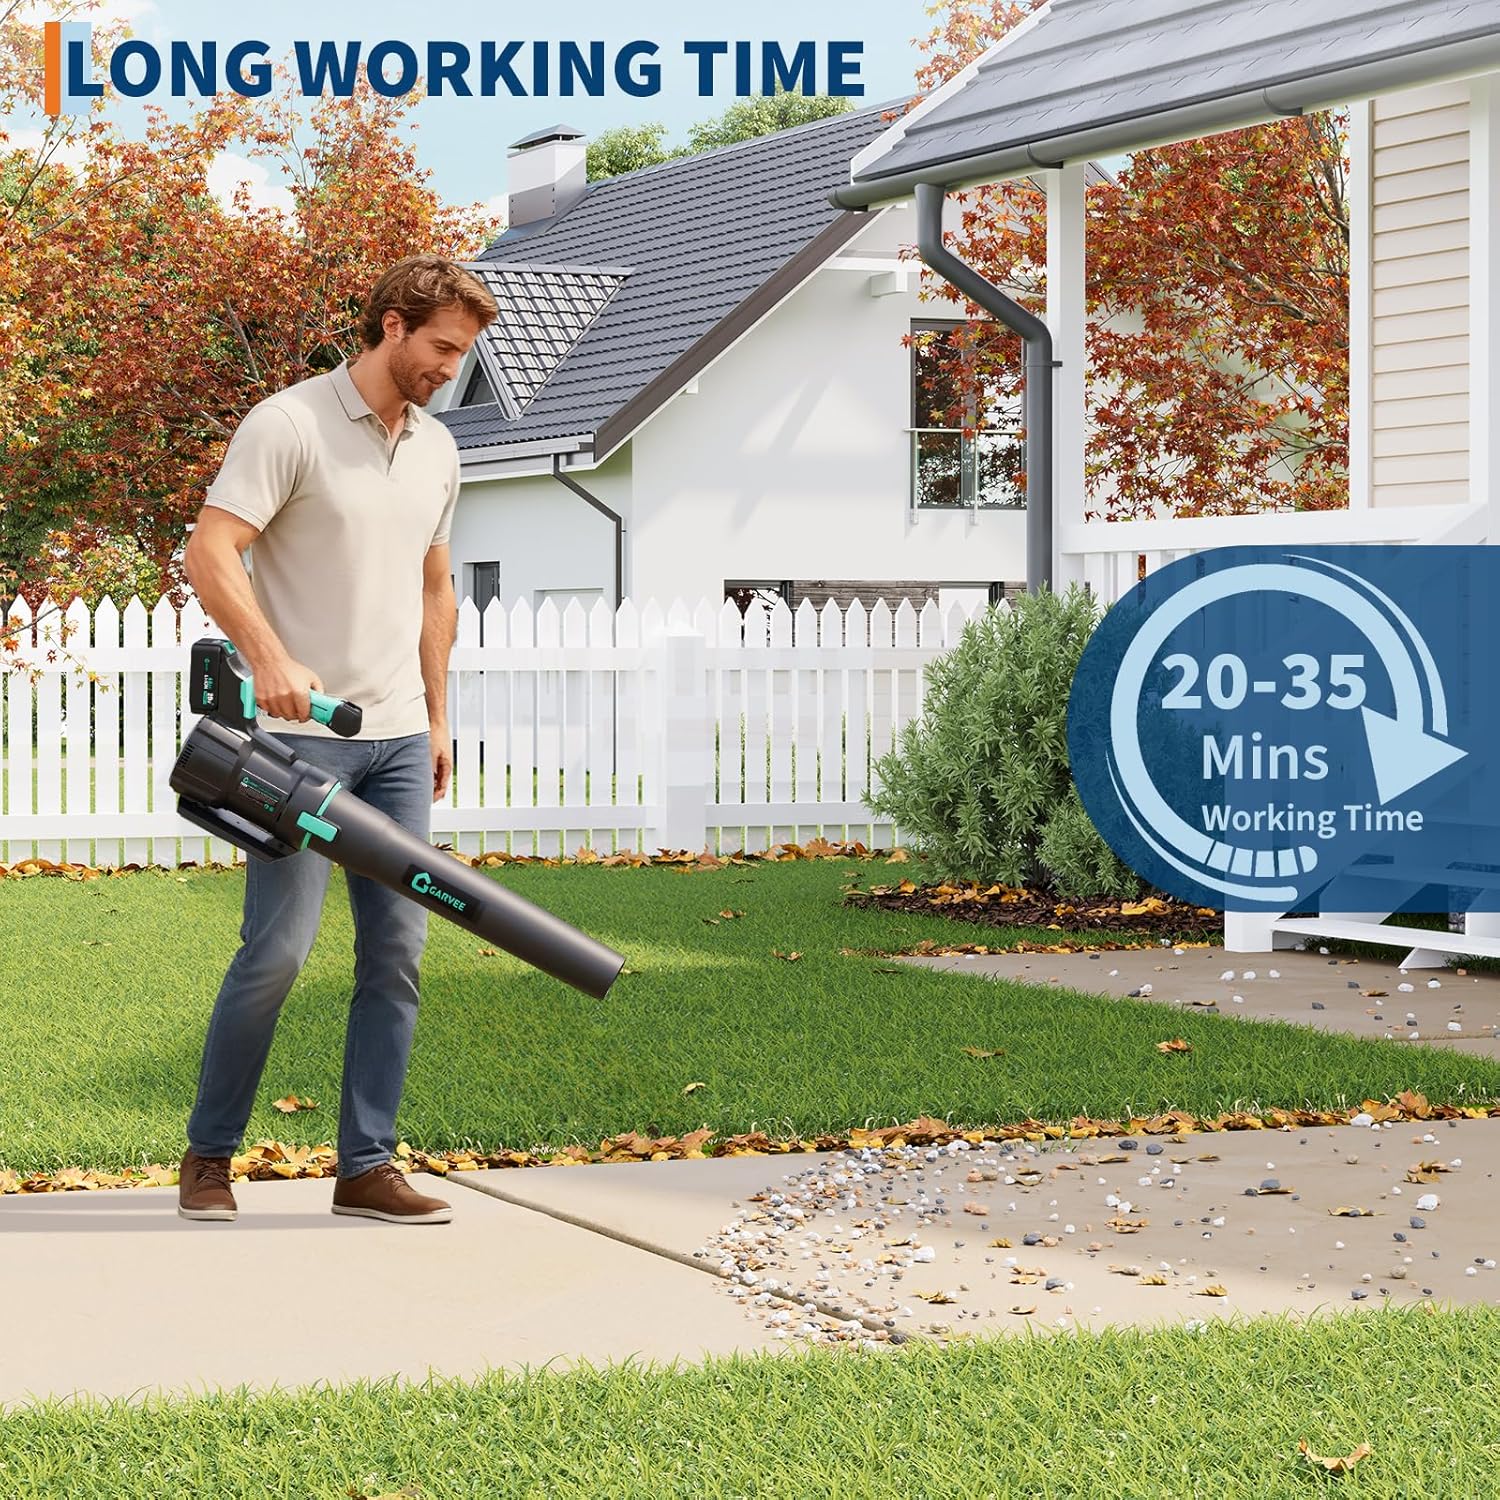
- The lightweight and ergonomic design allows for comfortable one-handed operation, reducing user fatigue.


3. ഔദ്യോഗിക ഉൽപ്പന്ന വീഡിയോ
മെയിൻ്റനൻസ്
1. ബാറ്ററി പരിചരണം
- The battery is equipped with overheat protection. If the battery becomes too hot, it will automatically shut down. Allow it to cool before resuming use.
- After each use, allow the battery to cool down for 5 minutes before recharging.
- For long-term storage, recharge the battery every six months to maintain peak performance and extend its lifespan.
2 ജനറൽ ക്ലീനിംഗ്
- Ensure the blower is turned off and the battery is removed before cleaning.
- ബ്ലോവറിന്റെ പുറംഭാഗം ഒരു ക്ലീൻ, ഡി ഉപയോഗിച്ച് തുടയ്ക്കുക.amp തുണി. കഠിനമായ രാസവസ്തുക്കളോ ഉരച്ചിലുകളുള്ള ക്ലീനറുകളോ ഉപയോഗിക്കരുത്.
- Clear any debris from the air intake and blower nozzle to ensure unobstructed airflow.
ട്രബിൾഷൂട്ടിംഗ്
| പ്രശ്നം | സാധ്യമായ കാരണം | പരിഹാരം |
|---|---|---|
| ബ്ലോവർ സ്റ്റാർട്ടാകുന്നില്ല. | ബാറ്ററി ശരിയായി ചേർത്തിട്ടില്ല അല്ലെങ്കിൽ ചാർജ് ചെയ്തിട്ടില്ല. | ബാറ്ററി പൂർണ്ണമായും ഇട്ടിട്ടുണ്ടെന്നും ചാർജ്ജ് ചെയ്തിട്ടുണ്ടെന്നും ഉറപ്പാക്കുക. |
| Low airflow or power. | Battery low, nozzle obstructed, or operating in low speed. | Recharge battery, clear nozzle, or switch to higher speed mode. |
| Battery overheats and shuts down. | Prolonged high-power use. | Allow battery to cool down for 5 minutes before resuming use or recharging. |
സ്പെസിഫിക്കേഷനുകൾ
- ബ്രാൻഡ്: ഗാർവീ
- മോഡലിൻ്റെ പേര്: BLOWERS-M
- ഊർജ്ജ സ്രോതസ്സ്: ബാറ്ററി പവർ
- വാല്യംtage: 20 വോൾട്ട്
- ബാറ്ററി തരം: 4.0Ah ലിഥിയം-അയൺ
- എയർ സ്പീഡ്: Up to 200 MPH (Turbo Mode)
- വായുവിൻ്റെ അളവ്: 650 CFM
- ഫോം ഘടകം: ഹാൻഡ്ഹെൽഡ്
- ഇനത്തിൻ്റെ ഭാരം: 8.69 പൗണ്ട്
- ഉൽപ്പന്ന അളവുകൾ: 7.28"L x 12.6"W x 36.2"H
- പ്രത്യേക സവിശേഷതകൾ: Adjustable Speed, Lightweight, Portable, Rechargeable
വാറൻ്റിയും പിന്തുണയും
Garvee products are designed and manufactured to the highest quality standards. This product comes with a 1-year limited warranty from the date of purchase, covering defects in materials and workmanship.
For warranty claims, technical support, or any questions regarding your Garvee Leaf Blower, please contact our customer service team:
- Webസൈറ്റ്: Visit the Garvee Store on Amazon
- ഇമെയിൽ: support@garvee.com (example email, replace if actual is known)
- ഫോൺ: 1-800-GARVEE (example phone, replace if actual is known)
Please have your model number (BLOWERS-M) and purchase date ready when contacting support.


