ആമുഖം
This manual provides detailed instructions for the Qubick Wireless Controller, designed for use with Nintendo Switch, NS2, and PC. Please read this manual carefully before using the product to ensure proper operation and to maximize your gaming experience. Keep this manual for future reference.
ഉൽപ്പന്നം കഴിഞ്ഞുview
The Qubick Wireless Controller features advanced wireless technology, Hall Effect triggers, precise analog sticks, and a Six-Axis motion sensor for immersive gameplay. It includes programmable back buttons, adjustable vibration, and multiple connectivity modes.
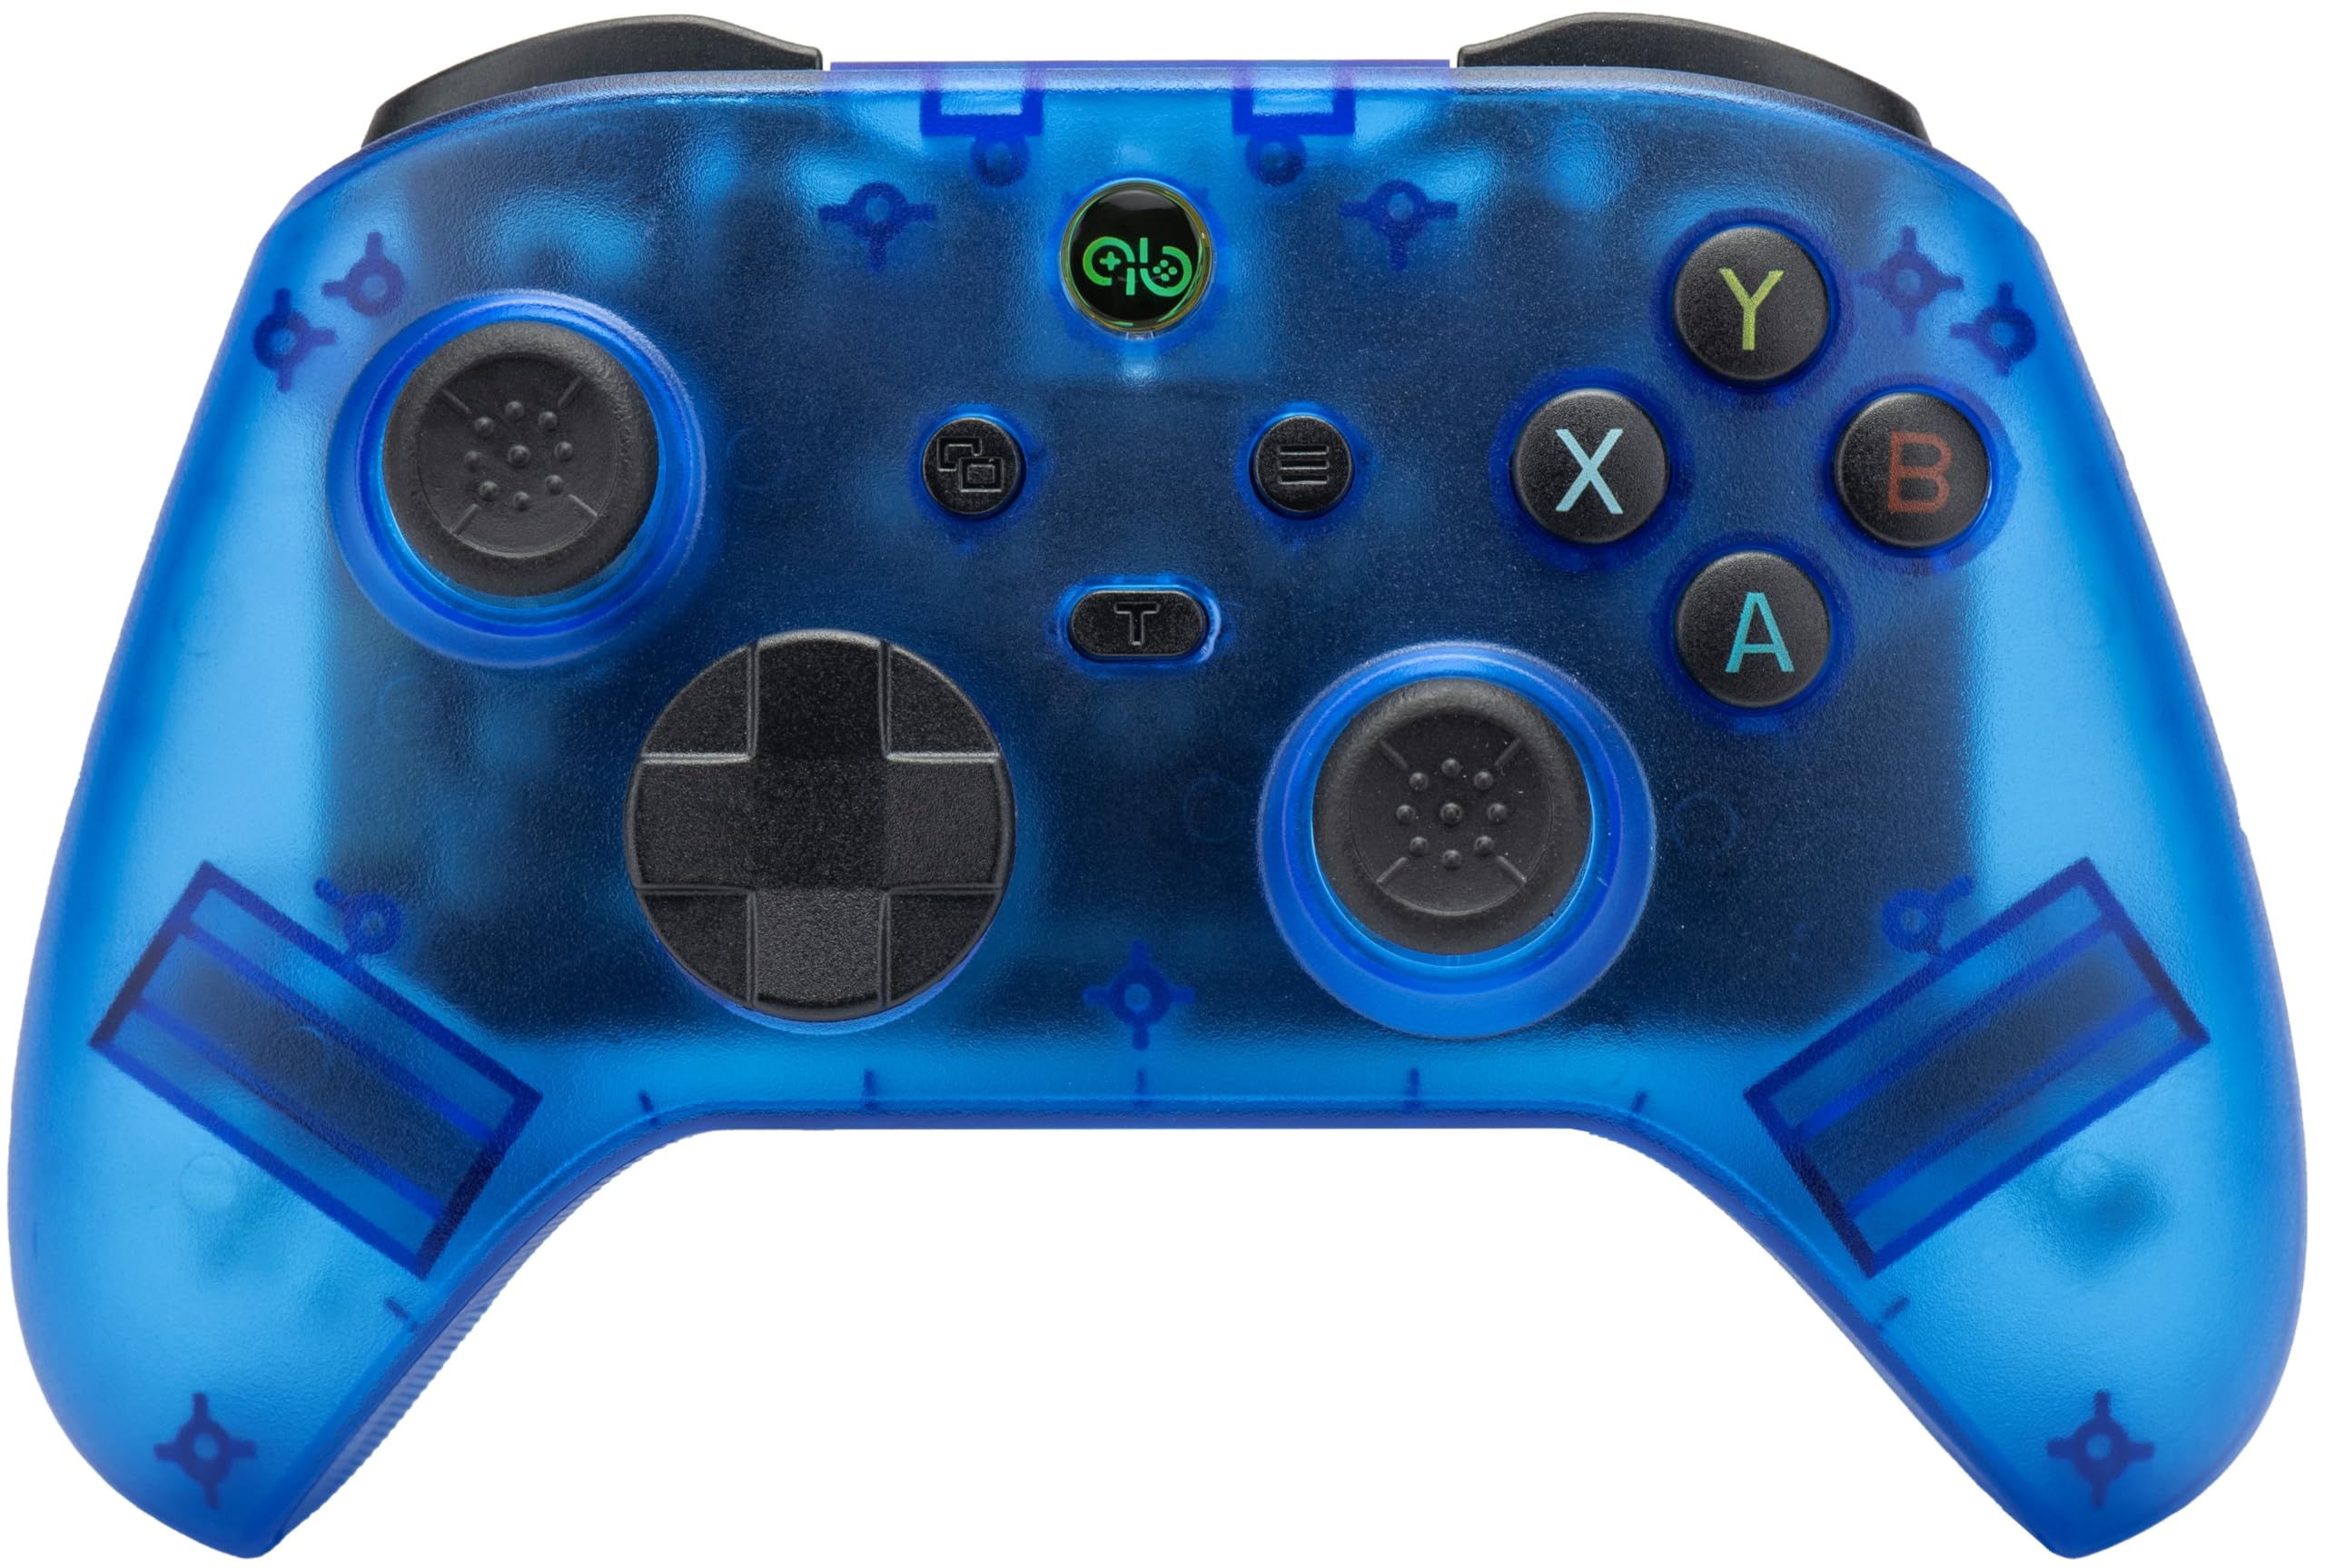
ചിത്രം: മുൻഭാഗം view of the Qubick Wireless Controller, showcasing its transparent blue casing, dual analog sticks, D-pad, and face buttons (A, B, X, Y).
സജ്ജമാക്കുക
1. പ്രാരംഭ ചാർജിംഗ്
Before first use, fully charge the controller. Connect the supplied USB Type-C cable to the controller's charging port and the other end to a USB power source (e.g., console, PC, or USB wall adapter). The LED indicators will show charging status.
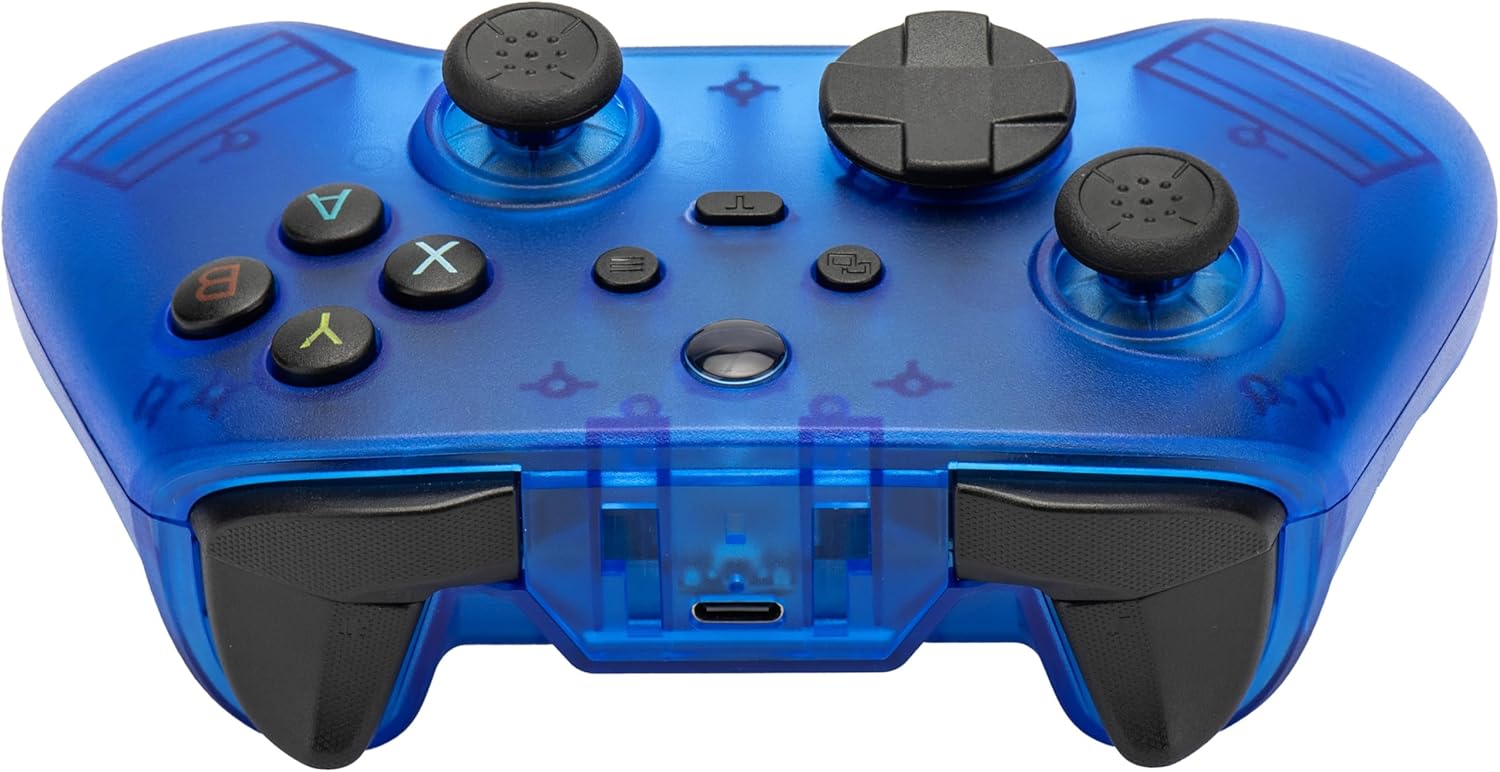
ചിത്രം: മുൻഭാഗം view of the Qubick Wireless Controller, highlighting the USB Type-C charging port located at the top center.
2. നിന്റെൻഡോ സ്വിച്ചുമായി ജോടിയാക്കൽ
- നിങ്ങളുടെ Nintendo Switch കൺസോളിൽ, ഹോം മെനുവിലേക്ക് പോകുക.
- 'കൺട്രോളറുകൾ' > 'ഗ്രിപ്പ്/ഓർഡർ മാറ്റുക' തിരഞ്ഞെടുക്കുക.
- Press and hold the pairing button on the Qubick Wireless Controller until the LED indicators begin to flash rapidly.
- Once paired, the controller's LED will remain solid, indicating a successful connection.
3. Pairing with PC
- Ensure the controller is in the correct PC mode (Xinput). Use the mode change button if necessary.
- Connect the controller to your PC via the USB Type-C cable, or follow Bluetooth pairing instructions if your PC supports it.
- For Bluetooth, go to your PC's Bluetooth settings, enable Bluetooth, and search for new devices. Select the Qubick Wireless Controller when it appears.
4. മോഡ് സ്വിച്ചിംഗ്
The controller supports multiple modes: V3, MFi, Xinput, Switch, and 2.4G. Use the dedicated mode change button to cycle through these options to match your device's requirements.
പ്രവർത്തന നിർദ്ദേശങ്ങൾ
1. ബട്ടൺ ലേഔട്ട്
Familiarize yourself with the controller's buttons:
- അനലോഗ് സ്റ്റിക്കുകൾ: Left and Right for movement and camera control.
- ഡി-പാഡ്: ദിശാ ഇൻപുട്ട്.
- ഫേസ് ബട്ടണുകൾ (എ, ബി, എക്സ്, വൈ): Primary action buttons.
- Shoulder Buttons (L, R) and Triggers (ZL, ZR): Additional action inputs.
- ഹോം ബട്ടണ്: കൺസോളിന്റെ ഹോം സ്ക്രീനിലേക്ക് മടങ്ങുന്നു.
- പ്ലസ് (+) / മൈനസ് (-) ബട്ടണുകൾ: സിസ്റ്റം പ്രവർത്തനങ്ങൾ.
- സ്ക്രീൻഷോട്ട് ബട്ടൺ: സ്ക്രീൻഷോട്ടുകൾ എടുക്കുന്നു.
- M1 / M2 ബട്ടണുകൾ: പ്രോഗ്രാം ചെയ്യാവുന്ന ബാക്ക് ബട്ടണുകൾ.

ചിത്രം: കോണാകൃതിയിലുള്ള മുൻഭാഗം view of the Qubick Wireless Controller, showing the arrangement of all primary buttons and analog sticks.
2. Turbo and Auto Turbo Function
The controller supports Turbo and Auto Turbo functions for rapid button presses.
- ടർബോ സജീവമാക്കാൻ: Press and hold the desired action button, then press the Turbo button. The button will now rapidly repeat its input when held down.
- To activate Auto Turbo: Press the desired action button, then press the Turbo button twice. The button will now rapidly repeat its input without being held down.
- To deactivate Turbo/Auto Turbo: Repeat the activation steps for the specific button, or clear all Turbo settings by holding the Turbo button for 5 seconds.
3. വൈബ്രേഷൻ ക്രമീകരണം
The dual-motor vibration system has 3 intensity levels. To adjust, press and hold the vibration adjustment button (refer to controller diagram for location) and use the D-pad Up/Down to cycle through intensity levels.
4. Six-Axis Motion Sensor Calibration
If motion controls feel inaccurate, you can recalibrate the Six-Axis sensor. Refer to the specific instructions provided in the console's system settings or the full online manual for detailed calibration steps.
5. Programmable Back Buttons (M1/M2)
The M1 and M2 buttons on the back of the controller can be programmed to replicate other button inputs.

ചിത്രം: പിന്നിലേക്ക് view of the Qubick Wireless Controller, clearly showing the M1 and M2 programmable buttons on the grips.
- പ്രോഗ്രാമിലേക്ക്: Press and hold the 'Program' button (usually a small button near M1/M2) until the indicator light flashes.
- Press the M1 or M2 button you wish to program.
- Press the button (or sequence of buttons) you want M1/M2 to emulate.
- Press the 'Program' button again to save the setting. The indicator light will stop flashing.
6. എൽഇഡി സൂചകങ്ങൾ
The controller features LED indicators to display its status:
- മിന്നുന്ന LED-കൾ: ജോടിയാക്കൽ മോഡ് അല്ലെങ്കിൽ കുറഞ്ഞ ബാറ്ററി സൂചിപ്പിക്കുന്നു.
- Solid LED(s): Indicates successful connection and player number (for Switch).
- പൾസിംഗ് LED: ചാർജിംഗ് പുരോഗമിക്കുന്നുവെന്ന് സൂചിപ്പിക്കുന്നു.
- LED Off (when connected to power): Indicates fully charged.
മെയിൻ്റനൻസ്
1. വൃത്തിയാക്കൽ
കൺട്രോളർ വൃത്തിയാക്കാൻ മൃദുവായതും ഉണങ്ങിയതുമായ തുണി ഉപയോഗിക്കുക. കഠിനമായ അഴുക്കിന്, ചെറുതായി dampen the cloth with water. Do not use harsh chemicals or abrasive cleaners, as these can damage the surface.
2. സംഭരണം
കൺട്രോളർ നേരിട്ട് സൂര്യപ്രകാശം ഏൽക്കാത്തതും തീവ്രമായ താപനില ഏൽക്കാത്തതുമായ ഒരു തണുത്ത വരണ്ട സ്ഥലത്ത് സൂക്ഷിക്കുക. കൺട്രോളറിൽ ഭാരമുള്ള വസ്തുക്കൾ വയ്ക്കുന്നത് ഒഴിവാക്കുക.
3. ബാറ്ററി പരിചരണം
To prolong battery life, avoid fully discharging the controller frequently. If storing for an extended period, charge the battery to approximately 50% every few months.
ട്രബിൾഷൂട്ടിംഗ്
- കൺട്രോളർ കണക്റ്റുചെയ്യുന്നില്ല:
Ensure the controller is charged. Verify it is in the correct mode for your device (Switch, Xinput for PC). Re-attempt the pairing process. If using Bluetooth, ensure your device's Bluetooth is enabled and discoverable. - ബട്ടണുകൾ അല്ലെങ്കിൽ സ്റ്റിക്കുകൾ പ്രതികരിക്കുന്നില്ല:
Check if the controller is properly connected. Restart the controller and the console/PC. If the issue persists, a factory reset (if available, refer to online manual) might be necessary. - ചാർജിംഗ് പ്രശ്നങ്ങൾ:
Ensure the USB Type-C cable is securely connected to both the controller and the power source. Try a different USB port or charging cable. - വൈബ്രേഷൻ പ്രവർത്തിക്കുന്നില്ല അല്ലെങ്കിൽ വളരെ ദുർബലമാണ്/ശക്തമാണ്:
Adjust the vibration intensity as described in the 'Operating Instructions' section. Ensure the game you are playing supports vibration feedback. - Motion controls inaccurate:
Perform a Six-Axis motion sensor calibration as described in the 'Operating Instructions' section.
സ്പെസിഫിക്കേഷനുകൾ
| ബ്രാൻഡ് | Qubick |
| മോഡൽ | Wireless Controller (NSW) |
| അനുയോജ്യത | Nintendo Switch, NS2, PC |
| കണക്റ്റിവിറ്റി | നൂതന വയർലെസ് സാങ്കേതികവിദ്യ |
| ട്രിഗറുകൾ | ഹാൾ ഇഫക്റ്റ് സാങ്കേതികവിദ്യ |
| അനലോഗ് സ്റ്റിക്കുകൾ | Precise Analog Sticks |
| മോഷൻ സെൻസർ | Six-Axis with Calibration Function |
| വൈബ്രേഷൻ | Dual Motor with 3 Intensity Levels |
| ബാറ്ററി | Integrated 400 mAh Li-ion Rechargeable Battery |
| ചാർജിംഗ് പോർട്ട് | യുഎസ്ബി ടൈപ്പ്-സി |
| പ്രോഗ്രാം ചെയ്യാവുന്ന ബട്ടണുകൾ | M1 / M2 Back Buttons |
| അളവുകൾ | ഏകദേശം 16 x 12 x 8 സെ.മീ |
| ഭാരം | ഏകദേശം 350 ഗ്രാം |
വാറൻ്റിയും പിന്തുണയും
For warranty information, technical support, or to download the latest version of this manual, please visit the official Qubick webസൈറ്റ്.
Official Manuals and Support: https://www.qubick.it/manuali
This product is manufactured by Cidiverte.
Image: Packaging of the Qubick Wireless Controller, displaying multilingual product information and a QR code linking to the online manual.
Image: Product packaging bottom, showing CE, RoHS, UKCA compliance marks and recycling information for cardboard packaging.


